

No Sew Halloween Toga Costumes You Can DIY In 5 Easy Steps
Looking for an easy Halloween costume that doesn’t require a sewing machine? These no-sew Halloween toga costumes are made from inexpensive flat sheets and can be customized with different tops, skirt lengths, fringe, and gold accessories.
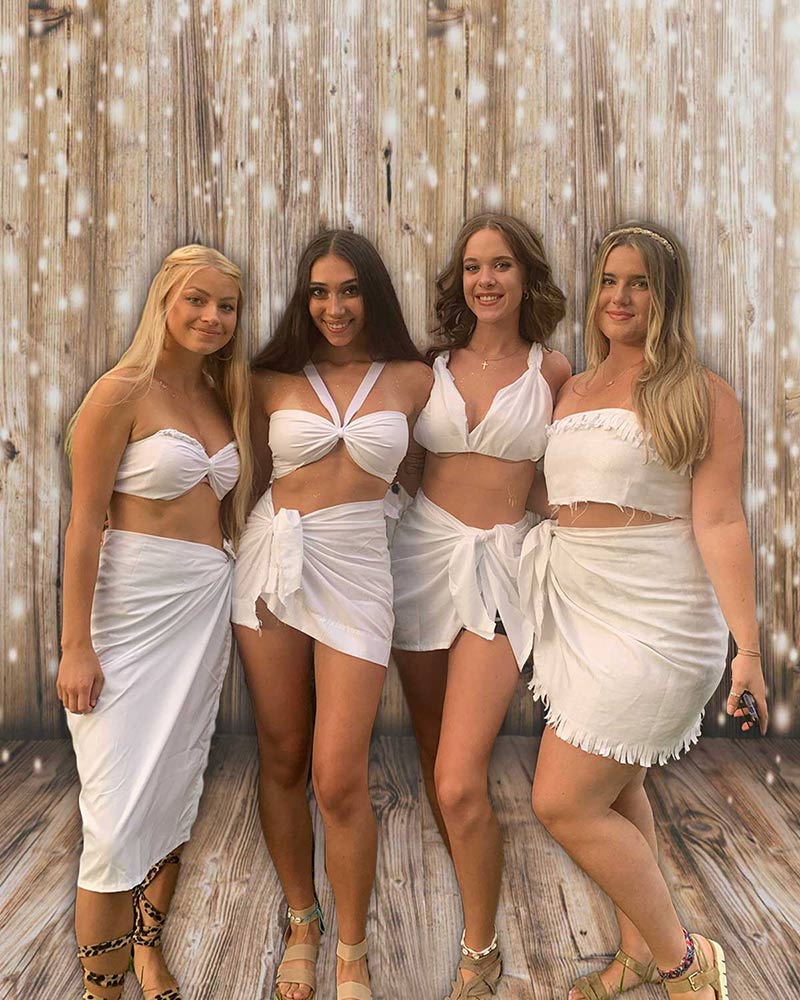
When my daughter Emma asked me to design toga costumes for her and her friends, I wanted each girl to have a look that reflected her personal style. We created two-piece toga outfits using the same simple wrap skirt construction, then changed up the tops and finishing details for each costume.
The result was a group of cute Greek goddess-inspired costumes that we made in one afternoon! Below, I’ll show you how to make the no-sew toga skirt, create two different top styles, and finish your Halloween look with accessories.
My blog periodically contains affiliate links meaning that if you make a purchase, I might make a small commission at no extra charge to you. Purchases made through them are greatly appreciated.
How to Make a Two-Piece Halloween Toga Costume:
We made all the toga skirts using the same wrap-and-tie method, then customized each outfit with different skirt lengths and top styles. This made it easy to create a coordinated group of Halloween costumes while giving each girl her own look.
The best part is that the pieces are adjustable. You can change the length, tighten the ties, or add fringe and accessories without sewing.
Sign up to be in the know! Keep updated on all my DIY projects and more!
What Size Sheet Do You Need for a Toga Costume?
I used inexpensive twin-size flat sheets to make these two-piece toga costumes. A flat sheet gives you plenty of fabric to work with, and its finished edges can be used as the bottom hem of the skirt for a cleaner look without sewing.
Lay your sheet on a large, flat surface before measuring and cutting. I used a cutting mat, rotary cutter, and large ruler, but you can also use a measuring tape, fabric scissors, and a pencil or fabric marker.The amount of fabric you need will depend on the person’s measurements, desired skirt length, and top style. Measure each piece before cutting rather than relying on one size for everyone.
How to make a toga skirt in 5 easy steps
I used a 10″ length for most of the girls (most wanted short skirts). I determined this by taking a measuring tape from the waist to the length they wanted (remember to add around 2 extra inches because when you wrap the skirt, it will gather at the top and naturally become shorter). You can always change this measurement depending on the height of the individual.
- Determine the length of the skirt. We started with using 10″, however, you can adjust this measurement to the desired length for the toga skirt.
- Wrap 10″ length around the back and overlap slightly in front of the person’s waist to determine width, then cut the desired overall width.
- Make sure you use the finished edge of the piece for the “hem” of your skirt if you have this available.
- Before cutting the width, leave extra at the top to form “ties” (see diagrams below)
- Make a slit on either side to thread the ties through and pull for a snug half knot. Once snug, finish the knot in front. (Fringe edge of toga skirt for an extra detail!)
How to achieve a perfect wrap toga skirt every time with a cute side knot. You can then fringe, add trim, add ribbon, etc. This stayed very secure for all the girls using this method. It was tested out with all the dancing that they did. These toga party costumes, even though they were no-sew, had a nice finished look. For extra modesty, you can add a bike short or bikini bottom underneath. Use safety pins to secure any pieces that you feel may come apart as well.

How to Make a No-Sew Fringe Toga Top
- Cut a piece of sheet full length. We made the height 12″ with a 2 1/2″ fold over.
- Press with a hot iron at the fold over to create a crisp crease. You can also add a few small safety pins if you want.
- Cut vertical strips around 1″ each to create fringe with the fold over.
- Make a slit on either side at the back to thread the ties through, then pull snugly at a half knot, then finish the knot in in back to secure. Same concept as a skirt
- We used the same detail from the toga skirt by leaving extra length and fringed the bottom with 1″ vertical cuts on her skirt for a complete fringed look!

Tips for Cutting the Fabric and Fringe
Spread your sheet on a flat surface and mark your measurements before cutting. Sharp fabric scissors or a rotary cutter will help you create clean, even strips.
For the fringe detail, I folded over approximately 5 inches of fabric, pressed the fold with an iron, and cut vertical strips to create the fringe. You can adjust the fringe length to suit your design.
A self-healing cutting mat, rotary cutter, and acrylic ruler make it easier to cut straight pieces. I use these tools for many of my DIY apparel projects, so they come in handy well beyond Halloween.
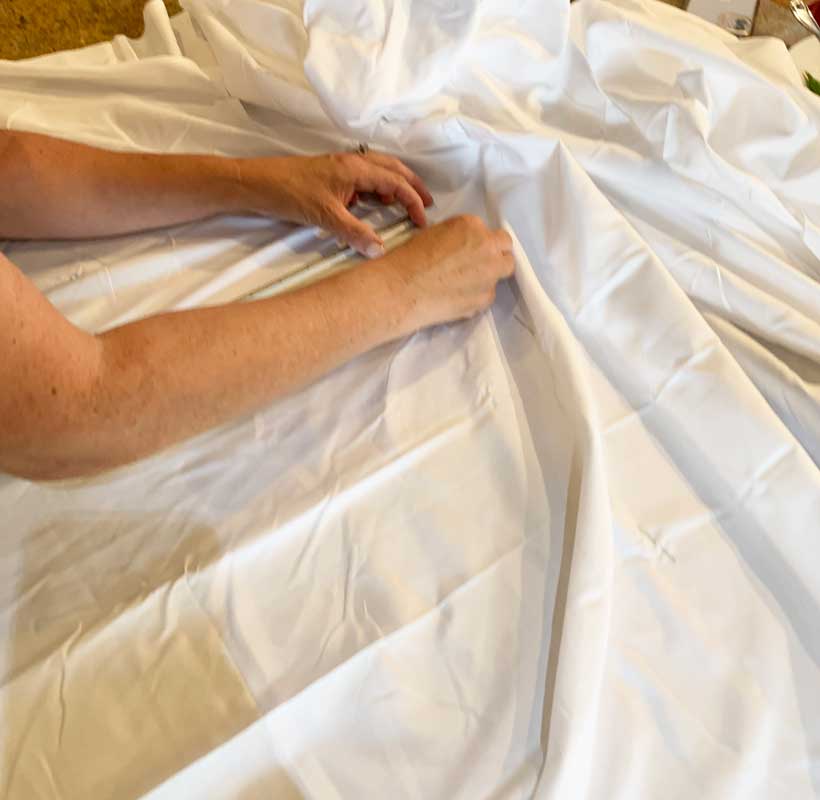
Work on a flat surface to spread your sheet out. Use a tape measure and ruler to mark off desired measurements. Important to use a sharp fabric scissor or rotary cutter and mat, so that you can cut clean, crisp pieces and strips from your sheet.
This self-healing mat, paired with the rotary cutter and ruler, makes it super easy when making your toga costume. If you are a DIY’er like me, these tools will become invaluable.

This rotary cutter makes cutting straight lines super easy.

Using this acrylic ruler with the matt is super helpful since it has a lip on one side that helps to make straight lines.
 No products found.
Scissor sharpening hack – Take a piece of Aluminum foil fold a few times into a square. Cut this with your scissors repeatedly to help sharpen the blade. I used this method when I cut the yarn for my pom poms, read about that here, when I made a pom pom mobile. This helped in sharpening my scissors.
How to Make a Cinched Bandeau Toga Top
Check out these easy diagrams for step-by-step instructions! Pin or save these diagrams for the toga top and toga skirt for easy how to make a two-piece toga. So simple!

- Cut a straight piece and double it, cinched center with a ribbon (you can also use a strip of a finished edge of a sheet).
- We looped the ribbon (or you can use a strip of finished edge of the sheet) around the center, made a knot at center to cinch the front
- Bring the straps up over the shoulders and tie them securely to the back strap. (important! Do not tie around the neck, this will not keep the top secure.)
- We used the same method as the toga skirt. Made two slits at the back of the band and threaded ends through, pulled snugly at a half knot, and then finished the knot securely at the back.
- You can take three strips of sheet and braid a length. This can be used for straps, or pinned at the edge of the top for a braided, detailed look.
- Self-healing mat– perfect to cut on!
- Flat white sheet – instead of buying a whole set
- Rotary cutter– use with ruler and mat for perfect straight cuts
- Large ruler– helps in measuring your fabric
- Sharp scissors– you can use this if you don’t have a rotary cutter
- Grosgrain ribbon– we used this on some of our toga tops
- Safety pins– Since this a no-sew toga, we need to secure our toga costumes together! This is a quick and easy way!
You can also buy the mat, rotary cutter, and ruler in a 3-piece set. These tools are used for all my diy apparel projects and come in handy. You will be able to use this for multiple projects going forward.
How to Accessorize a Halloween Toga Costume
Gold accessories are an easy way to transform a simple white sheet into a Greek goddess-inspired Halloween costume. We used different jewelry and finishing touches so each girl’s outfit felt unique. One of my favorite details was the gold temporary tattoos, which you can see on one of Emma’s friends in the group photo.
You don’t need every accessory on the list. A few well-chosen details can make the costume feel complete. Consider adding a few of these finishing touches:

- Gold hoop earrings
- Decorative arm cuffs
- Leaf headband
- Gold cinch belt (for a one-piece look)
- Gold coin necklace
- Chunky statement necklace
- Gold metallic temporary tattoos
- Gold Leaves Hair Barrettes
What Shoes Should You Wear With a Toga Cos
Yes, you can use a sandal in your closet; however, if you have time, here are some fun sandal ideas to complete your toga outfit

More Halloween Toga Costume Ideas
You can use the instructions above or use them as a guide, or come up with your designs! We had so much fun coming up with each toga outfit, figuring out what would work for each person. These toga Halloween costumes are not serious and are very forgiving, since they are no-sew Halloween costumes. It’s easy to tie a knot tighter or adjust a length simply by cutting. Most importantly, just have fun making these! Below are some additional ideas on Toga looks:
- Greek Goddess: Use flowy fabrics like chiffon and add gold accents. Drape the toga asymmetrically and accessorize with a laurel wreath, arm cuffs, and sandals.
- Roman Emperor: Opt for deep colors like burgundy or royal purple. Add a gold belt and pair it with a laurel wreath and sandals. Consider carrying a prop like a scroll or chalice.
- Modern Chic: Experiment with bold colors, patterns, or even animal prints. Create a two-piece toga and accessorize with contemporary jewelry and a fashionable belt.
Prefer a Ready-Made Toga Costume?
If you love the look but don’t have time to make your own, a ready-made toga costume is another option.
Hope that you found this post helpful for how to make a two-piece toga for Halloween. These are such easy toga costumes that can be made quickly, especially since they are no-sew!
Make Your Own No-Sew Halloween Toga Costume
Making these costumes with Emma and her friends was such a fun afternoon. Each girl arrived with a flat sheet, and we worked together to create a look that felt like her own. I loved seeing their ideas come to life, especially knowing we made everything without a sewing machine!
We were even able to cut several costume pieces from a single flat sheet, depending on the sizes and designs. And the best part was seeing how well the finished outfits held up throughout the girls’ Halloween festivities.
If you’re looking for more ways to wear a toga beyond Halloween, take a look at my general DIY toga costume tutorial for additional inspiration.
These no-sew Halloween toga costumes are a fun, affordable way to create a personalized costume using simple materials and a little creativity.
RELATED DIY POSTS!
Like my Toga party DIY post? Check out my related diy posts below for some fun additional apparel DIY projects that I have created. Keep checking back or subscribe because I add new diy projects weekly to Double Arrow Designs!
- Patchwork Jeans DIY- Free People Hack for way less!
- How To Fix Ripped Pant Knees – That Look Amazing!
- How to easily hem a pair of pants
Thanks for stopping by!

This post is all about making no-sew Halloween toga costumes using simple materials and easy DIY techniques.
Last update on 2026-11-03 / Affiliate links / Images from Amazon Product Advertising API