Small Space, Big Impact: How to Make a Wood Slat Accent Wall
Wood Slat Accent Wall
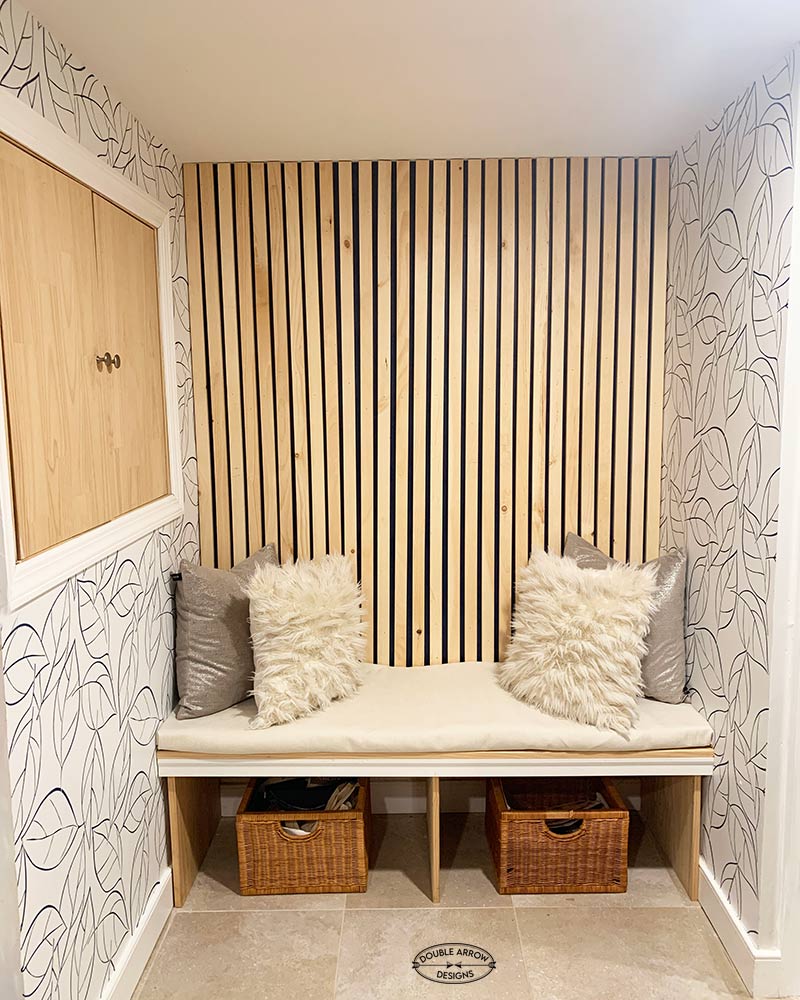
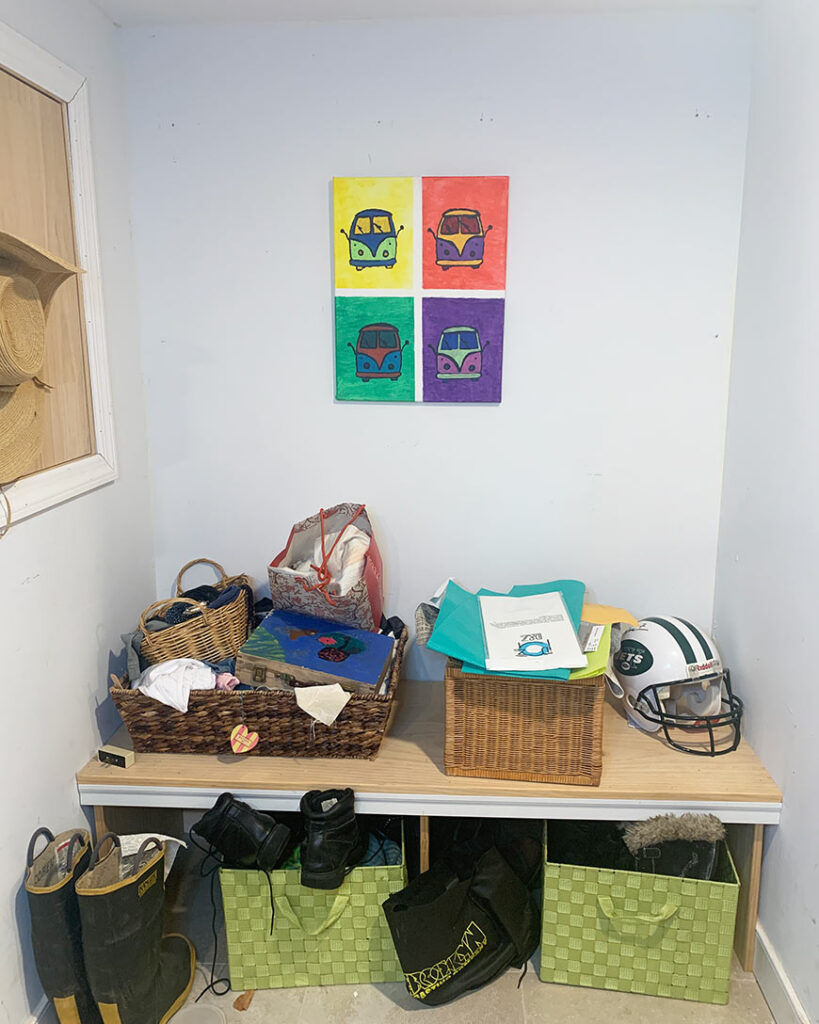
I’m turning this forgotten basement alcove into a stylish, standout space with a DIY wood slat accent wall! This simple project packs a big design punch and will transform the nook with just a few key decor touches. The vertical slats add texture, warmth, and a modern edge, creating the perfect backdrop for this alcove, with some added pattern with wallpaper, and a cushion for the existing bench. It’s an easy way to bring custom design to a small space, on a budget.
This post contains affiliate links. If you make a purchase through one of my links, I may earn a small commission at no extra cost to you. As an Amazon Associate I earn from qualifying purchases.
Wood slats for the wall
I first went to Lowe’s to find wood slats for this project. I selected a wooden sheet that I would cut down to the required length (62.5″ x 1.5″). We waited by the woodcutter for 10 minutes only to have an employee tell us the cutter was broken. Good thing there was a Home Depot right next door and that’s where we went!
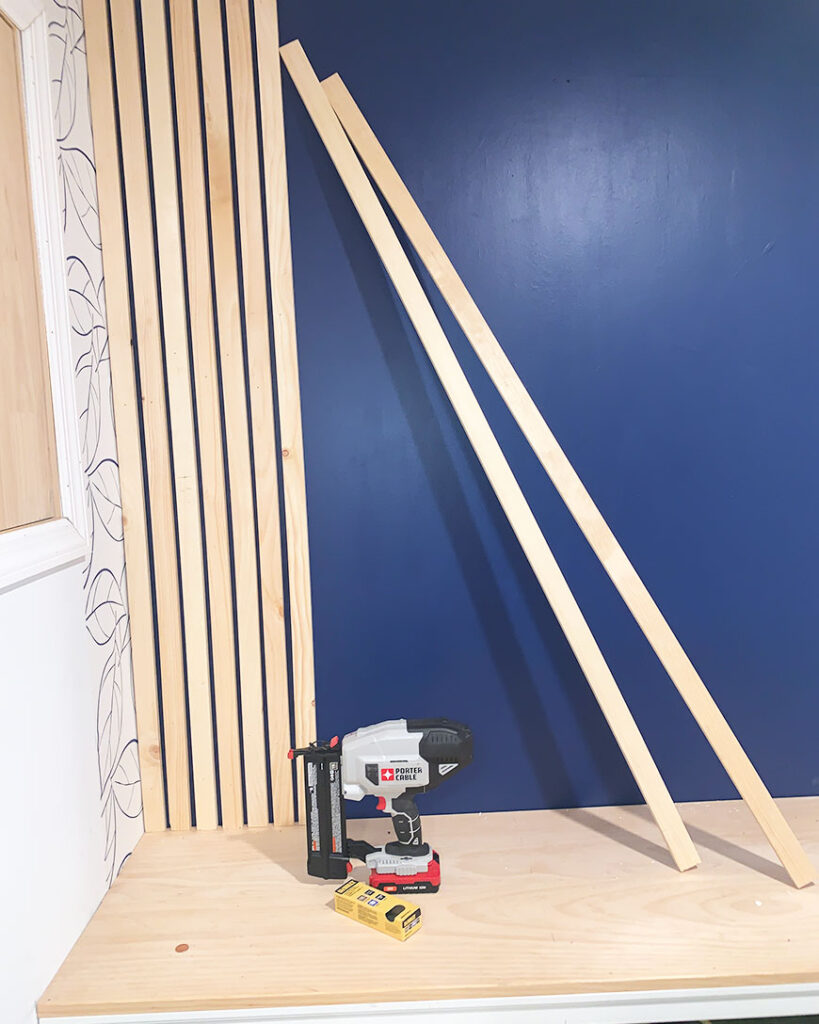
I found these precut 8 ‘ x1.5″ pine boards. These would be perfect for my project! I spent about $100 on my wood.
Using my neighbor’s table saw, we cut each 8′ length of wood to the length I needed for this project, which was 62″. Now that I have all the additional wood pieces left over, this will serve for another project in the future!
Prepping the wood slats
After cutting all my wood slats, I went ahead and sealed them with Minwax Polycrylic. I find it way easier to do this before putting them up so I can get the front and sides nice and covered. Since I wanted to keep that natural wood vibe and keep the space bright, I just used the polycrylic without any stain. But if you’re after a richer, warmer look, you can stain first and then seal. Once the slats are dry, they’re good to go and ready for installation!

How to measure the wall for your wood slats
The wall I’m working on measures 62″ high and 56″ wide. Since I wanted to leave a ½-inch gap between each wood slat, I divided the width (56″) by 2, which meant I needed about 28 wood slats for the entire wall.
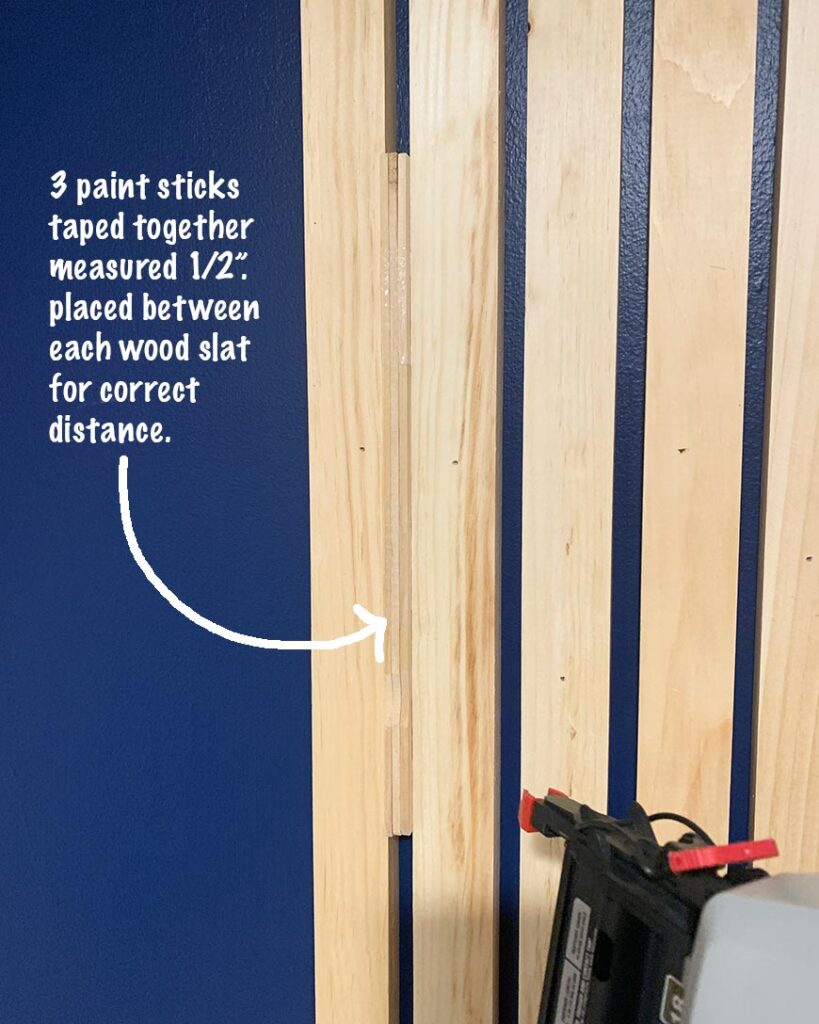
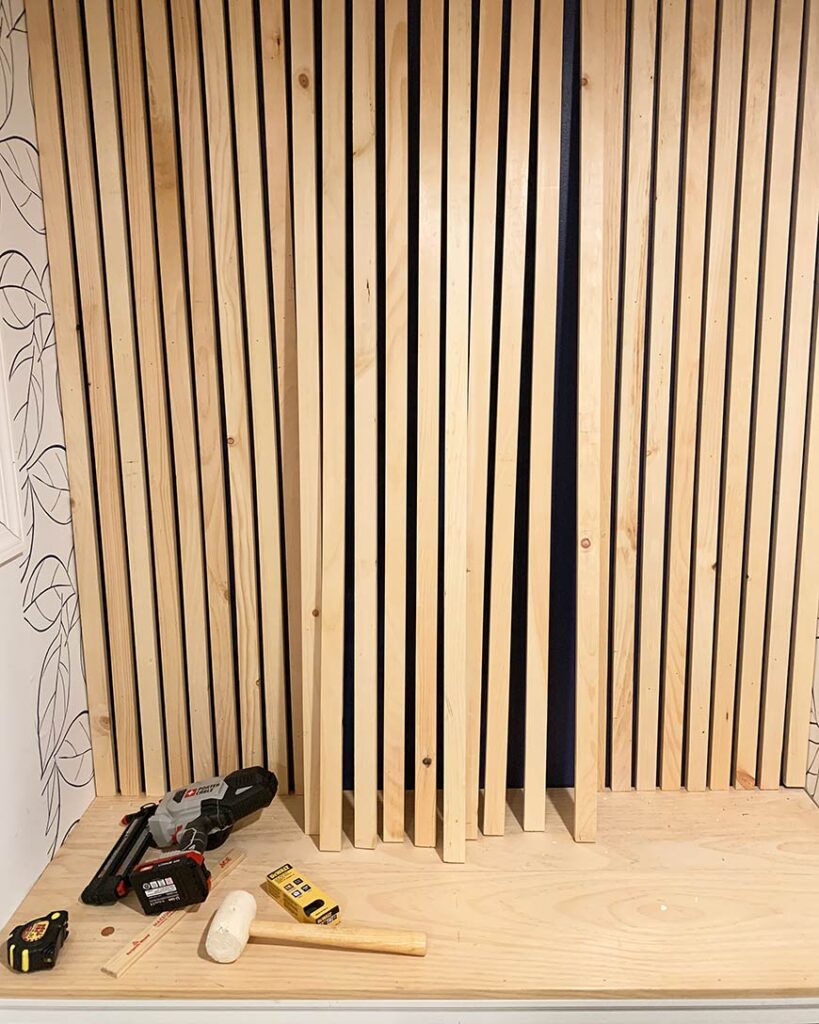
To keep my spacing consistent, I taped three painter’s sticks together to create a simple ½-inch spacer. After nailing the first wood slat to the wall, I placed this spacer between each slat before nailing the next one, making sure every gap was perfectly even.
To avoid running out of space on the other side, I started by nailing the first slat on one end, then worked from both edges inward, leaving a balanced finish across the whole wall.
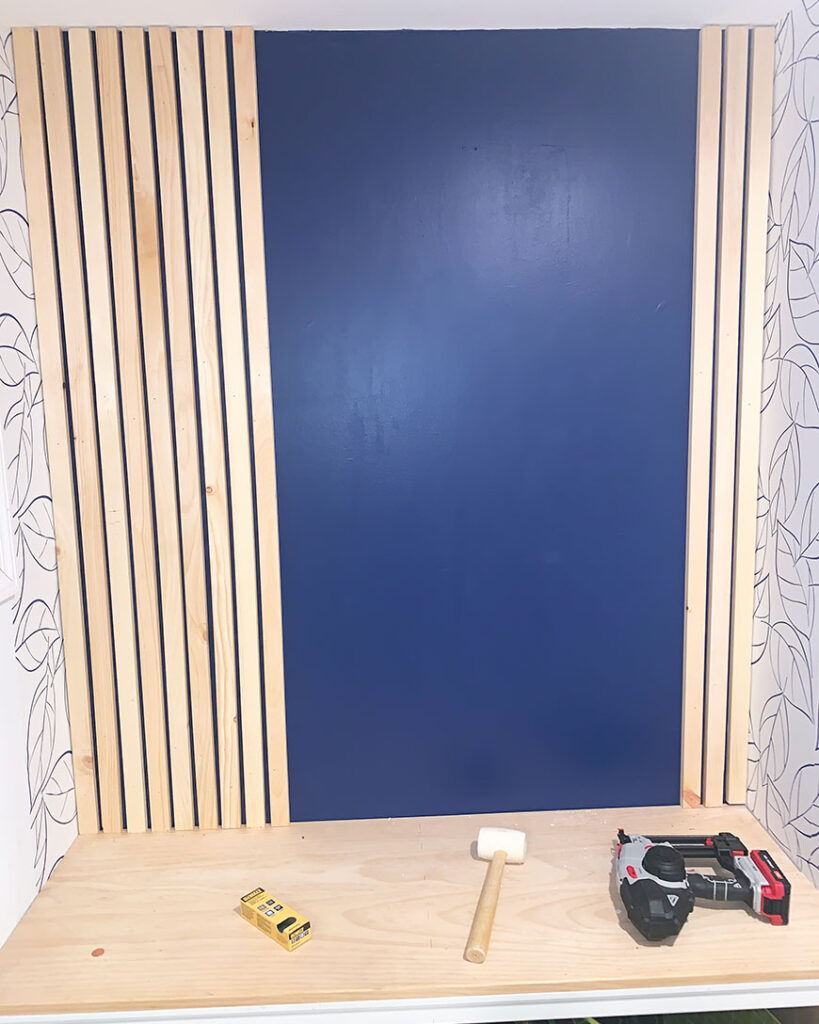
Wall color behind the wood slats
In order to make the wood pop on this wall. I decided to paint the wall in a dark navy color so that it would make for a nice contrast with the wood against the wall and add dimension. Because my wall are was very small, I was able to see a tester size amount, which cost me $8.00
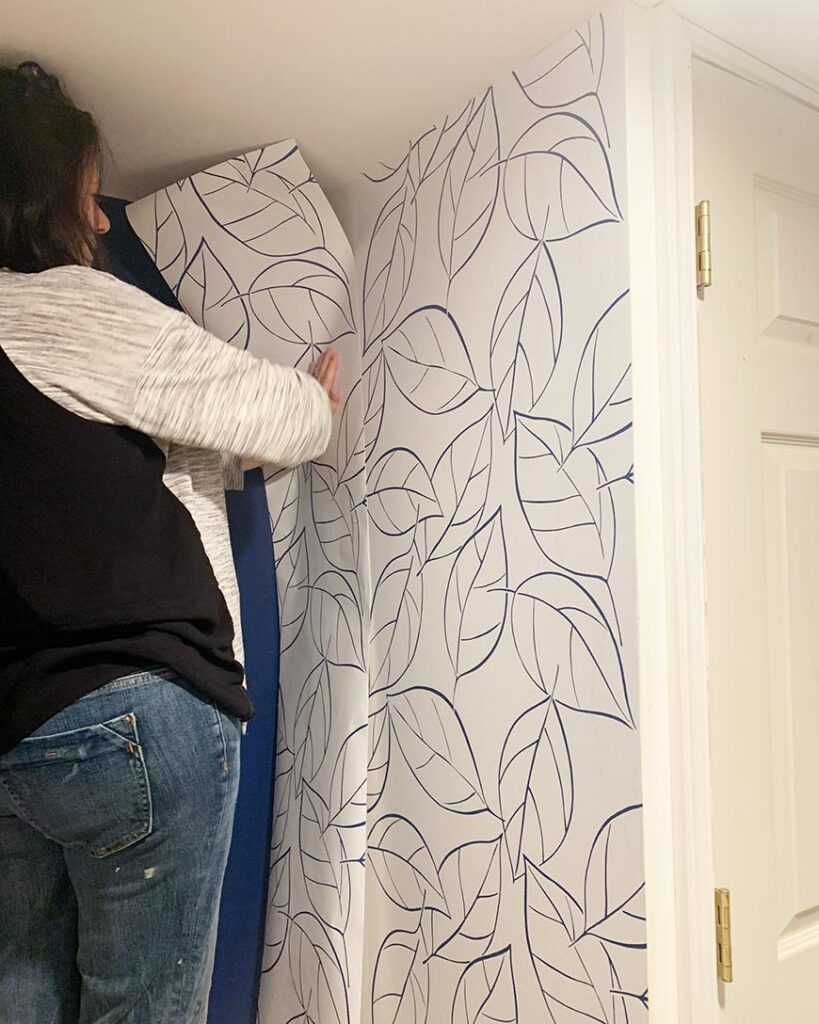
Wallpaper to coordinate with my accent wall
Since I was using wallpaper on the other two walls, I wanted this to coordinate. For my wallpaper for this project, I used NextWall Tossed Leaves Peel and Stick Wallpaper in Navy Blue. I needed two rolls. Keep in mind when you are wallpapering a wall that you have to match up the repeat, so you may have some waste because of this. The total cost of the two rolls was $70.00. However, there are many choices in the market that you can find to fit anyone’s budget.
I did a separate post on 9 Peel And Stick Wallpaper Ideas. You could get lost in all the options that this comes in today. So with all these options, you have a wide range of choices.
Installing wood slats on your wall
Now that the walls have been painted, I am ready to install the wood slats onto my wall! So, using a cordless power nail gun and nails size 1-1.5″, I attach the first board to the wall. I measure a half-inch space, then attach the next wood slat. I continue to do this until my whole wall is complete.
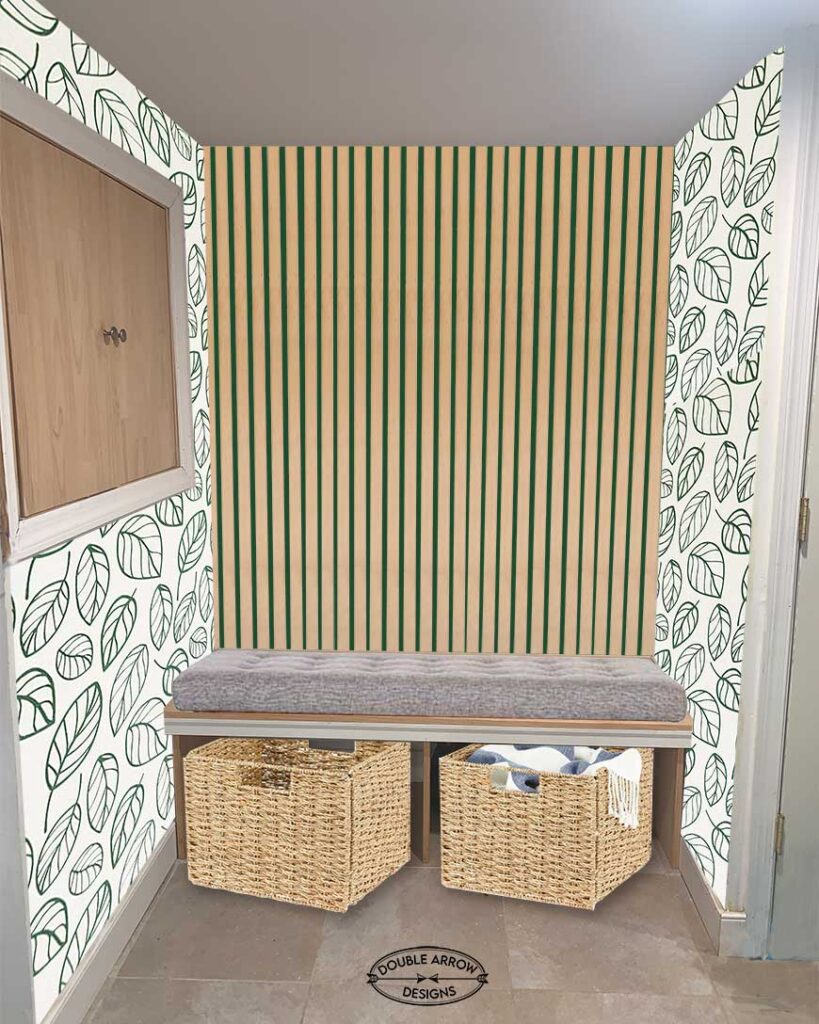
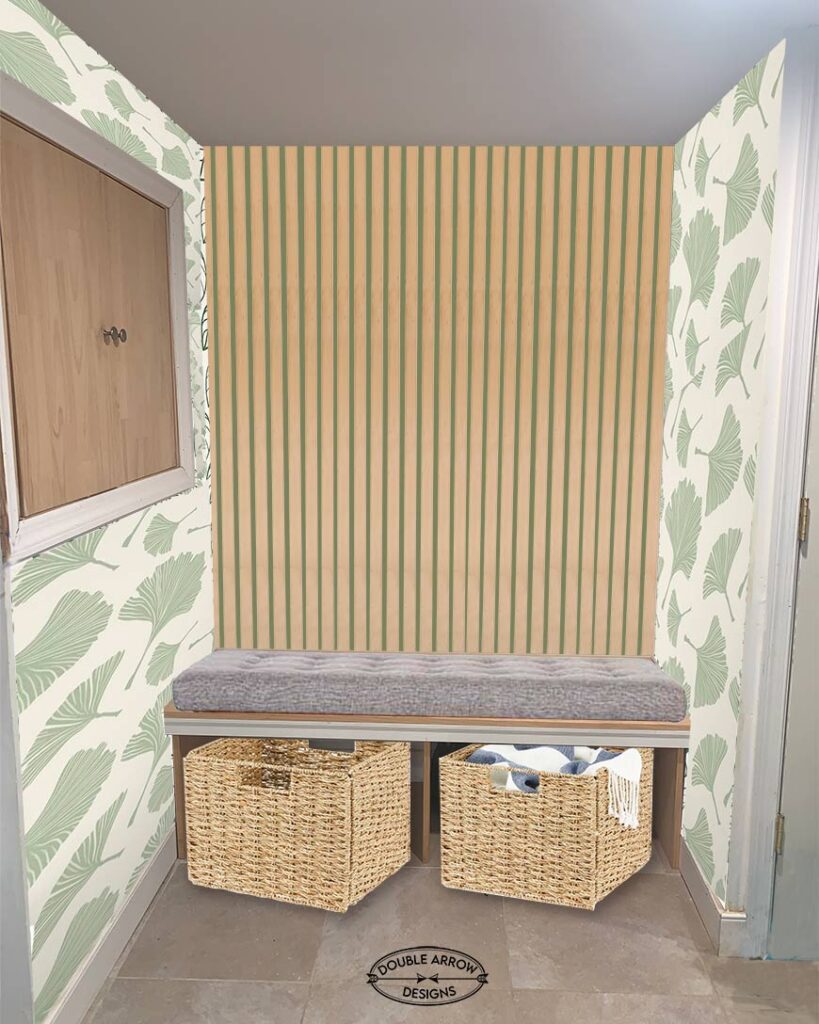
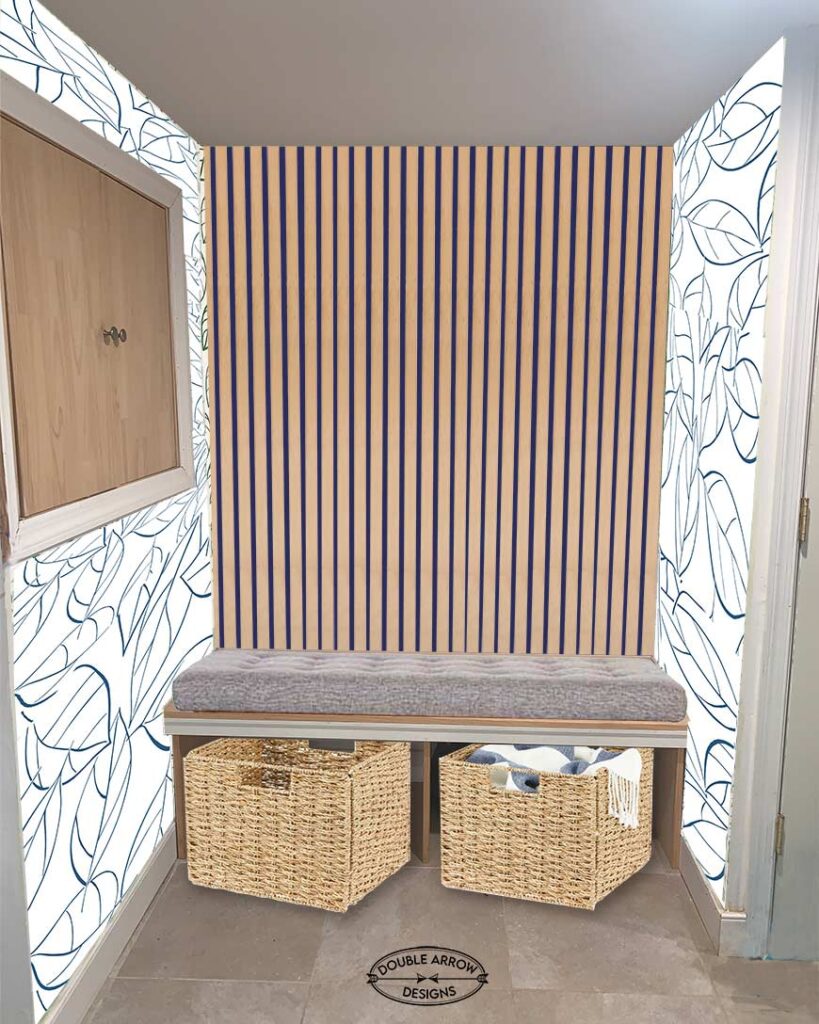
The first two were trying to use a green color story, but the navy in the last just worked so well! My image looks exactly like my finished project!
Modern wood slat accent wall ideas
Before I even got started, I did the following. I cleared the space out, then brought my image into Photoshop, where I played around with three different color schemes and wallpaper prints. See below for my options.
Finishing touches for my wood slat accent wall area
Once I had completed the wood slat feature wall, I then got to work on the bench! I bought foam and sized it to the seat area. I picked out my fabric and got to work on an easy upholstered cushion. This finished off my vertical wood slat accent wall. I found this perfect canvas fabric at my local fabric store in the sale bin. at $1.99 per yard. So I bought the balance of the 2.5 yards that was left on the roll, costing me $5.50 for my fabric.
I then took out my sewing machine and sewed together a very simple case, then slipped the foam in. Then, after adjusting it to fit, I hand-sewed the back to fully encase and close the fabric around the foam.
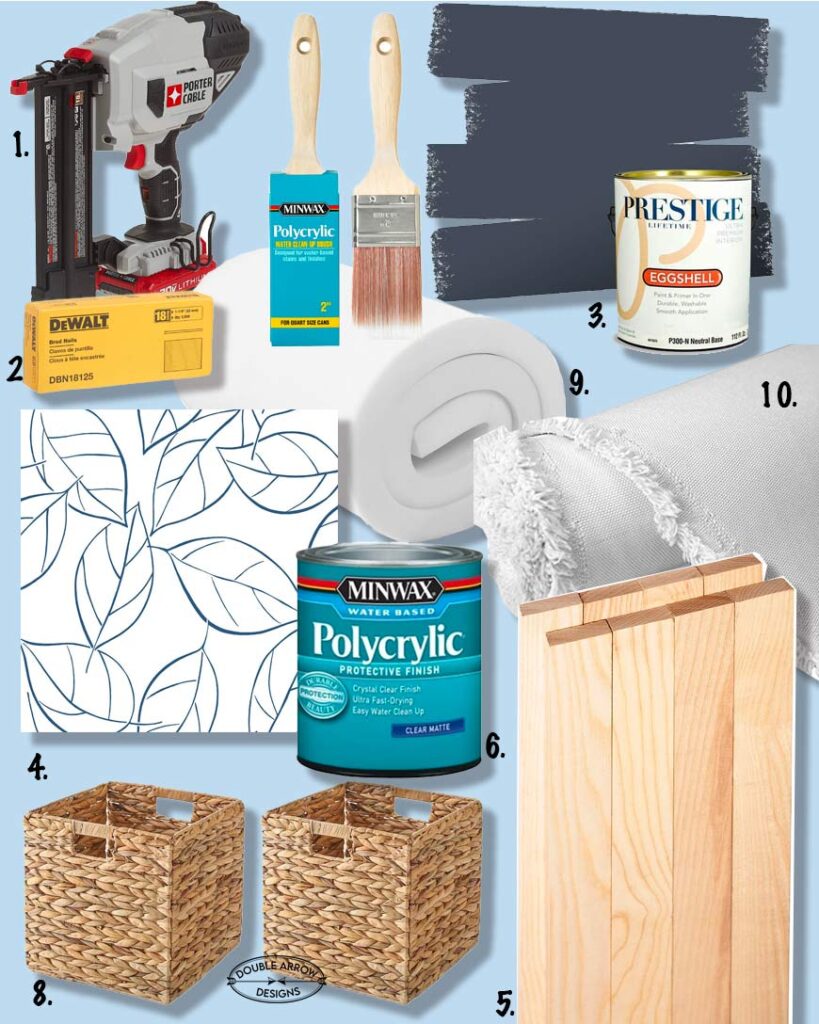
Materials used for my wood slat wall
Here’s everything I used to bring my wood slat accent wall to life—see the list below.
|| 1 || 2 || 3 || 4 || 5 || 6 || 7 || 8 || 9 || 10 ||
- PORTER-CABLE 20V MAX* Cordless Brad Nailer Kit with 1 Battery. I borrowed my neighbors, but this is going to be my next power tool investment! Super easy to use and handle.
- DEWALT Brad Nails, Heavy Duty– Check to make sure you use the correct size that is longer than the thickness of your wood boards.
- Interior Paint– This one is supposed to be comparable to Benjamin Moore. Measure out your surface to know how much paint you need. Because my area was so small I got away with a tester size and even did two coats!
- NextWall Tossed Leaves Peel and Stick Wallpaper– I used this in Navy to match back to my painted accent wall.
- Forest 2 Home Ash Bundle -1 X 2 X 48 inches – 8 Board Pack. This is an example of what type of wood I used, not exact. It will all depend on your space, the wood look that you want, also the thickness and spacing.
- Minwax Matte Crystal Clear Polycrylic– I use this for all my wood projects. The matte finish dries without any sheen. You can purchase different finishes. It’s just p to what your preference is.
- Polycrylic Wood Stain Brush– for painting on your polycrylic. I also use foam brushes which work great as well!
- Wicker Cube Baskets– Perfect to tuck under my bench. The wicker finish complements the pine wood I used for the wood slats.
- Milliard Upholstery Foam– Because I already had a built-in bench, I wanted to finish it off with a cushion. I custom-made mine to fit the exact size I needed. This specific one was 2″x24″x72″ I then cut it down to the size I needed with a Utility knife.
- Canvas fabric– You can buy this in any color or pattern; it just depends on your look.
Wood Slat Wall Video
Check out my video on all the steps I used to make this fun decorative wood slat wall for a unique space in my house.
Completed Wood Slat accent Wall
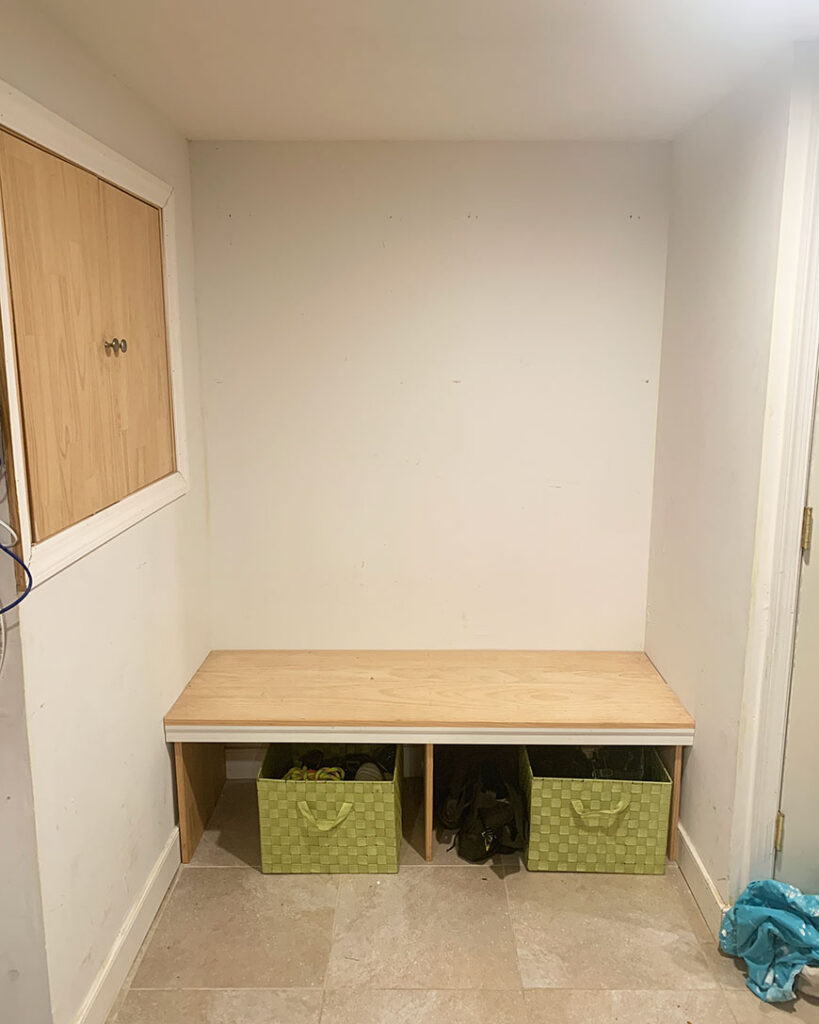
The before and after is such a transformation. See how this small nook was transformed into a perfect spot in my entryway. Loved how this came out! Super easy and affordable. This is a Great way to transform any area of your home into a focal point!
Share your projects! I love to see how people transform spaces. All it takes is a little vision and some work!
Complete your wood slat wall with these Faux fur pillow options
I love these fur pillows against the wood slats. It gives off a Scandinavian vibe. Check out some options below to finish off your wood accent wall.
No products found.
No products found.
Using wood for accents- home trend
Check out my previous post, where I took wood dowels and created this frame. Wood Dowel Mirror Frame- DIY. Because wood slats and wood dowels have become a great way to add to any interior for the current wood trend.
Creating a wood slat accent wall is a simple DIY project that delivers a big design impact. With just a few tools, some patience, and a little creativity, you can completely transform a blank wall into a stunning focal point. Whether you’re updating a basement nook, adding warmth to a bedroom, or bringing texture to a hallway, this project is customizable to your style and space. Don’t be afraid to get creative—and enjoy the instant upgrade!
Related Posts
Below are some additional posts if you liked this one. Adding new posts every week, so check back regularly. Join my mailing list to stay in the know. Below are some additional fun DIY projects that I have recently created.
Thanks for stopping by!
This post is all about how to make a wood slat accent wall
Last update on 2026-07-04 / Affiliate links / Images from Amazon Product Advertising API