Sewing Machine Cabinet Repurposed Into a Stunning Bar Cart You’ll Love
Sewing Machine Cabinet Repurposed
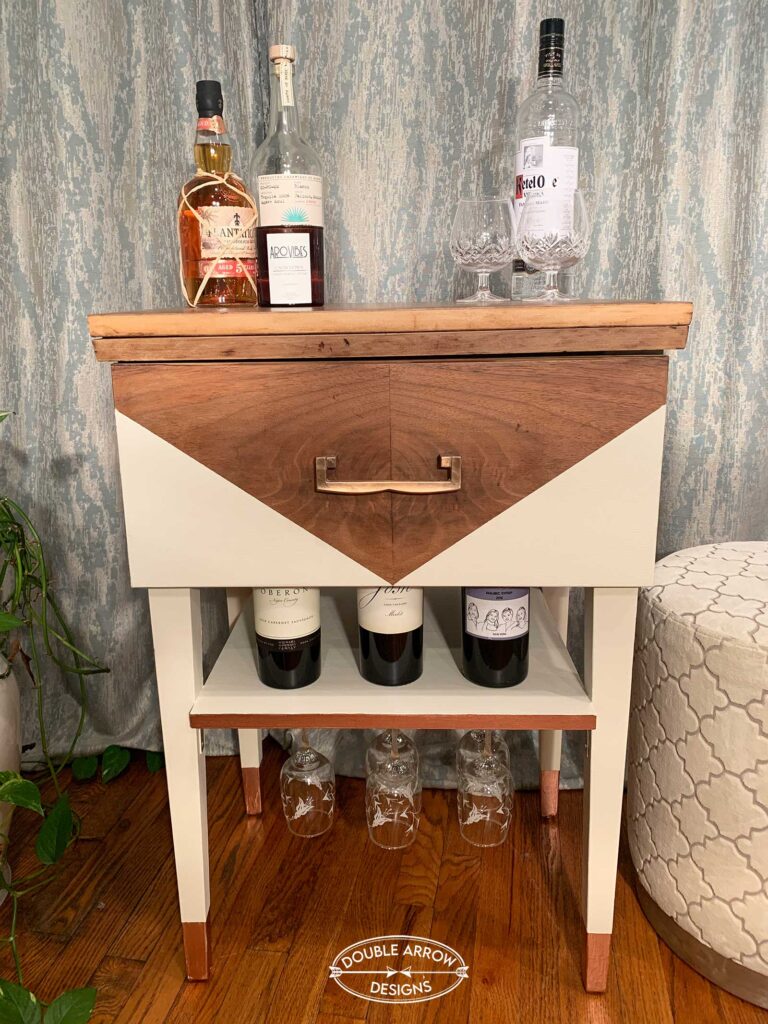
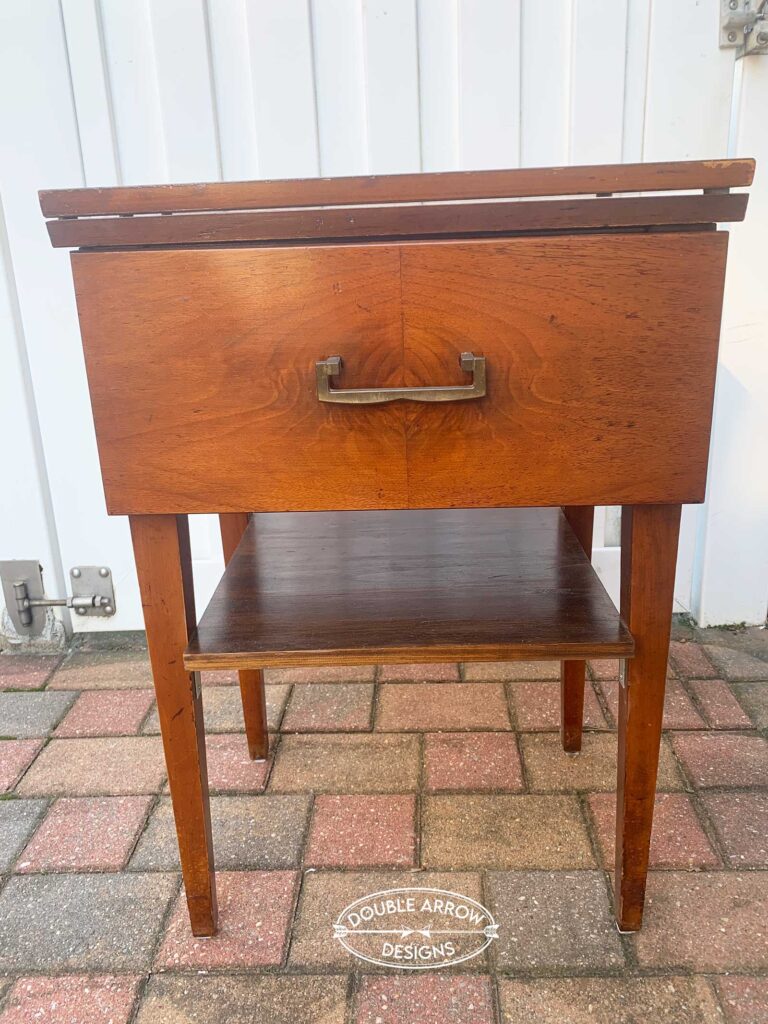
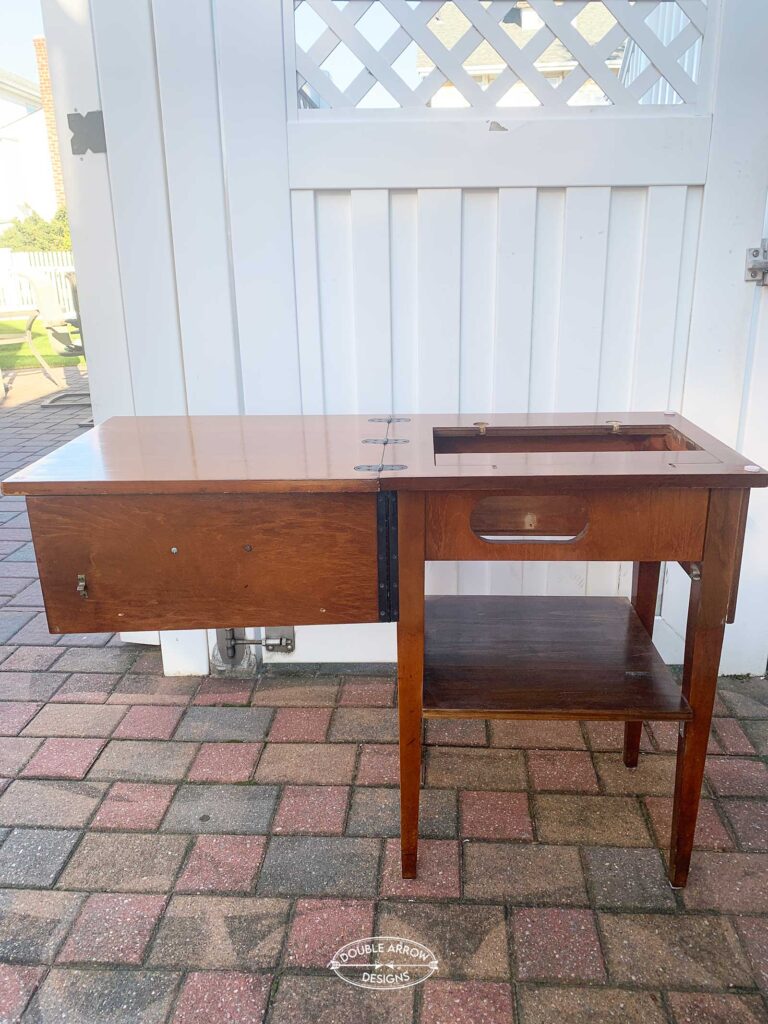
In this post, check out how I transformed an old, discarded sewing machine cabinet into a bar cart! Yes, this old furniture piece was found curbside, ready for the trash. Once I saw this, I knew exactly what I wanted to upcycle into a bar cabinet. You know what they say! “One person’s trash is another person’s treasure.” Come along and check out this amazing sewing machine cabinet repurposed as a bar cart.
This post contains affiliate links. If you make a purchase through one of my links, I may earn a small commission at no extra cost to you. As an Amazon Associate I earn from qualifying purchases.
Prepping the sewing cabinet
Before I do anything with this piece, I will remove the old, non-working sewing machine. Once this was removed, I took a washcloth and warm, soapy water and cleaned the entire piece…twice!
All amazing furniture redos start with a clean foundation. Always clean your piece first. Read about the importance of this in my How to Refinish A Secretary Desk post.
Supplies for the sewing machine cabinet repurposed project
Below are all the supplies and materials I used in repurposing this sewing machine cabinet
- Klean Strip Premium Stripper– This brand works well. I have tried a few others and like this one.
- paint spackle knife– Once varnish becomes soft, I use this to scrape off the varnish (always scrape with the grain)
- BLACK+DECKER Sander– Love this power tool, use this for all my furniture pieces, easy to use.
- Sanding Pads for Black and Decker Mouse– Buy a package of different-sized grit for different phases of sanding your wood.
- 220 soft grit sanding block is good for finishing touches once varnish and sanding is done, helping to give the wood a smooth surface.
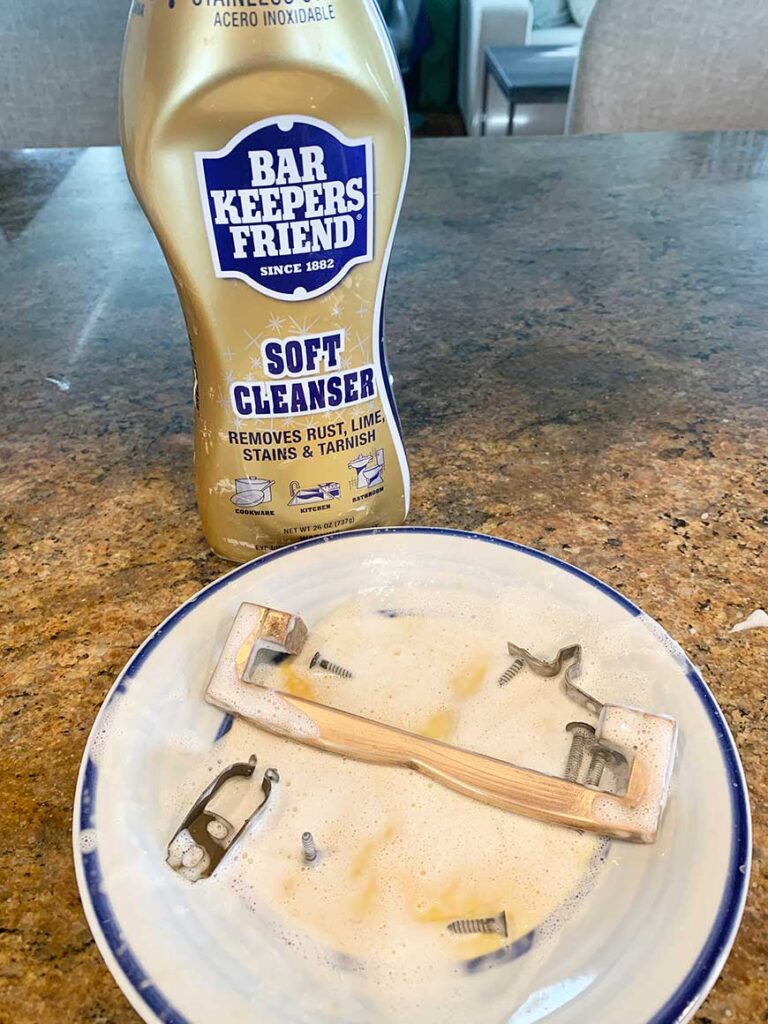
- Bar Keepers Friend Cleanser – used to clean hardware, as you can see, it did a great job at removing the old finish.
- Minwax Polycrylic– Clear matte finish, which helps protect the wood and paint from scratches and stains.
- Sponge brushes– The Package will give you multiple sizes, depending on what you are painting.
- Purdy brushes are 1.5″ and 2″. I use both, depending on the surface or area you are painting.
- Fusion Mineral paint– I used the color Champlain for this project, which worked so well with the light wood color.
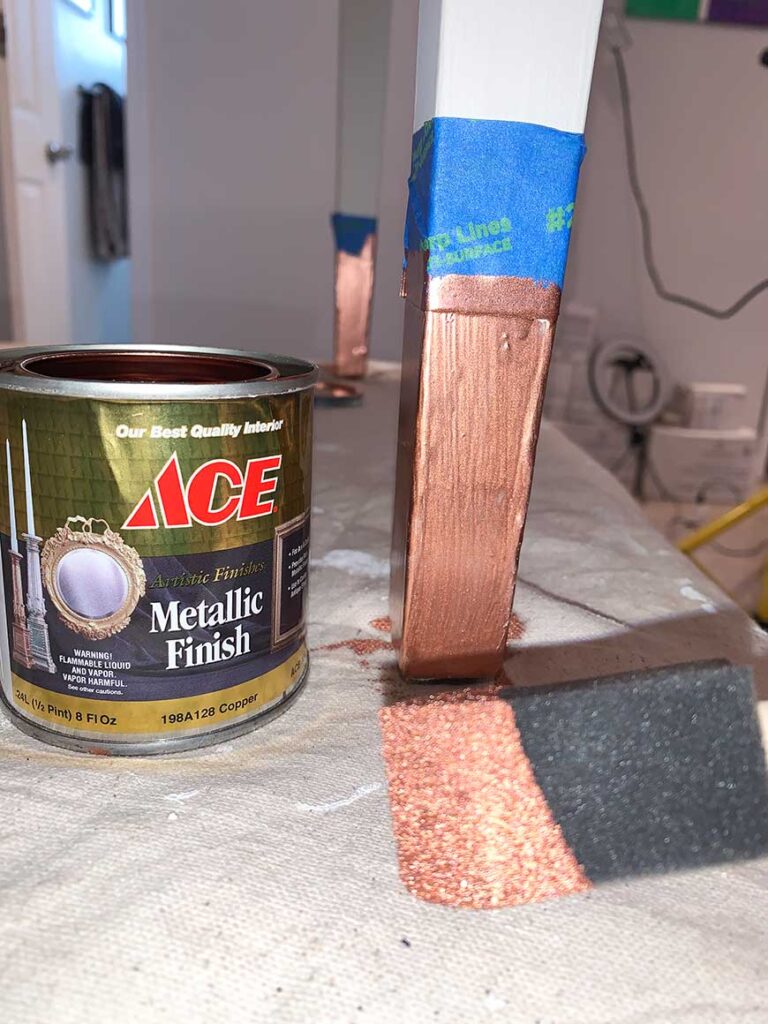
- Gold metallic paint– I wanted to bring in more metallic from the hardware to the bottom of the legs was the perfect place.
- felt pads for furniture legs– Always add these to your furniture legs to help protect your floors.
- Bottle opener– Optional but very functional!
Sewing Machine Cabinet Wood Prep
Below are the steps I took to prepare the wood that will be exposed on my sewing machine cabinet.
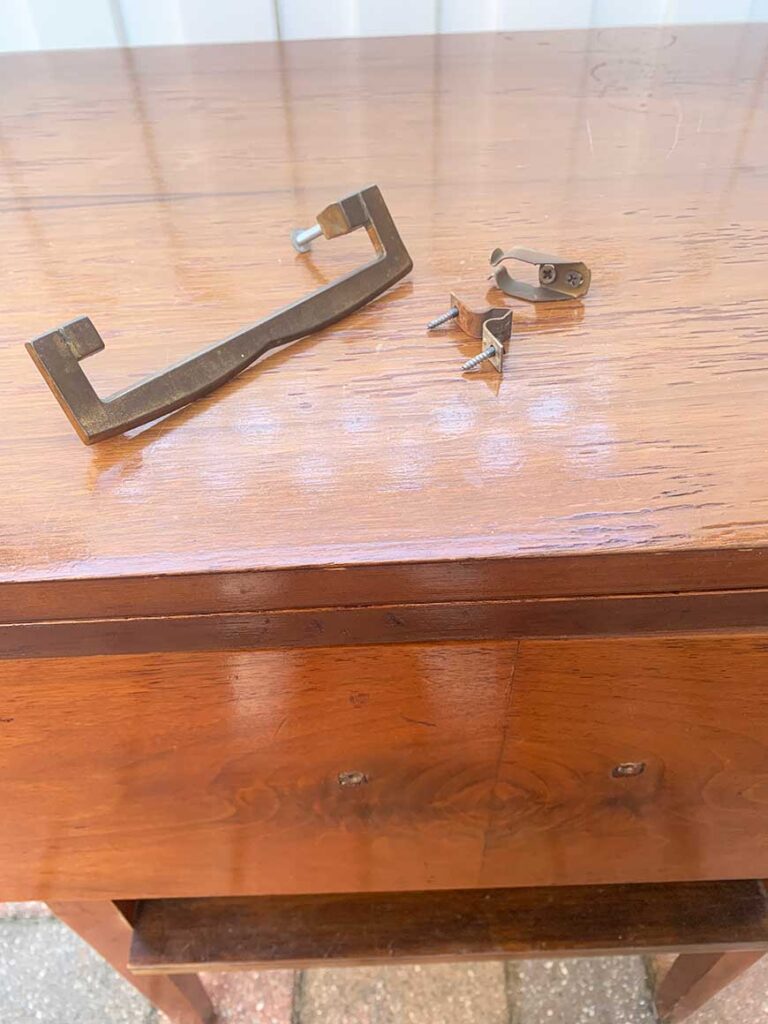
- Remove any hardware and place it in a bag for safekeeping. This hardware, once cleaned, was perfect to reuse. The mid-century pull worked well with the sleek lines of the cabinet.
- Use furniture stripper and follow instructions! As you can see, the surface was damaged. By removing the old finish, it was as if I had a new piece of wood.
- Scrape all old varnish off with a spackle knife. Do this in the same direction as the wood. Be careful not to damage the wood as you do this process.
- After the wood is stripped, use a sander with an 80-grit to remove any remaining stain or finish. The stripper will not remove everything. So the sander will complete the job.
- Take a 220-grit block and smooth out any rough areas. Using a lighter grit, this will remove any roughness from the wood surface.
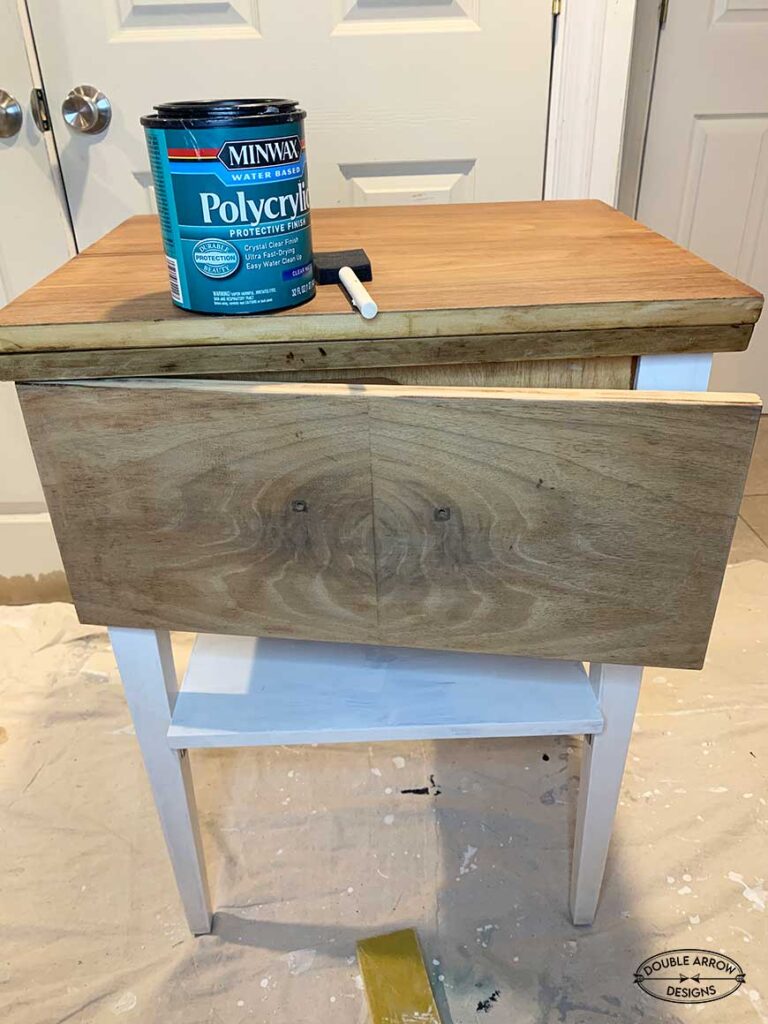
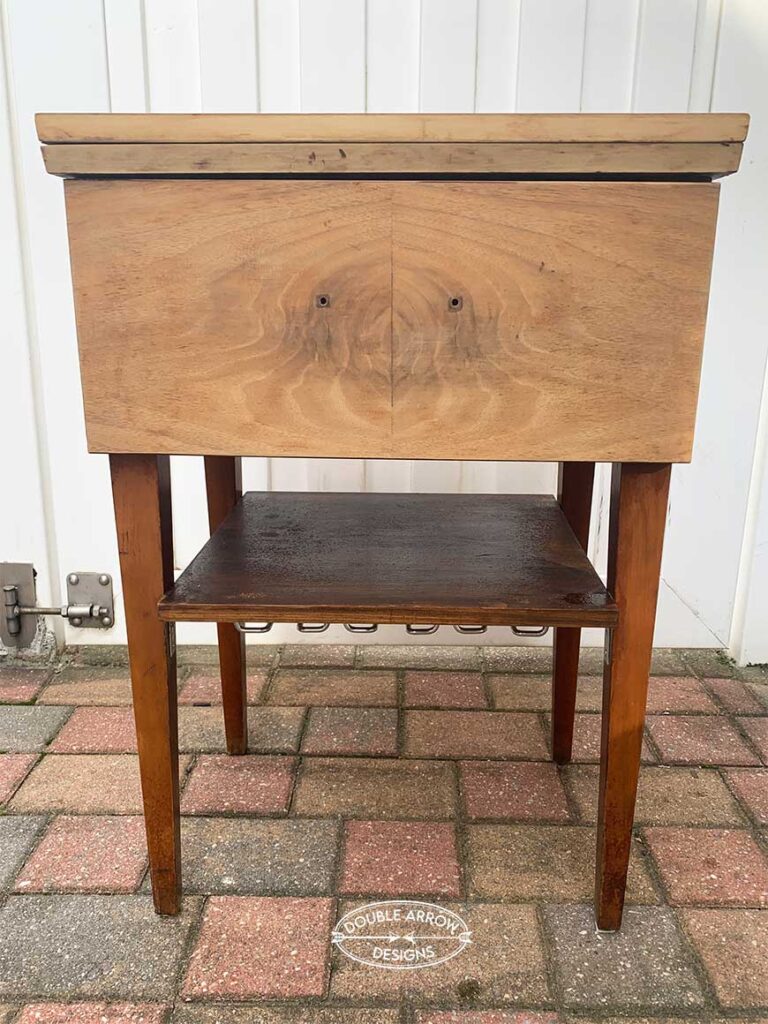
- For this project, I chose to bleach the wood after stripping off the old varnish. It helped eliminate the yellow tones and gave the wood a lighter, more refreshed look.
- For steps on bleaching, go to How to Refinish A Secretary Desk Post for bleaching steps
- Once lightly sanded, I use Minwax polycrylic to seal my wood.
Reusing Hardware
After a deep cleaning with Bar Keepers Friend, the original hardware revealed a stunning rose gold finish that influenced my choice of metallic paint.
Design for sewing machine cabinet
Once I have stripped the wood that I would like to use. It is time to decide on my design. I am going with a natural wood, off white paint, and rose gold accents.
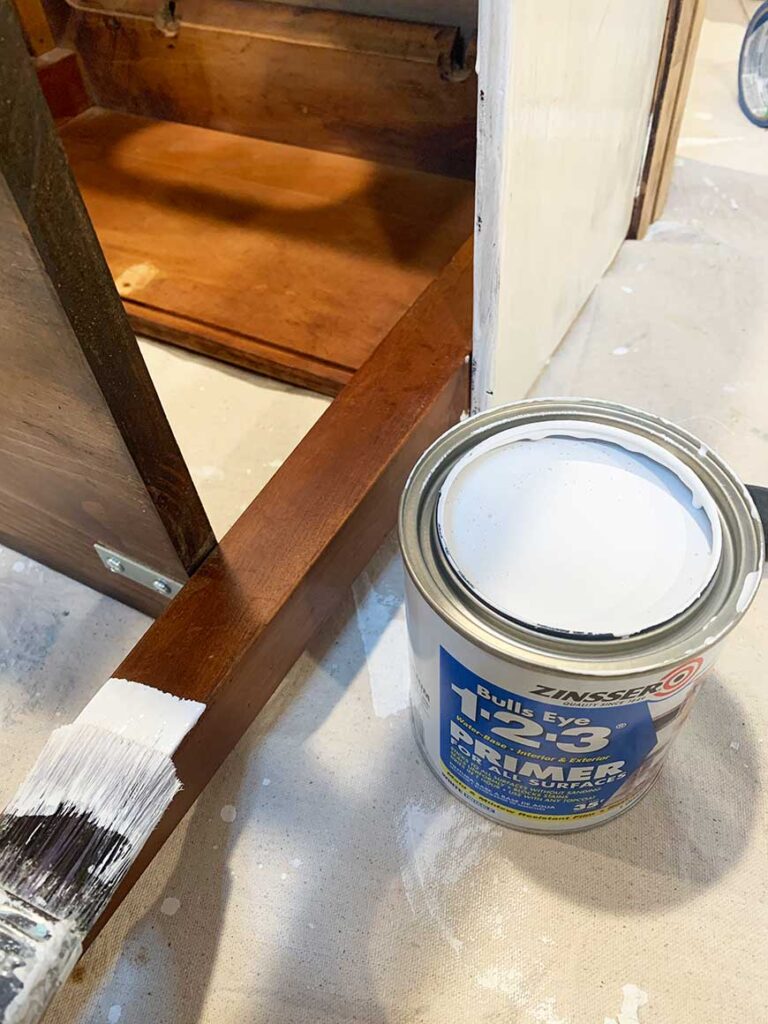
- Prime all wood that will be painted. This way, it is ready to go.
- I am using Fusion Mineral Paint, which says you do not need to do this. However, because it is a dark wood and I am painting a light color, I will add this process. Primer will block any wood tannins that may bleed through to your paint, and you do not want this to happen!
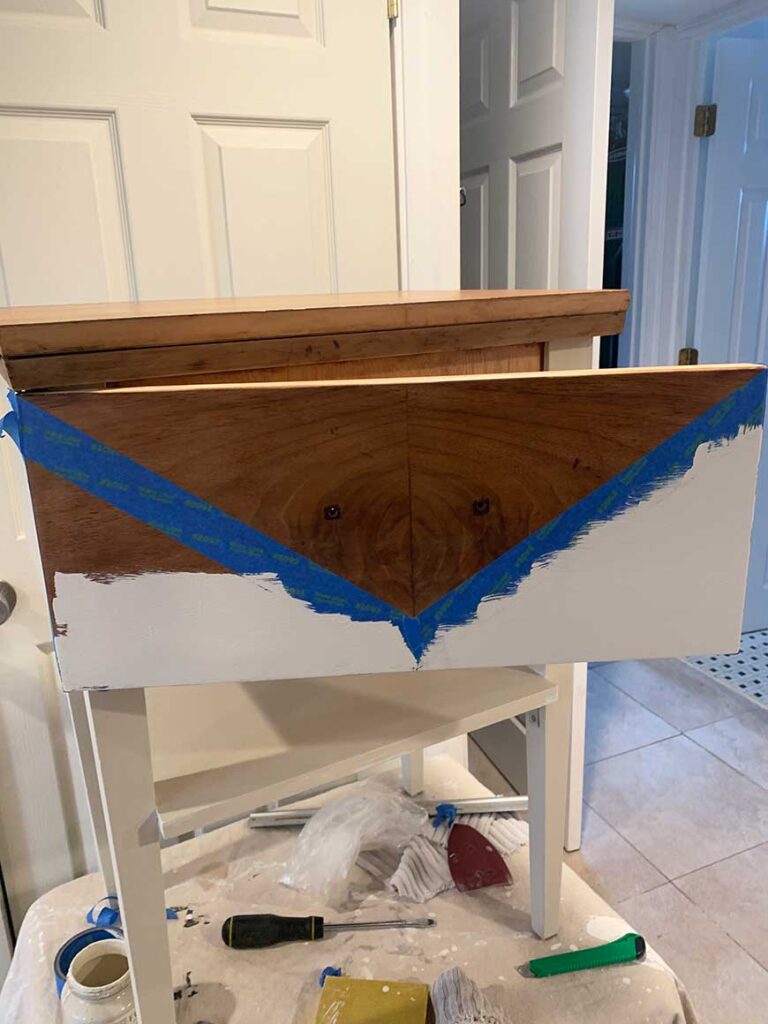
- Place painters’ tape in the desired layout, check out the TikTok video below where I show the process.
- Apply two coats of paint on the desired areas. Once the first coat is dry, apply the second.
- Remove painters’ tape. Once fully dry, I retaped the lines for the metallic paint accents.
- Paint metallic accents. I did two coats of this, and usingACE Metallic finish as shown in the above image.
- Reusing old hardware, after a good cleaning with Barkeep, my old hardware surprised us with this beautiful rose gold finish. My metallic paint accent was determined by this!
- Once all paint is dry, seal with Minwax Polyacrylic to help protect the paint and metallic trim.
- Add an undermount wine rack & Bottle opener
- Glue down felt tabs at the bottom of the legs to protect from scraping the floor.
- Add all your favorite bottles and accessories. Check out my curated list of accessories below.
Accessories for the sewing machine bar cabinet

Fun accessories for this sewing machine turn bar cart!
- Wine Opener- Corkscrew- rose gold– keeping to a theme!
- 10-piece Bartender Cocktail Kit -Mix in style. Great kit for any cocktail making. This set comes in 4 metallic finishes.
- Salem Wine Glasses, Set Of 4– decorative gold rims give it a touch of class for any bar cart.
- City Double Old-Fashioneds, Set of 4. These cut crystal glasses are perfect for an array of cocktails
- Providence Marble Round 4 Piece Coaster Set– Each 4″ Coaster is made from Natural Marble and has its unique pattern. Marble is durable, heat-tolerant, and protects surfaces from scratches, stains, and water rings.
- Cotton Cocktail Napkin – 4.5 x 4.5 in – 50 units per roll- These come in multiple colors and patterns, linen-like, and can be used up to 6 times. Can be machine-washed. Adds super elegance to your bar cart setup.
- Bleecker Ice Bucket-Bucket is made of glass, aluminum, and steel. with stainless steel tongs
- Morgan Metallic Decanter– Hold your liquor in this sleek decanter with a stopper.
- Reusable Glass Straws with Cleaning Brush – Love a reusable option? Also comes with glass straw cleaners to keep them like new.
Sewing machine cabinet repurposed Video
This quick video walks you through every step I took to transform an old sewing cabinet into a stylish bar cart—from removing the machine and stripping the finish, to painting, and styling the final look. It’s a great way to see the full DIY process in action!
Final Touches: Functionality Meets Style
I absolutely love how this project turned out! The combination of wood, paint, and metallic accents came together beautifully for a sophisticated look. It’s incredibly functional when opened, yet easily folds back into a compact cabinet that works perfectly as a stylish display piece.
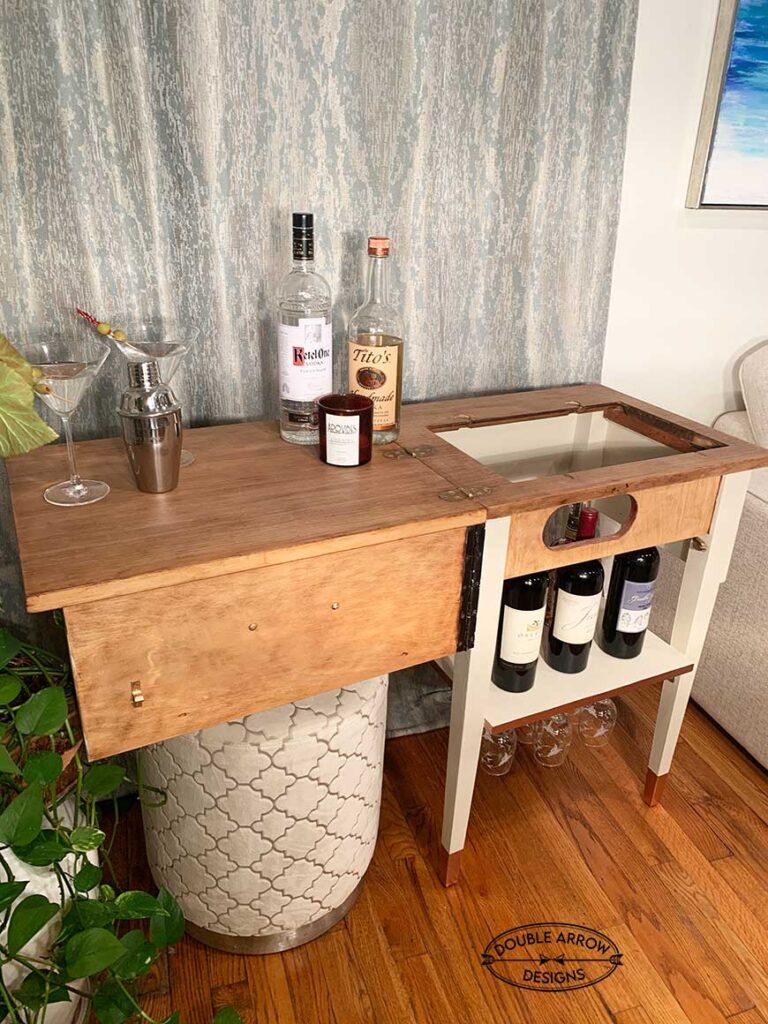
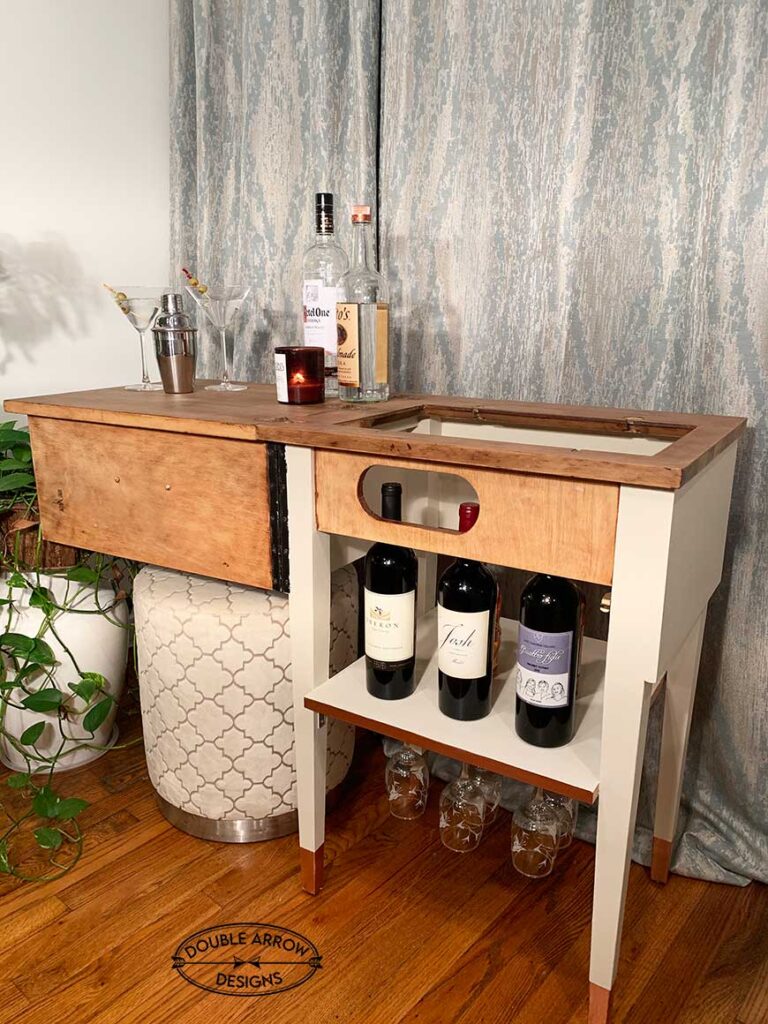
I added a wine rack to the bottom shelf, which makes it easy to store extra glasses when they’re not in use—such a great storage solution! I’m also planning to add a wall-mounted bottle opener to the side of the cabinet. It’s a simple upgrade: just purchase a metal opener and screw it into place. Lastly, to bring in a pop of color, I’ll be adding peel-and-stick wallpaper to the inside of the door. Check out the update below once the wallpaper is in place—it made such a difference in the overall look!
No products found.
Update on Bar Cart
Once I finished transforming the sewing machine into a bar cart, I noticed the inside felt a bit plain when fully opened. To add a pop of personality and color, I used peel-and-stick wallpaper. I picked a bold, conversational print that brought a fun, eclectic vibe to the space, just the finishing touch it needed!

Additional products for this bar cart
- Wine rack– First, measure your surface to make sure it fits.
- Wall-mounted bottle opener– Comes in a few finishes, check which one works for you.
- Peel-and-stick wallpaper– This is the one we chose. However, there are a ton of choices!
No products found.
Bar Carts for the non DIY’ers!
Not everyone has a vintage sewing cabinet ready for a makeover, so I always like to include a few fun alternatives that match the look and vibe of the project. Hope you find something you love—happy shopping!

- Hibiscus 31″H Gold Bar Cart with Caster Wheels, Marble Shelf, Wine Storage and Sled Bottom, for easy placement.
- Bella Storage & Bar Cart– Two-tone design with steel shelves and warm wood accents. Comapct for any small space.
- Rayle Bar Cart Doubles as an end table in space-conscious living rooms. With its black metal frame and solid wood shelves
- Norma Fluted Oak Bar Cart is fluted wood oak finished with brass accents for a touch of industrial charm.
- Sculptural Oak Bar Cart piece raises the bar with a checkered shelf and a scalloped tray – perfect for displaying your favorite glasses, books, and bottles.
- Modern Coffee Bar Cabinet– High-quality MDF, paired with tempered glass cabinet doors, and supported by 4 sturdy metal legs for long-term use
- Bar Cabinet with Storage and Shelves– Made from engineered white oak, featuring a rounded style with a mirrored shelf. Open for display or close the doors for a sleek cabinet to store all your favorite cocktail accessories.
Bringing New Life to Old Pieces: A DIY Worth Celebrating
Transforming an old sewing machine cabinet into a bar cart has not only given new life to a forgotten piece of furniture, but it’s also added a one-of-a-kind statement to my home. This project was more than just a makeover—it was a creative journey that blended function, personality, and charm. Whether you’re an experienced DIYer or just starting, this bar cart transformation proves that with a little vision and the right tools, you can turn something headed for the landfill into something both beautiful and useful. I hope this post inspires you to look at the items around you with fresh eyes and see the potential in pieces that others might overlook. Cheers to repurposing, refreshing, and reimagining—one DIY project at a time!
Related Posts
Enjoy what you have just read? Check out some related posts below for more inspiring DIY ideas, or visit my homepage at Double Arrow Designs for a ton of fun and creative projects. Whether you’re looking to repurpose furniture, add stylish touches to your home, or find easy-to-follow tutorials, there’s something here for every DIY lover. Don’t forget to subscribe for updates and join the community of fellow makers who love turning everyday items into treasures!
Leave a comment and let me know what furniture piece you’d like to learn more about or see transformed next. Whether it’s something classic, quirky, or unexpected, I’m excited to hear your ideas! Your suggestions inspire future projects and help me create content that you’ll truly enjoy. Don’t be shy—let’s start a conversation and make DIY design fun and accessible for everyone!
Thanks for stopping by!

This post is all about a sewing machine cabinet repurposed into a bar cart
Last update on 2026-07-16 / Affiliate links / Images from Amazon Product Advertising API