Timeless Revival: How to Refinish a Secretary Desk with Style!
In this post, I share how to refinish a secretary desk and update it to be a one-of-a-kind, relevant piece for today’s lifestyle. This painted secretary desk is now a functional piece in my clients’ homes.
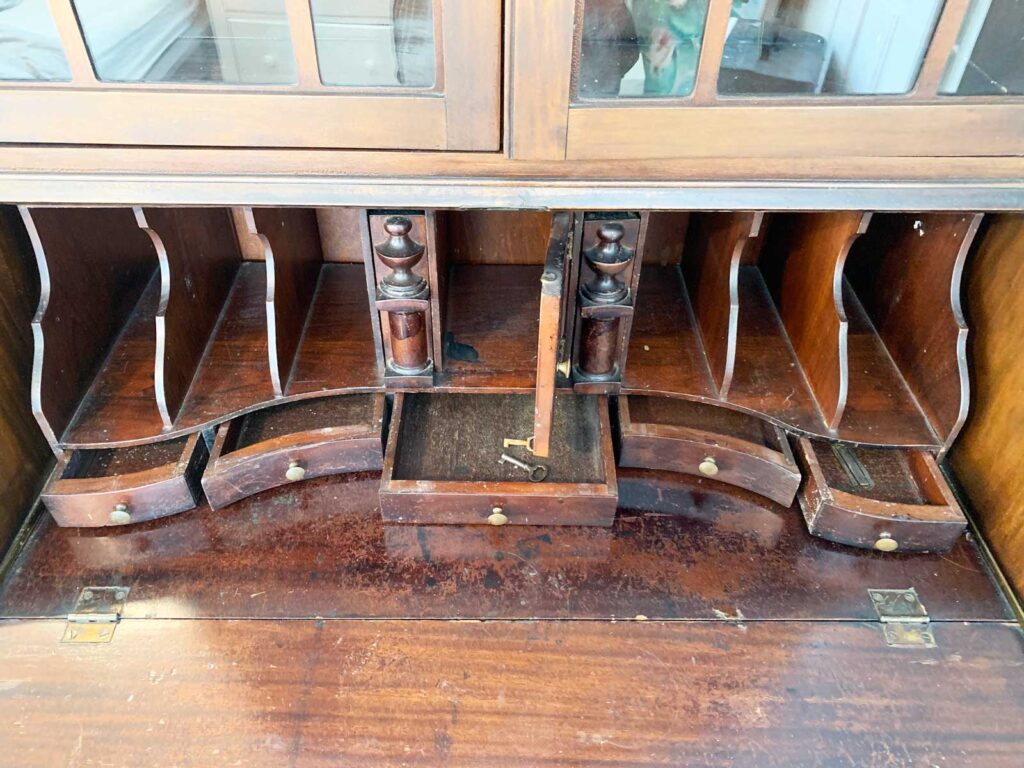
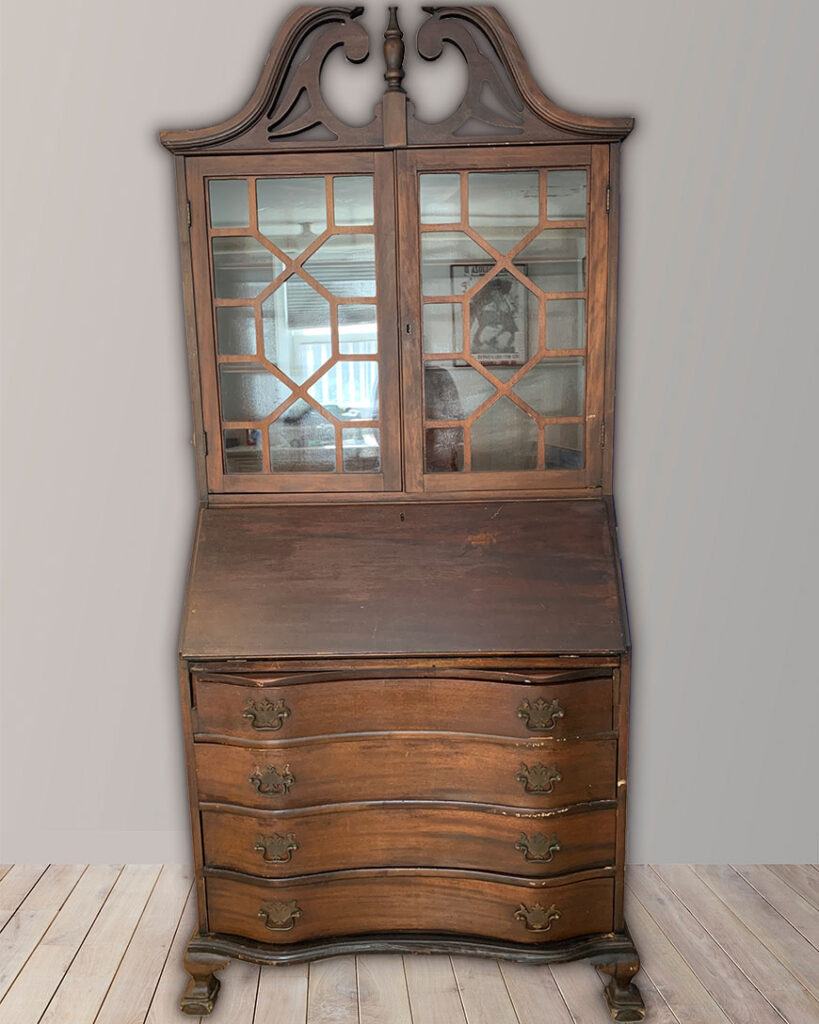
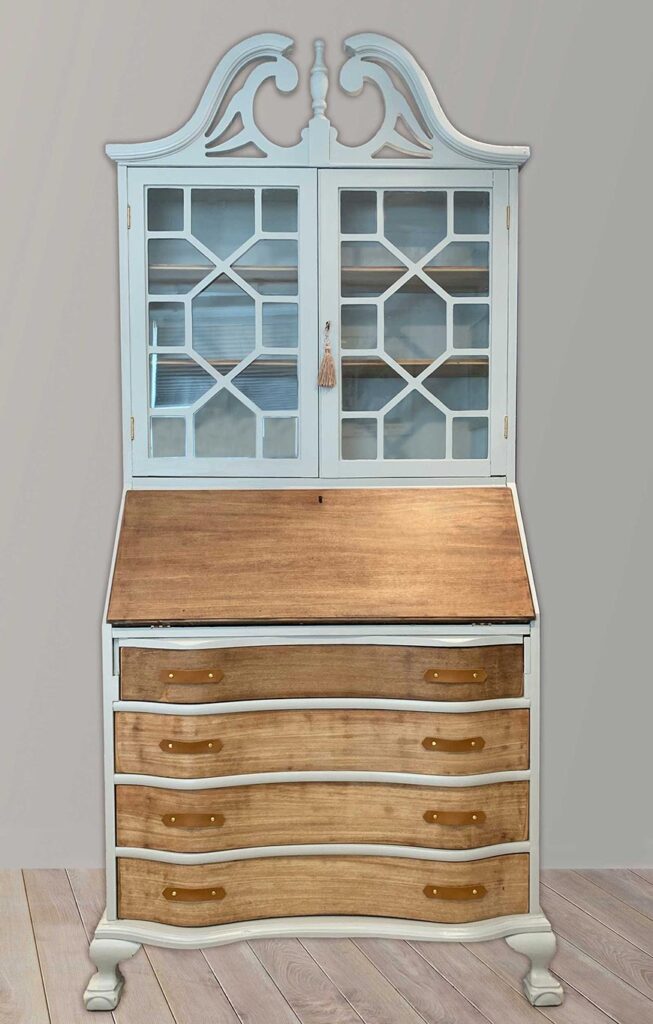
When I saw this secretary’s desk for sale, I had to have it. Taylor, my niece, was so excited by this piece as well; she understood that we could transform this piece into a one-of-a-kind beauty. This secretary desk had so much potential! It is a fairly compact piece. its 78″ high and only 34″ wide. It was old, but in good condition, and even had the original skeleton key that locked the cabinet and the desktop. This is a perfect piece to fit in a small area in a living space. Functional as a display, work and storage piece, it packs a punch for versatility and use. This secretary desk we were about to refinish, has three main functional sections.
This post contains affiliate links. If you make a purchase through one of my links, I may earn a small commission at no extra cost to you. As an Amazon Associate I earn from qualifying purchases.
- The top portion has three shelves with glass doors, perfect to house glassware, china, or books, or a combination of any of these items.
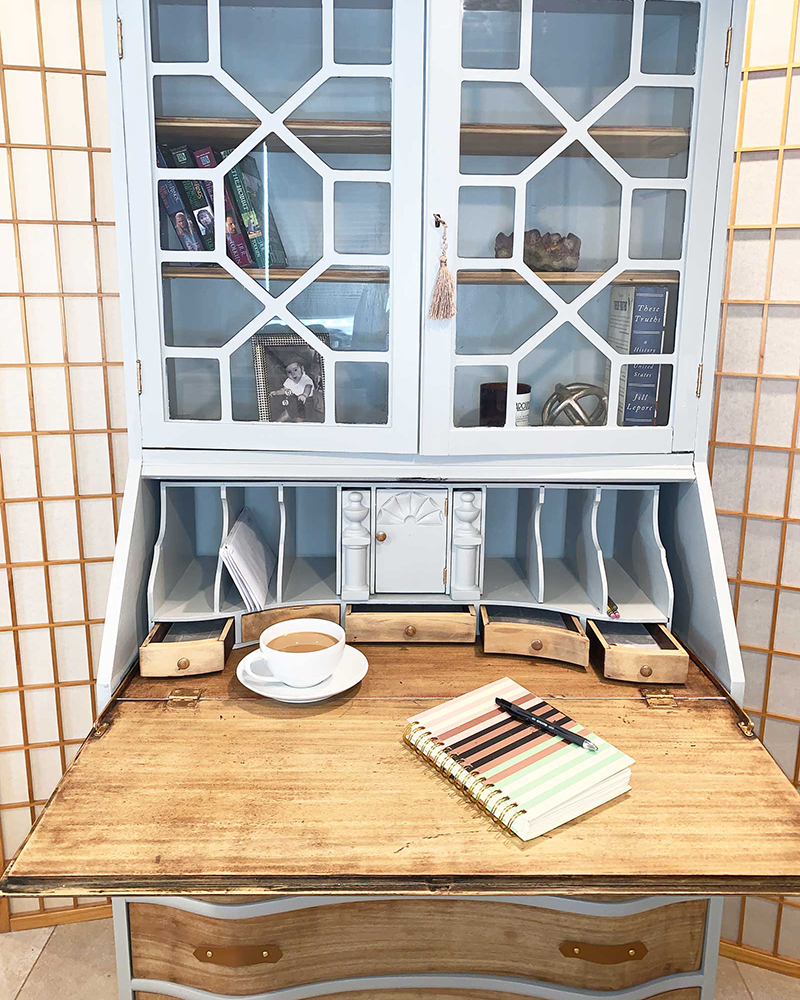
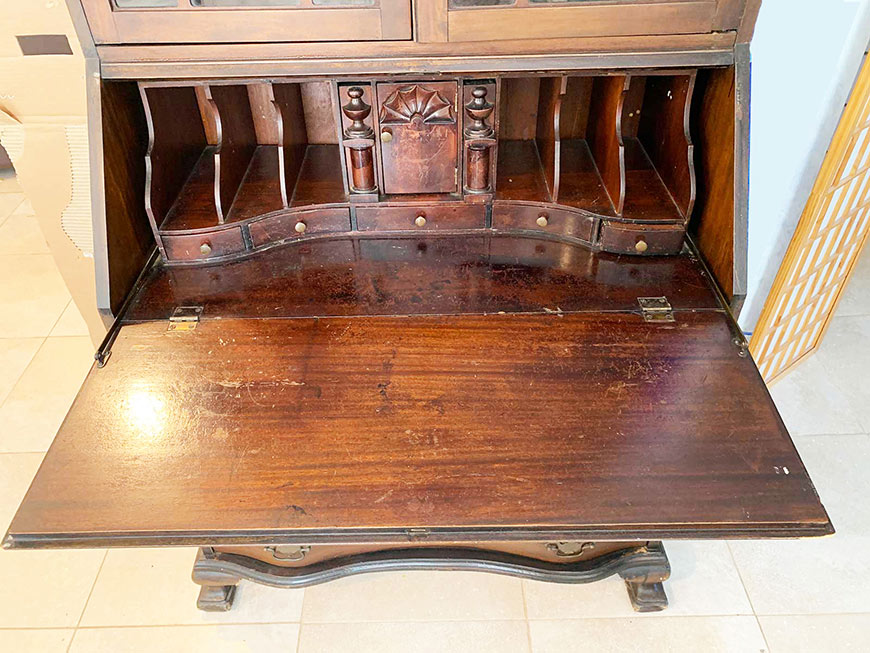
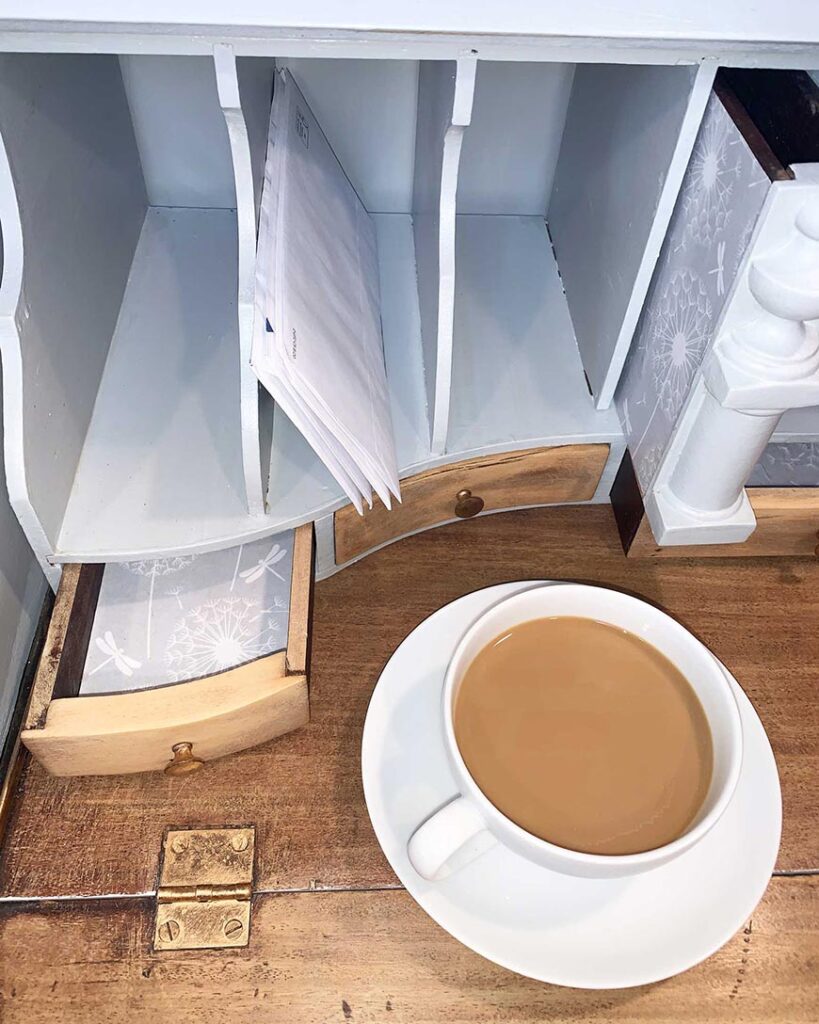
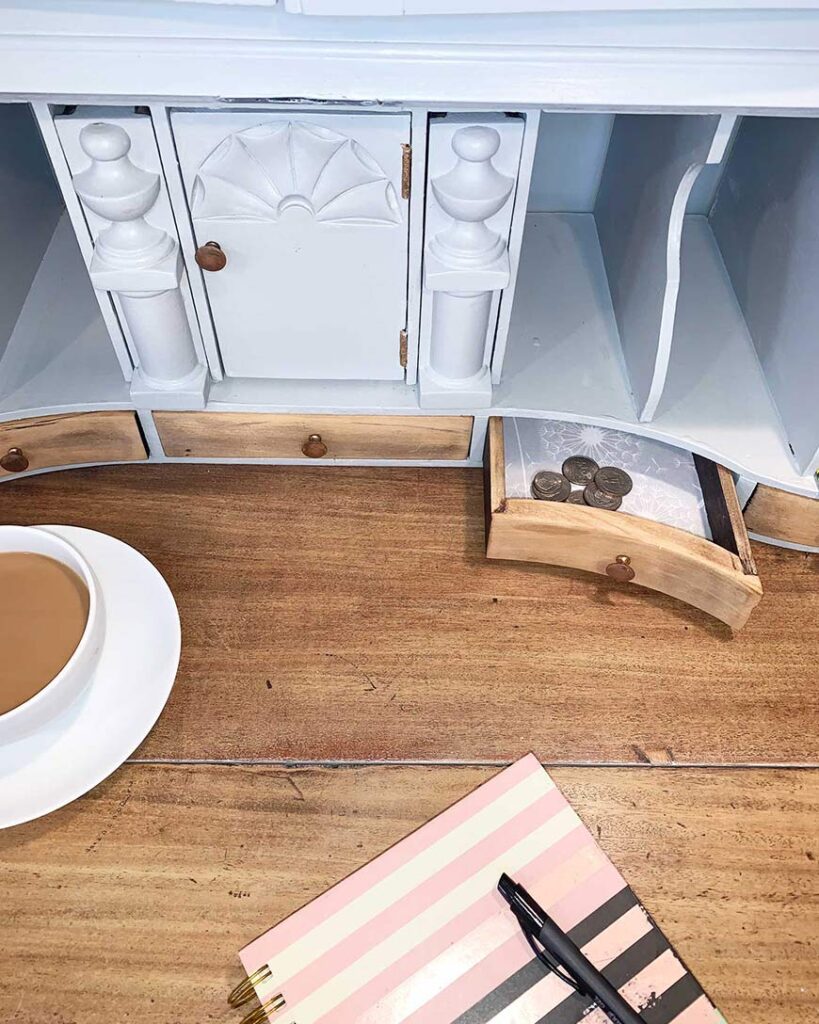
- The middle section showcases a perfect workspace. Once you fold the leaf down, it reveals its wooden cubby that houses slots and drawers that can hold papers, bills, jewelry, etc. Once the leaf is folded back up, all is concealed.
- The bottom section of this piece has 4 drawers. There is plenty of room for folded clothes, blankets, sheets, storage, etc.
Preparation before any renovations
Before starting any project, it is so important to fully clean your furniture piece. First, vacuum up any dust or dirt. I did this for the secretary’s desk. Make sure to get underneath your furniture piece as well. Then I used Meyers cleaner with warm water and a sponge and cleaned from top to bottom… I did this twice! Before anything else gets done, this is the best practice. Like I have said before in this past post, painted dust is not a pretty sight. Paint cannot conceal a surface that was not properly prepared. As much as I want to get started, I have learned from all of my painted furniture projects that preparation is key to any successful furniture redo.
Color scheme for renovating this secretary desk
Natural wood and light grey with tan leather drawer pulls
If you have been reading along on my posts on painted furniture, you know I always start with a color scheme in mind. You can check out a past painted project here. Because this piece has been stained and has darkened over the years, the overall color was very dark and outdated. Taylor and I decided before we refinished this secretary desk that it needed to be a much lighter, neutral piece. This helped showcase some of the secretary desk’s natural wood beauty.
Our final decision on how we would refinish this secretary desk was to paint most of the piece using Benjamin Moore paint in the color Coventry Gray. Then, for the wood areas, we would bleach the wood. For the natural wood areas, Taylor and I chose all the drawer faces, the small drawer faces on the cubby portion inside the desk, the desk leaf, and the two suspended shelves in the upper cabinet. Which would carry the natural wood element throughout the secretary’s desk in three sections.
How to bleach wood that has been stained
Please note when bleaching! Make sure that you wear safety goggles, gloves, and that you are working in a well-ventilated area (outside is best). Bleach is a very caustic agent and must be handled with care.
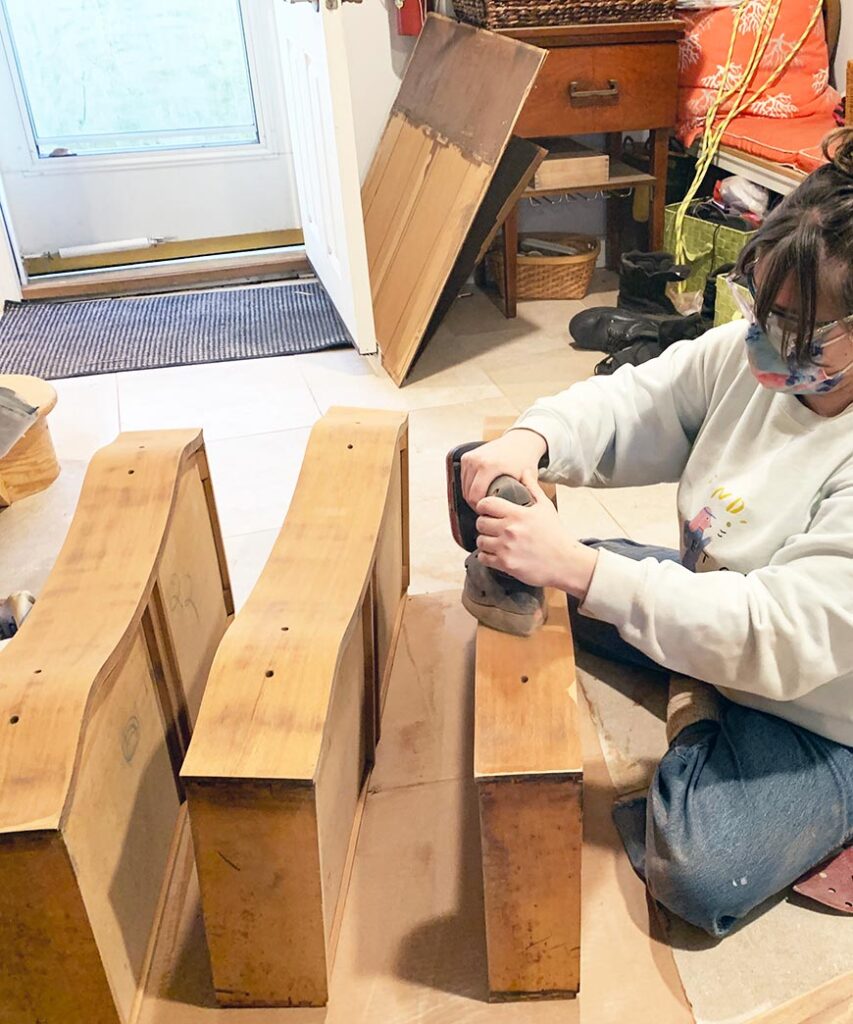
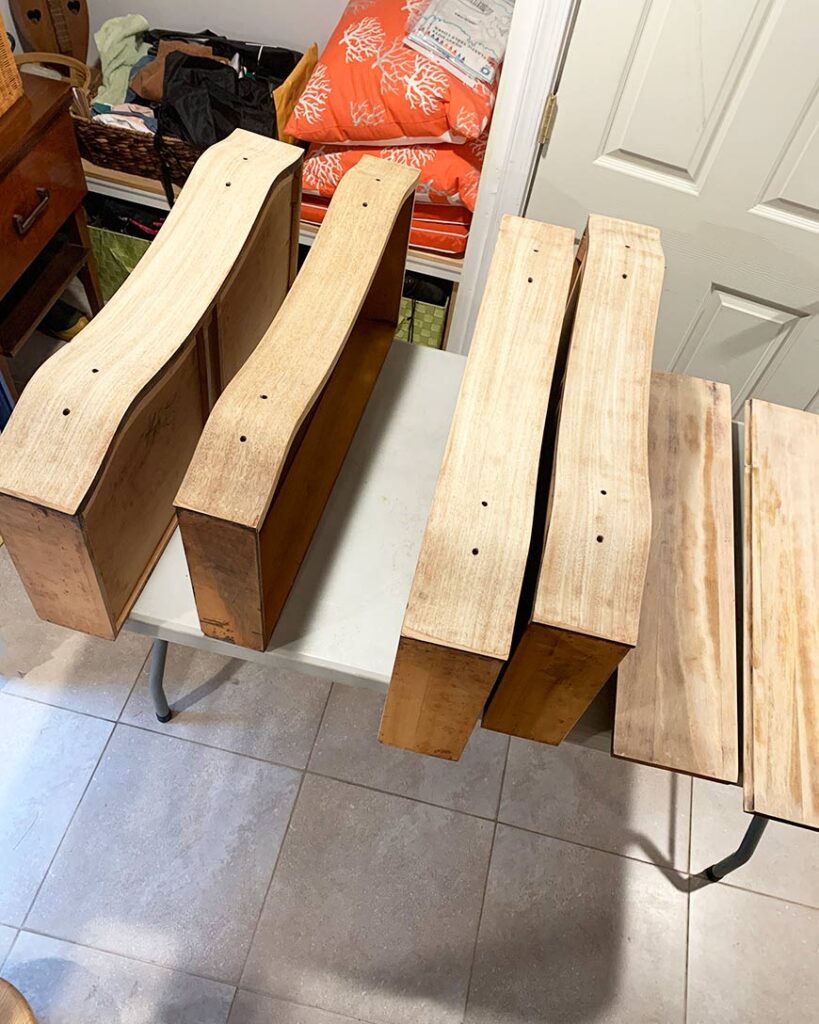
Part of the appeal to refinish a secretary desk was to give it a two-tone look with paint and wood. This has been a big trend recently, and we love the depth that it gives a refinished piece of furniture. Because the wood areas had been stained, we needed to sand them down to get to the unstained portion of the wood. Now, if anyone knows me, especially, sanding is a labor-intensive job, and one I like to avoid at all costs! Thank goodness I have Taylor, who has been working with me on all creative projects. We spent a day sanding all the areas down to their natural wood. Once we did this, all the wood had a red tone to it. So we decided to bleach the wood to make it a lighter, more natural, modern look. The process is pretty simple.
Steps for bleaching wood
- You can use a stain stripper, like Citrus Paint & Varnish Remover Gel, or, in our case, we sanded the wood, removing all stain and finish. Using a stripper is best to help cut down on the sanding.
- Once the unfinished wood has been cleaned, wiped down, it must sit for 24 hours if you have wiped it down with water. Your wood must be dry.
- We wrapped all the metal hardware with painters’ tape that was supporting the desk leaf. Bleach, when in contact with metal, will corrode. So, please make sure that all metal is either removed or covered.
- Then, with a brush, we applied household bleach in a one-directional motion following the grain.
- Let bleach sit for around 4 hours to do its work. You will see the wood lighten as soon as the bleach starts to dry.
- Once the wood is at the desired color. Make a mixture of half white vinegar and half water. Use a clean brush and brush on this mixture. This neutralizes the bleach and stops the chemical reaction.
- Let the wood completely dry.
- The surface of the bleached wood will have a rough feel to it. So use a fine 150 grit sandpaper block and lightly hand sand the surface smooth. Always follow in the direction of the wood grain.
- To seal this newly bleached wood, I used a clear wax. We applied this with a lint-free microfiber rag in circular motions, then wiped in the direction of the wood grain any excess wax. We applied two coats on all the bleached wood areas. We Loved the final result of this for the refinished secretary desk drawers.
Painted secretary desk
Now that the wood areas are complete, it’s time to paint and refinish a secretary desk. Because we do not want to sand anymore, we have to prime all the wood before starting to paint. The wood is dark, and there is a good possibility for stains to come through from the tannins in the wood. First prep is using the Bin primer from Zinzer. Your primer coat doesn’t have to be pretty,y but it has to coat all surfaces. Bin Primer is a shellac-based primer. You need to work relatively fast because it can dry quickly. To clean your brushes properly, use 1 part ammonia to 2 parts water. I soaked them in this solution, then washed my brushes out with warm water and soap.
Once this is dry, I am ready to apply my first coat of paint. Once my first coat has completely dried, I will add a second coat. For my topcoat, I use my Minwax Polycrylic Matte Coat to unify the finished look between the natural wood and painted areas.
Supplies used to refinish a Secretary desk
Below are the products or similar products that were used to refinish the secretary desk.
|| 1 || 2 || 3 || 4 || 5 || 6 || 7 || 8 || 9 || 10 || 11 ||
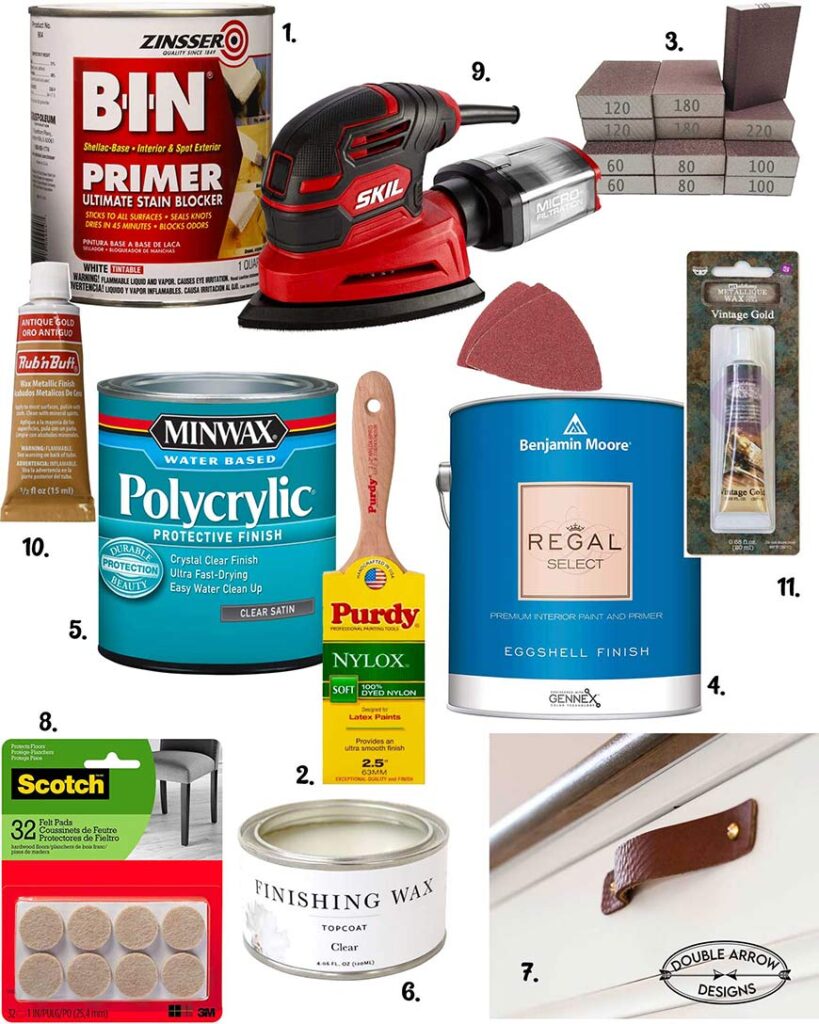
- Bin Primer– Shellac base is great for covering dark old wood
- Purdy Brush– a 2.5″ is a good starting point
- Sanding blocks– this pack has a good variety of grit sizes
- Benjamin Moore paint– Eggshell finish – Here is a comparable brand to Benjamin Moore in a variety of colors
- Minwax Polycrylic– Use over all painted surfaces to seal and protect
- Clear Wax– (Similar product)Used on bleached [art of wood on this project
- Leather drawer handles– We used the color Nicotine on the secretary desk
- Felt tabs– add to the bottom of feet to avoid scratching the floor
- SKIL Corded Detail Sander– Love a power tool! Perfect for furniture projects. I have had mine for many years.
- Rub N Buff – Antique gold used on all the hardware
- Metallique Wax-Vintage Gold– Used for accent on the painted scrolls and feet
No products found.
No products found.
No products found.
[No products found.
No products found.
No products found.
No products found.
No products found.
No products found.
No products found.
New back panel for the secretary’s desk
When I brought this secretary desk into my workroom, I noticed that the back panel was warped and brittle. Removing the old panel made it much easier to refinish the desk properly. First, we removed the middle cubby section, along with all its drawers, to clean and paint it separately. This also made it a much easier way to work around the rest of the desk.
Replacing the panel was simple. We measured the piece, then went to Lowe’s, where my husband, Brian, bought a 1/4″ pressboard panel — so much nicer than the original! We painted the new panel the same color as the body of the desk to give it a clean, unified look.
It’s all about the details!
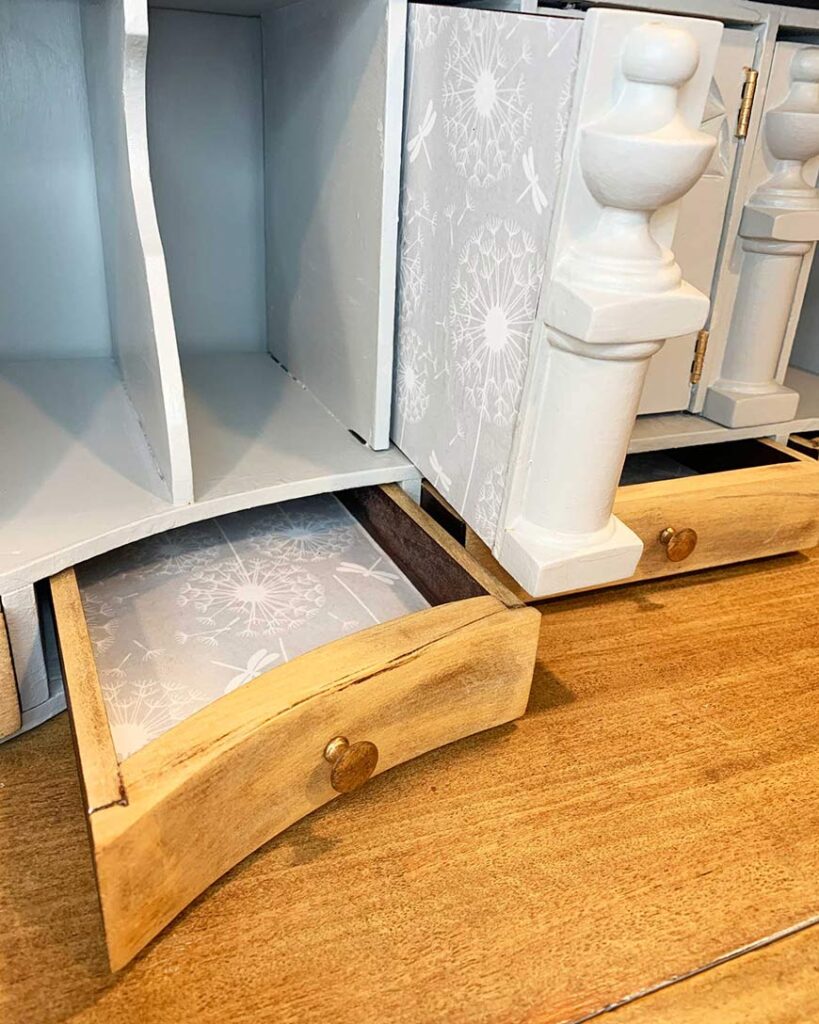
- Renewing all the existing hardware to its former glory. For all the hardware, we used Rub and Buff in an antique gold finish for all the hinges and small drawer knobs to bring out all the metal finishes. It gives it a renewed, fresh luster.
- Inside the small drawer, I created a dandelion motif with dragonflies that would complement the larger stencil on the side of the desk. I printed this out, then decoupaged it into the drawers by cutting the paper to size, then using Mod Podge to incorporate it into the drawer bottoms.
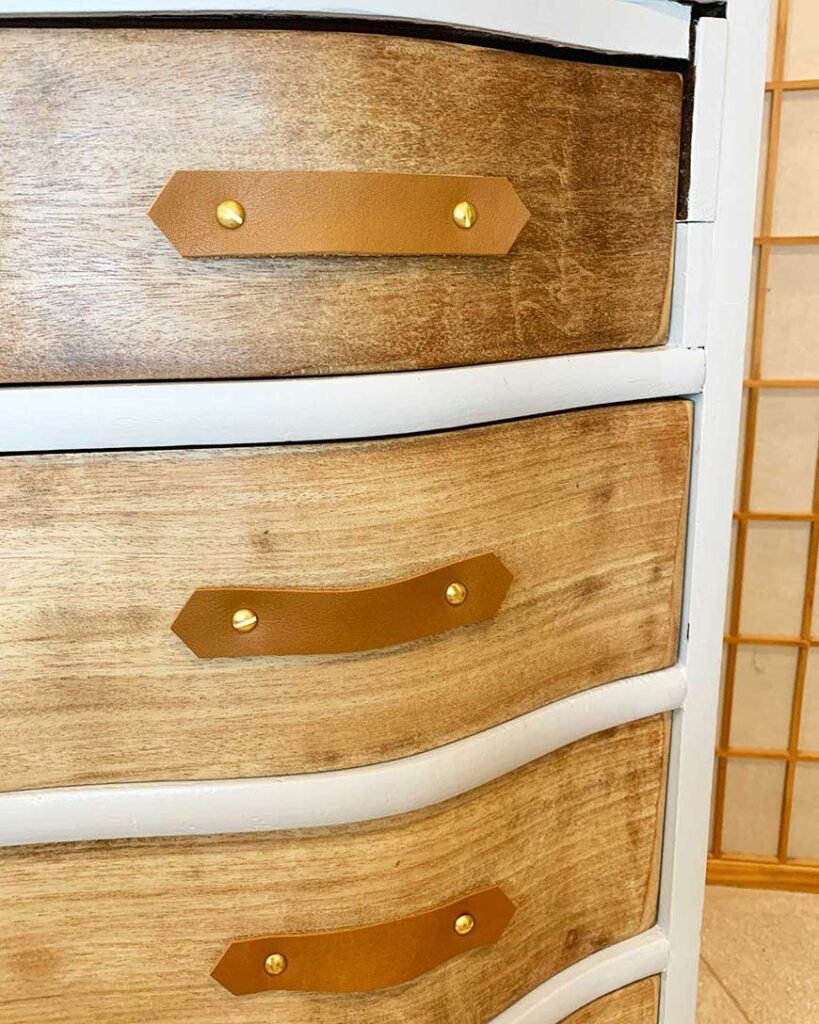
- We removed all the old colonial drawer pulls and are now ready to replace them with a more modern, updated pull. My client and I sat and found these beautiful leather pulls on Etsy and thought they were a perfect eclectic look for this piece, plus the metal hardware matched the overall metal finish.
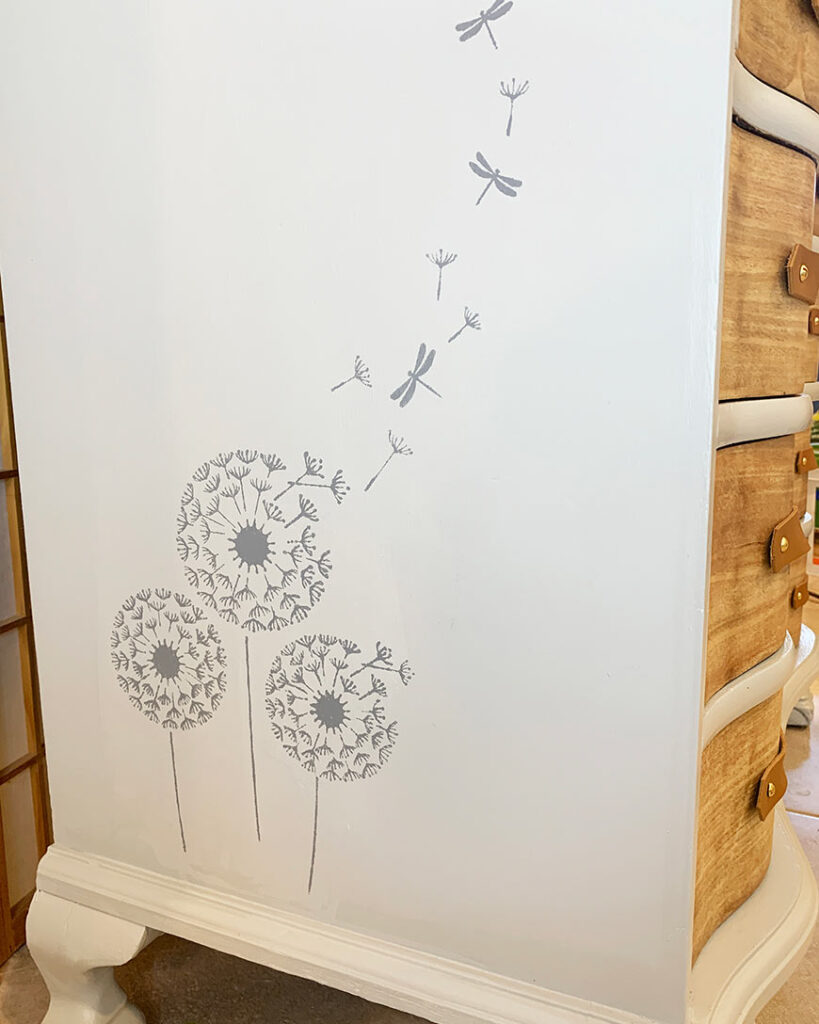
- On this piece, I decided to add a hand-drawn stencil. This would reveal itself on the side of the refinished secretary’s desk. You can purchase this digital file on my Double Arrow Designs Etsy store for the exact stencil file. For me, the dandelion image with the petals floating away that are intertwined with dragonflies reminded me of all the freedom and beauty life has to offer, as long as we are open to seeing this.
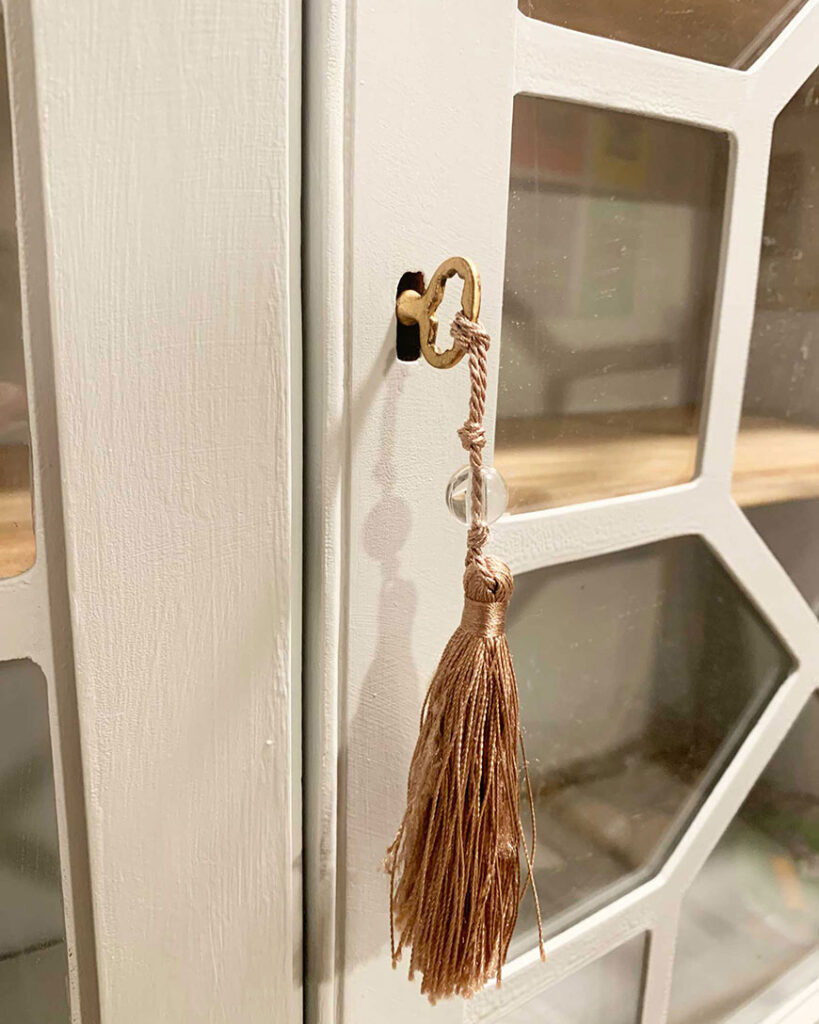
- Lastly, we wanted to make sure that the skeleton key that came with this secretary’s desk was fully functional and well showcased. So we added this beautiful tassel (you can make one as well!) to hang from it so that when it sits in the lock it can remain a decorative element.
Finishing touches on the refinished Secretary desk
Once everything was finished, I added my go-to final touch — felt pads on the bottom of the legs. It’s such a small step, but it makes a huge difference! The felt helps protect your floors from scratches and makes it way easier to slide the desk around if you ever want to move it. No heavy lifting or worrying about scuff marks. Little details like this really help make a project feel complete.
Refinish a Secretary desk has its final reveal!
This project took some time, patience, and elbow grease, but it was so worth it! The transformation turned out beautiful. Taylor and I had a blast working on it together. Every piece we find has its own story and personality, and it’s so much fun seeing how a little love (and paint!) can totally change it. We’re already excited to see what our next makeover will be!
Related posts
Check out these additional posts below on other DIY furniture projects I have done.
Thanks for stopping by!

This post is all about refinishing a secretary desk
Last update on 2026-07-04 / Affiliate links / Images from Amazon Product Advertising API