From Formal to Fabulous!Repurposed China Cabinet Makeover
In this post, I’m revealing how my repurposed china cabinet, minus the top half, turned out! This piece has now become a functional buffet cabinet that we use every day! I originally shared the design plan in Repurposing a Dining Room: Room Revamp, where I outlined the vision for the space. Now, you’ll see the finished transformation of the china cabinet, a key element in my dining room refresh.
This post contains affiliate links. If you make a purchase through one of my links, I may earn a small commission at no extra cost to you. As an Amazon Associate I earn from qualifying purchases.
Why did I remove the china cabinet from the base?


It was dark and outdated! I would be losing a ton of storage, but I will be minimizing my glassware and overall stuff that I just don’t use anymore. However, I will gain a whole buffet top that I can use when I have company. The new dynamics between the new buffet console table and the wallpapered wall will revise this into a more modern space.
How I repurposed the china cabinet base
I break down each component of this china cabinet to detail each section and repurpose this china cabinet into a new, modern, functional piece. So this is my plan:
- Strip the Finish: Removed the old dark varnish and stain from the tabletop surface of the cabinet base to prep it for a fresh look.
- Paint the Exterior: Painted the outside of the cabinet base and its doors using Fusion Mineral Paint in Midnight Blue for a bold, updated finish.
- Add Height with Legs: Elevated the cabinet by attaching 3″ wooden legs. To securely install them, each leg was screwed into a 1″ wooden block affixed to the cabinet’s base, adding a total of 4″ in height and bringing the overall height to 34″.
- Add Wallpaper Accents: Applied the same peel-and-stick wallpaper used on the wall behind the cabinet to the inside faces of the two drawers, creating a coordinated and stylish detail.
- Upgrade the Hardware: Swapped out the original door knobs for modern brushed nickel concave knobs to complete the refreshed look.
Repurposing the china cabinet base table top
Once I remove the top, I want to remove the old dark stain. I did this by using a paint and varnish stripper. I used Klean Strip Green paint and varnish stripper. Once this sat for half an hour, I used a metal putty knife and peeled the old varnish off. In the past, I have bleached the wood; you can see this process in my post on How to Refinish A Secretary Desk, but I love how the wood looks on its own, so I will skip that step here!
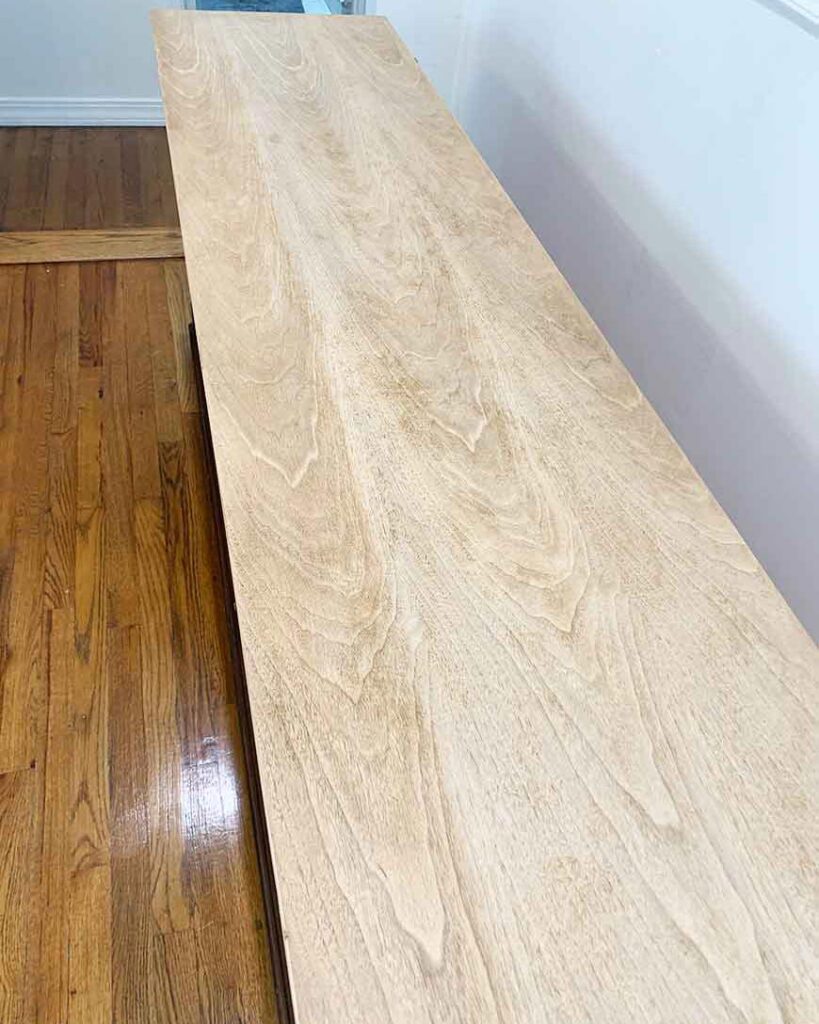

- Strip the tabletop to the original wood- I used a varnish and paint remover
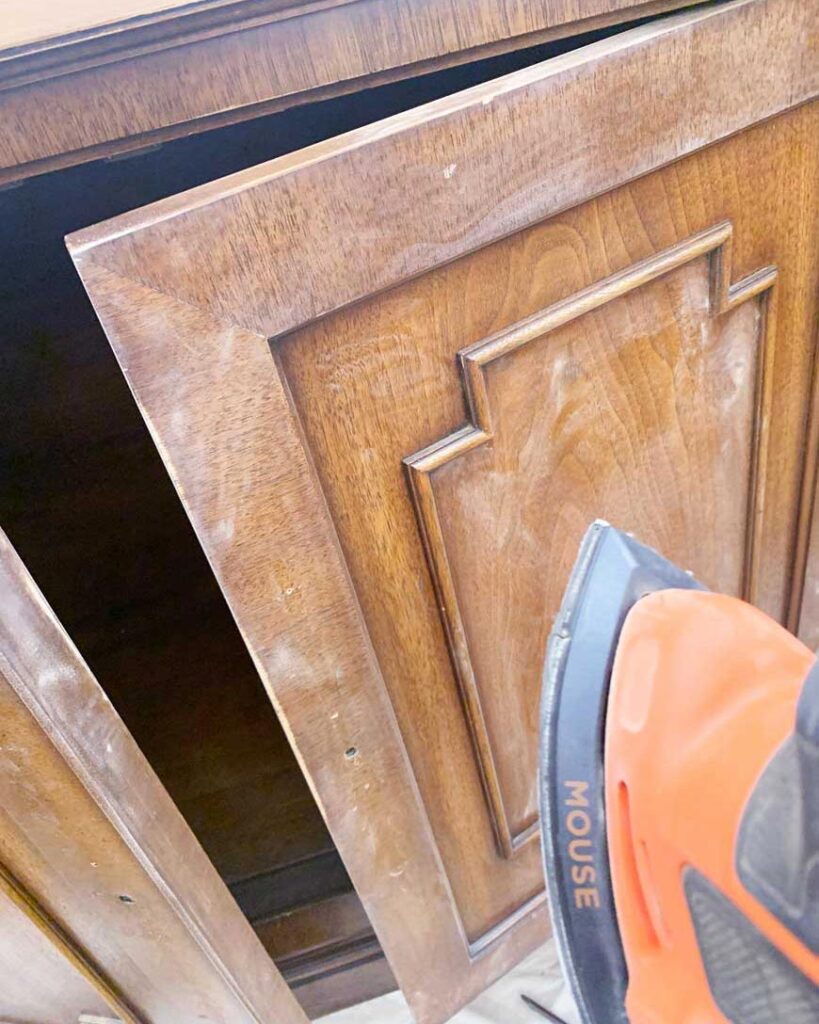
- Once this is stripped, you will be left with spots of stubborn varnish- I used an electrical sander to remove the rest of the varnish
- Once complete, use a fine-grit sanding block to smooth out any rough wood.
- Use a damp cloth and wipe down (several times) the unfinished wood surface
- Minwax Polycrylic in clear matte- I used a sponge brush to avoid brush strokes and applied 3 coats, letting each coat dry fully before applying the next coat.
Prepping the China cabinet for painting

The finished painted piece’s success will always be in the prep work. In my post How to Refinish A Secretary Desk, I explain how important this is.
- Vacuum Thoroughly: Remove all dust and debris from the piece, especially underneath and in corners where dust collects.
- Clean All Surfaces: Using warm water and mild soap, wipe down the entire piece to remove any grease, dirt, or residue.
- (If Sanding) Clean After Sanding: If you plan to sand the furniture, complete the sanding process first, then wipe it down again to remove all dust from the surface.
- Fill Imperfections: Over time, this cabinet’s veneers have cracked and broken. So I applied wood filler to any chips, cracks, or uneven areas, and let it dry completely according to the manufacturer’s instructions.
- Sand Smooth: Once the filler is dry, lightly sand the repaired areas to ensure a smooth, even surface for painting or staining.
Painting the China cabinet base
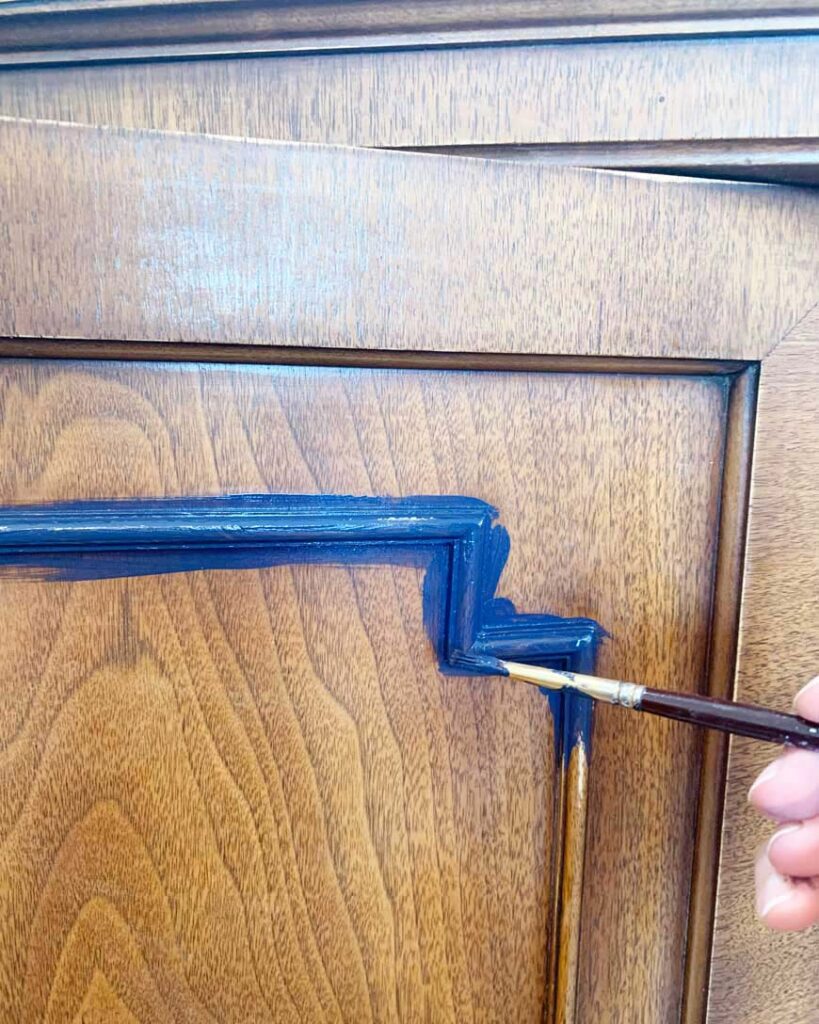
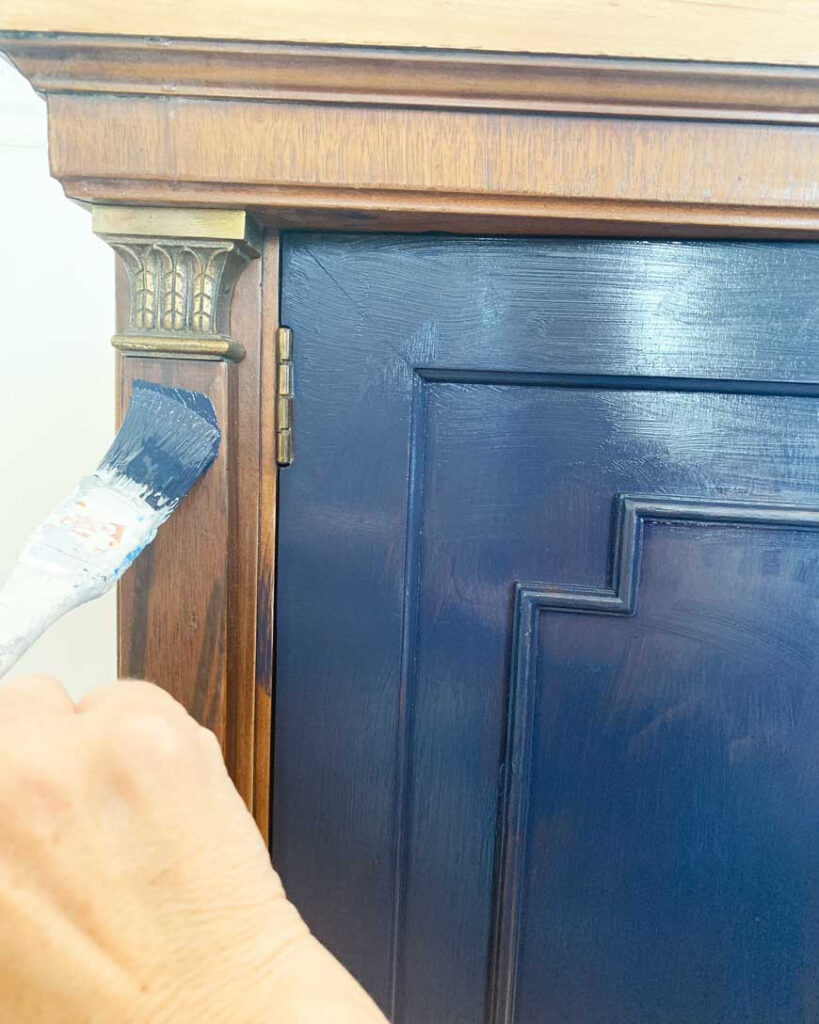
There is a trend going on right now with painted furniture, and that’s the color blue. I loved the idea of painting this piece a dark color, which would make a nice contrast to the light wood buffet top. I chose to use Fusion Mineral Paint in Midnight Blue for this project. It matched my wallpaper perfectly!
I love Purdy paint brushes, and use regular paint brushes as shown above for small, detailed areas.
- Lightly sand the entire piece; this will give the paint a way to adhere to the surface by sanding down any gloss.
- Use wood filler to fill in any chips or missing veneer
- An alternative is using a deglosser. I have used both; however, on this project, I will sand this specific project so that I can go over the wood filler areas and make it all even.
- Use a high-quality brush! I always use Purdy; they are more expensive, but if you wash properly and take care of them, they can last for years.
- Brush on one coat, let it dry, and add another. Fusion Mineral Paint says it is “foundation to finish.”
Adding legs to my cabinet


Because this piece had a large china cabinet on top, it sat on the floor without legs. Now that I have removed the china cabinet top, I wanted to add some additional height. The cabinet, based on its own, is 30″, so I bought 3-inch Sofa Legs Wood Furniture Legs Pack of 4 Pyramid Couch Legs, so the total finished height will be 34″.
I needed to add a 1″ block (shown in the first image) because the base of the cabinet had metal discs inside the wood, and I couldn’t screw the legs directly into this, so I added the blocks and then screwed the legs into the blocks and then sanded, filled with wood glue, and painted!
How I attached the legs:
My first order of business is to have this piece flipped onto its side so I have clear access to where I will screw the legs in. Thankfully, I had muscle around to help me! My son, Connor, and my neighbor’s son. This is one heavy piece! I used a drill bit and pre-drilled holes, then screwed in the hardware that came with the legs into my 1″ block, then screwed the legs in! Once this was done, we flipped my piece onto its new legs.
Adding peel and stick to the inside drawers
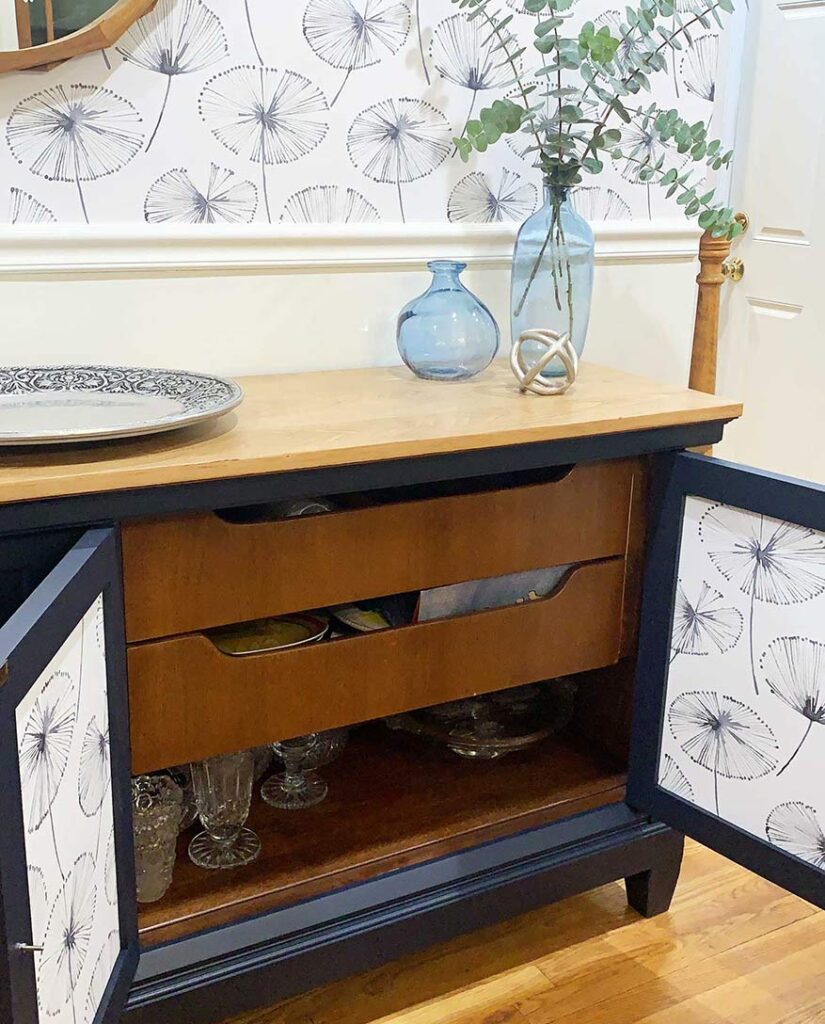
To add a fun detail, I am taking the peel-and-stick wallpaper I used on the wall behind this piece and using it on the inside door panels. This will add a fun coordinating element when the cabinet doors are opened!
Check out my post on 9 Peel And Stick Wallpaper Ideas for some fun ways to use this and lots of fun selections, so take a look!
Replacing the door knobs


This is the finishing touch for the project! It’s like adding jewelry! I chose these brushed nickel concave rectangular Bravo knobs from Anthropologie because they accented the lines of this china cabinet base really well. The metal in my dining room is mostly silver, so this will accent nicely for this room.
Painted metal accents


On each corner of my china cabinet base are decorative metal accents. I chose not to paint them silver, as it felt too bright and would have disrupted the rich blue on the columns. Instead, I used Rub ’n Buff in Antique Gold—perfect for picking up the warm tones in the newly finished wood top.
This product is amazing to shine up any old metal, ot comes in a variety of metal finishes. I used Q-tips and rubbed them onto the metal, then wiped any excess off.
Video below on the whole process that went viral on TikTok, take a look and watch how I tackled this project from start to finish, the reveal is unbelievable!
Supplies used for this project.
See below for all the materials and supplies I used on my Repurposed China Cabinet project.
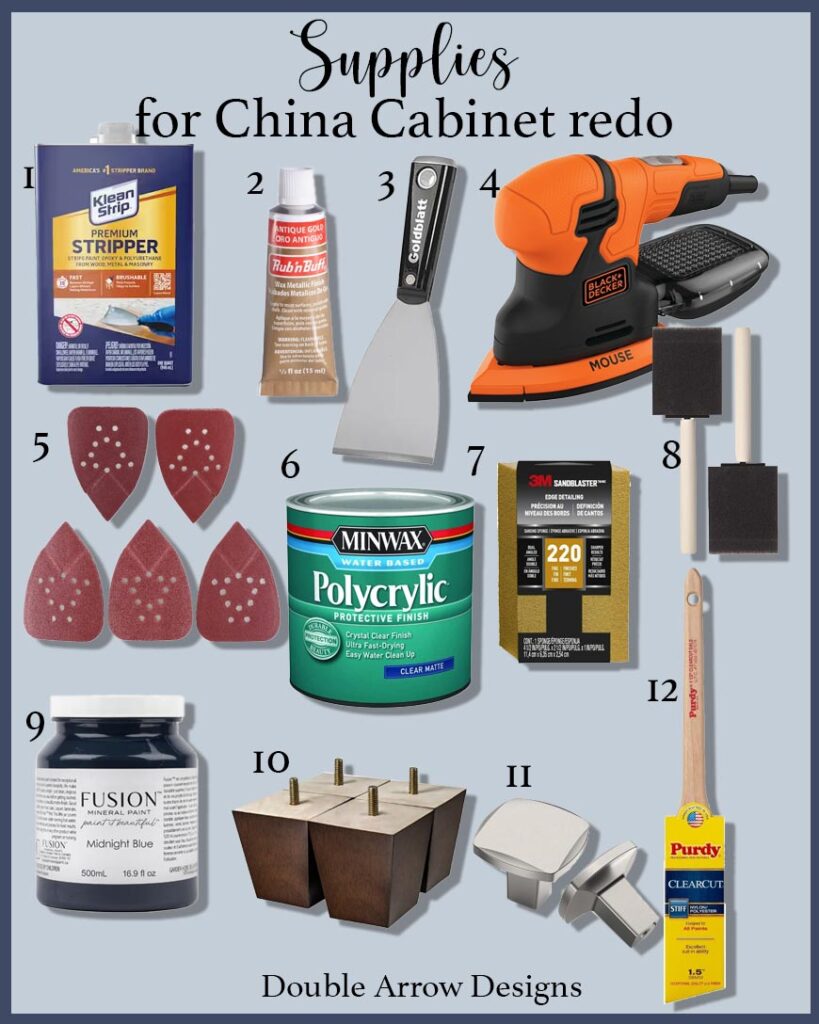
- Kleen Strip varnish and paint remover- Love that product to remove old and dark finishes on wood
- AMACO Rub ‘n Buff Wax Metallic Finish
- Carbon-Steel Putty Knife Blade– Use this to easily peel away old varnish
- BLACK+DECKER Sander– Once stripped, this sander takes away any remaining varnish down to the natural wood.
- Sanding Pads for Black and Decker Mouse Sanders– has a variety of grits
- Minwax Polycrylic Protective Finish Water Based– I always use a clear matte finish
- 3M SandBlaster Angle Sanding Sponge 220-Grit– I used this in between poly coats on top, and where I used wood filler
- Foam Paint Brushes– I use these with the Polycrylic Perfect Coat every time!
- Fusion Mineral Paint Midnight Blue– the coverage is amazing, loved the color for this piece!
- Wood Furniture Legs 3 inch Sofa Legs– An easy way to add height to any furniture piece
- Brushed Satin Nickel Cabinet Knobs– The ones I used were from Anthropologie so these are a similar shape and finish to the ones I used.
- Purdy Paint Brush – Yes, they are more expensive, but worth it. This is the only brush I will use. Wash and maintain them well, and you will get years out of these brushes. I recommend having a 1 1/2″ and. a 2″ brush.
Accessorizing my china cabinet


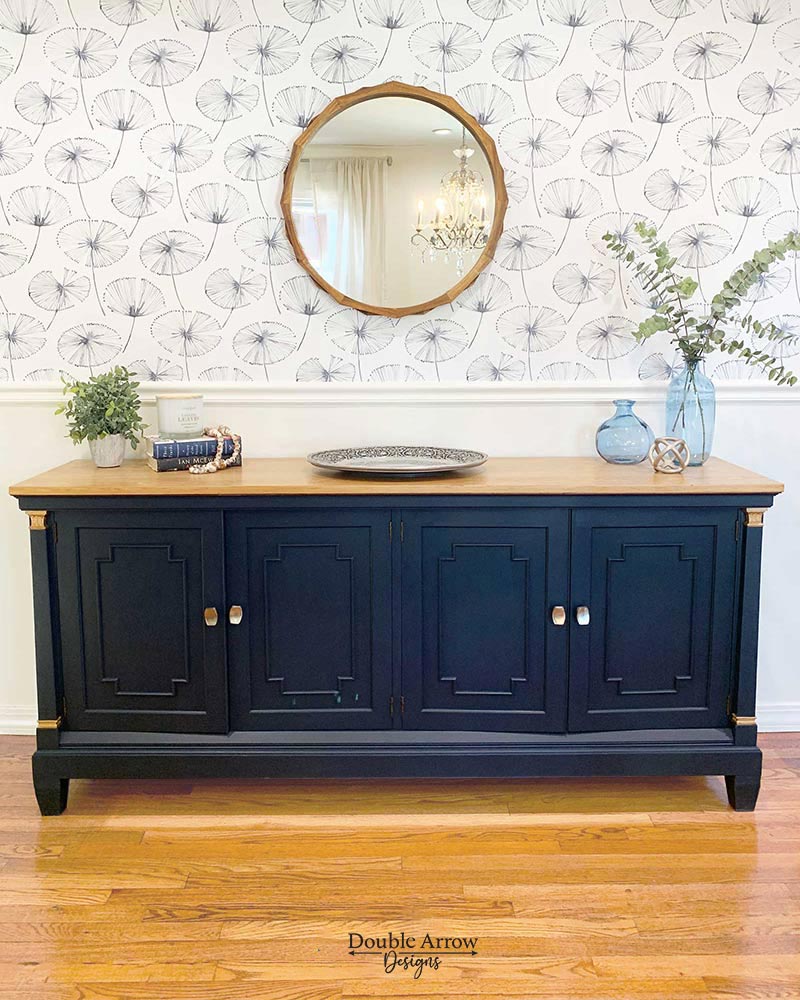
Now that I have finished my china cabinet, it’s time to accessorize it! Originally, I was going to do floating shelves. to house some of my glasses and vases. But I found this amazing wood frame mirror that looked perfect as the focal point above my china cabinet base. Using a silver platter under the mirror gives your yes a place to go. On either side, I placed items in groups of three, with one side adding height. Loved how the overall look came out!
Similar accessories I used for my repurposed china cabinet
Check out these fun accessories to get the look!
- Medium Round Brown Contemporary Mirror, this one measures (24″ W)
- Blue ombre vases– These are similar to what I have on my new buffet giving off the same vibe.
- Preserved Baby Eucalyptus Bunch– gave the height I needed for my china cabinet
- Wilton Armetale Coastal Handle Serving Tray– Similar to the one I have, but in a more updated look!
- Xanter Metal Sphere (Silver, Small)
- Natural Soy Wax Blend Scented Candle Falling Leaves
No products found.
No products found.
No products found.
No products found.
No products found.
No products found.
Completed look of my Repurposed China Cabinet


Take a look at this transformation! I am so thrilled with the finished results of the repurposed china cabinet and how the entire Dining room wall turned out! Just in time for the holidays!
Buffet Cabinets for NON-DIY’ERS
Not everyone has the time or desire to do a makeover like this, but would love to have a functional eclectic piece that is a wow factor for their Dining room or Living room. Take a look below for some fun pieces:
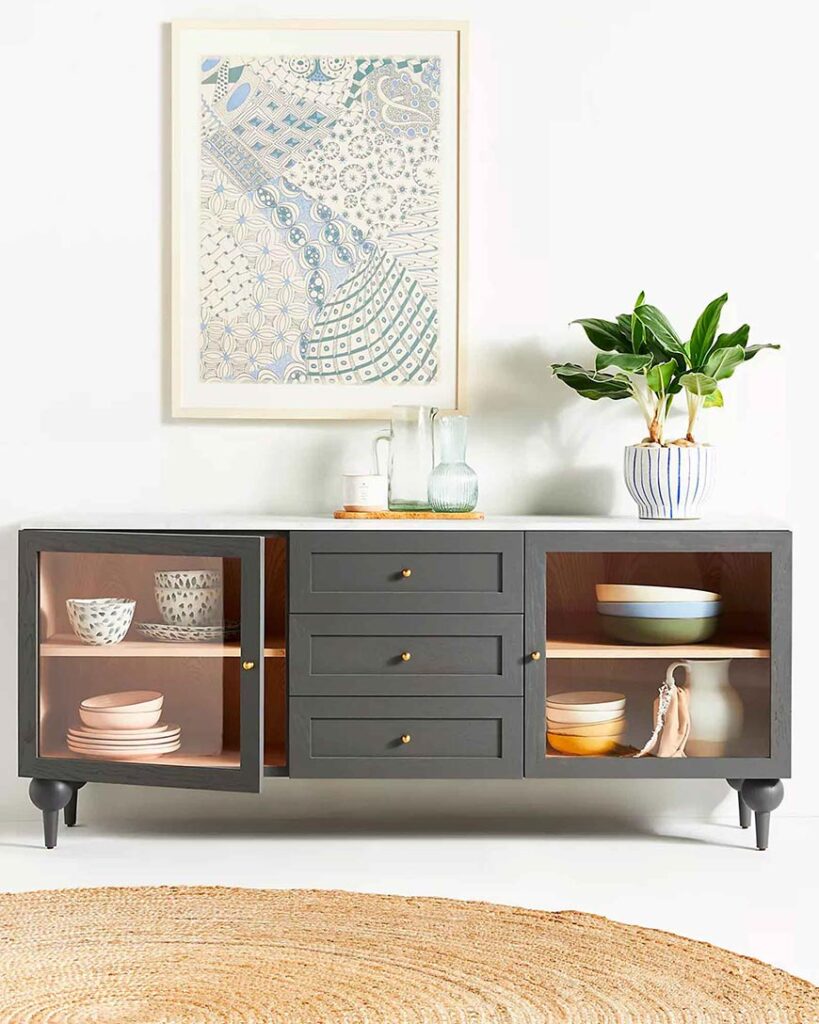
A blend of mid-century and modern design, the Fern Buffet features sculptural, turned wood legs and a sleek silhouette for a timeless aesthetic. Crafted from natural ash wood with a warm finish, it offers ample storage behind glass-paneled doors.

fluted-wood detailing, rounded corners, and brass-finished steel accents, the Isla Sideboard makes a stunning statement in any entertaining space, and has ample storage.

Large cabinet space for storage, this beauty comes in 4 colors for a variety of looks, depending on your interior color scheme.

Crafted from black-washed mango wood, this credenza features doors inset with arched panels of woven cane. Its dark, modern design makes it a striking focal point in any room.
Repurposing my old, outdated, and cluttered china cabinet into a modern, painted buffet cabinet has truly transformed my dining room. What once felt dark and outdated now brings a fresh, functional, and stylish touch to the space. This project not only gave new life to a piece I once considered replacing but also proved that with a little creativity and effort, outdated furniture can become a statement piece. I’m thrilled with how it turned out, and I hope it inspires you to take on a similar transformation in your own home!
RELATED POSTS
I am always DIYing something! Check out some fun posts where I repurposed a piece of furniture.
- How To Repurpose A Sewing Machine Base
- Old Door Dining Table- check this out!
- Telephone Chair-DIY That Looks Amazing!
Thanks for stopping by!

This post is all about a repurposed china cabinet
Last update on 2026-07-26 / Affiliate links / Images from Amazon Product Advertising API