How to Paint Outdoor Metal Furniture and Make It Look Brand New
Originally published on April 26, 2021. Updated on March 14, 2026
Outdoor metal furniture is built to last, but years of sun, rain, and humidity can leave it looking faded, chipped, or rusty. The good news is that with the right preparation and paint, you can completely transform old patio furniture and make it look brand new again.
Painting metal outdoor furniture is one of the easiest DIY projects for refreshing a patio, deck, or backyard space. With proper prep, rust removal, and the right outdoor paint, your furniture can last for years without peeling or fading.
In this step-by-step guide, I am sharing exactly how I refreshed my metal patio furniture, along with the preparation methods that make the biggest difference in how long the paint finish lasts.
If you take the time to properly clean, sand, prime, and paint the metal surface, you can achieve a professional-looking finish that holds up to outdoor weather conditions.
This post contains affiliate links. If you make a purchase through one of my links, I may earn a small commission at no extra cost to you. As an Amazon Associate I earn from qualifying purchases.
Why Painting Metal Outdoor Furniture Is Worth It
Before throwing out worn patio furniture, consider giving it a makeover. Most metal furniture is incredibly durable and only needs a cosmetic update.
Benefits of repainting metal patio furniture include:
• extending the life of outdoor furniture
• protecting metal from rust and corrosion
• updating the color to match your outdoor decor
• saving money compared to replacing furniture
Properly preparing and painting metal surfaces helps paint adhere better and prevents rust from spreading under the new finish.
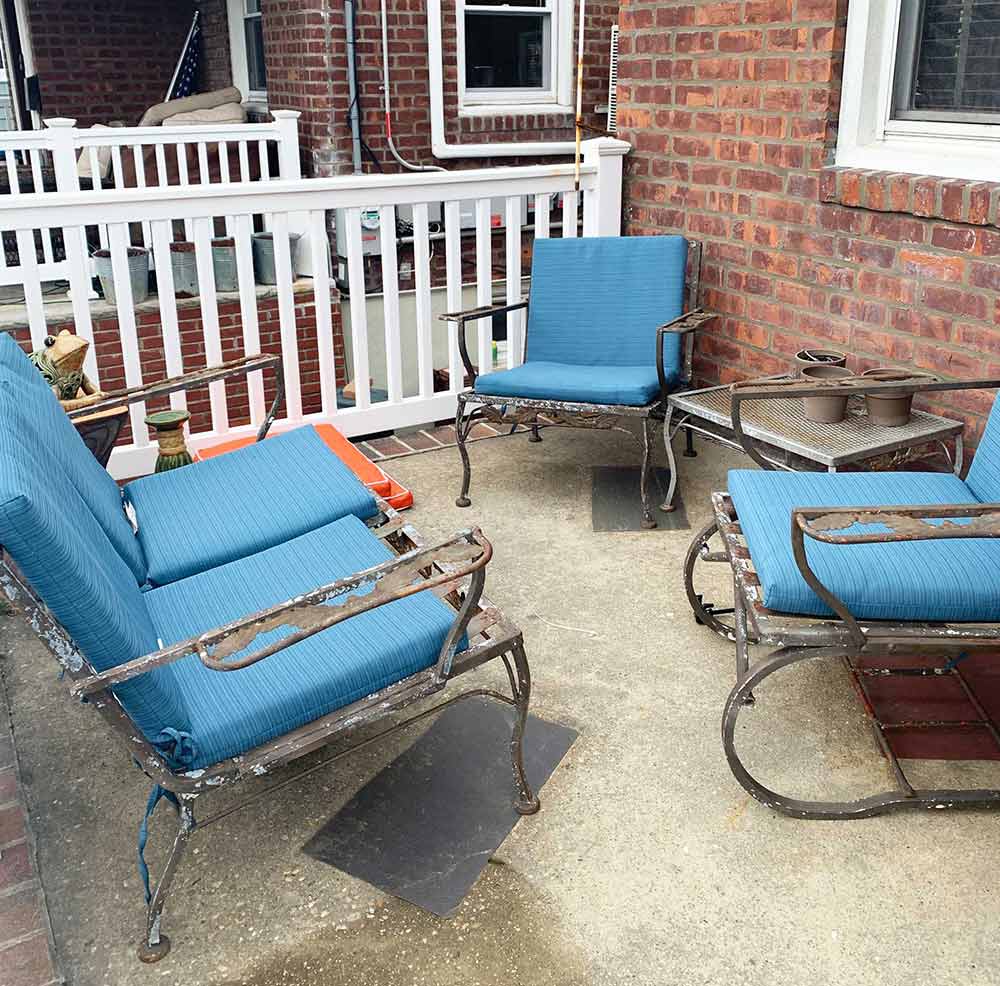
Wrought Iron Patio Set
The 4-piece set was left behind by the previous homeowner. The original piece was painted in white, and by the time we arrived, it was more like a white and rust combination. We never got rid of it because it fit our front patio so well that it always worked. Most likely from the 1950’s, these timeless sets do not go out of style. They just need to be updated with a new color and cushions! Through the years, it has needed a refresh, and this year I am giving it an ultimate makeover and painting my metal outdoor furniture.
Check out my video on my process
I recorded my process so that I can show you my actual labor on these outdoor metal furniture pieces. I seriously spent more time sanding than painting because I will always tell anyone that prep is just as important, if not more then the actual painting. Spend the time and really prepare your surface before painting. I used the hammered metal finish because I know that I was going to have a little bit of a rough surface, with years of old paint. The finished result looks great!
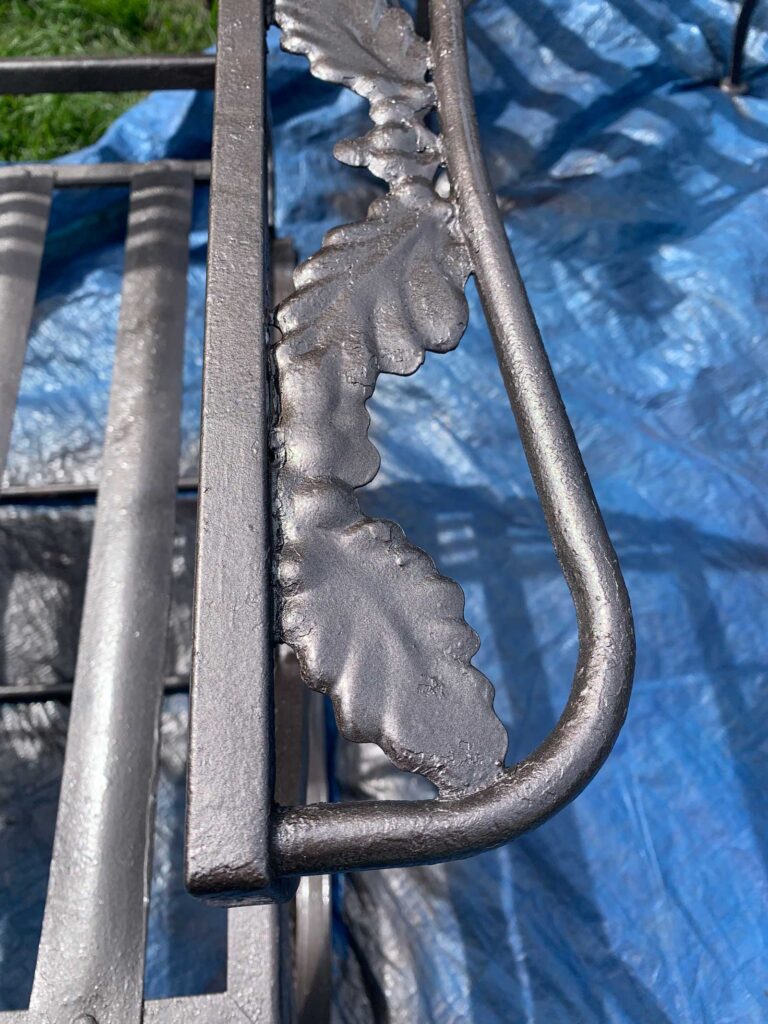
Preparation for painting metal furniture
The first thing that happens with these metal outdoor furniture sets is the metal gets worn by the elements. Rust happens and the paint starts to chip. First thing is to sand down all the flaking paint, and smooth the rust areas down. My tool of choice for this is a electric porter-cable drill with a round wire head attachment– they come in an assortment of shapes which is helpful for certain areas. The chairs and table have a lot of surfaces. You don’t think they do until you get started. The most important thing you can do when you paint your metal outdoor furniture is to prepare your surfaces. Paint will not hide this and a better prepared surface will allow for a beautiful painted surface. Make sure that you place a heavy duty tarp underneath your furniture to protect any outdoor surfaces.
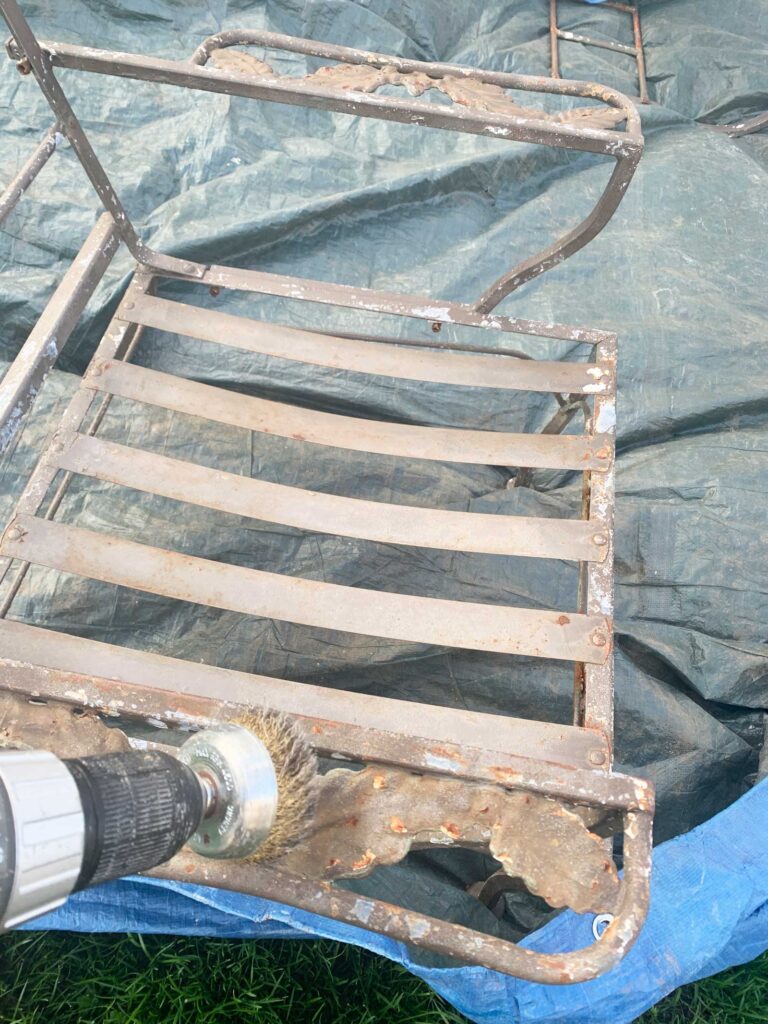
Pro tip! Prepping your surface is just as important, if not more than, painting it!
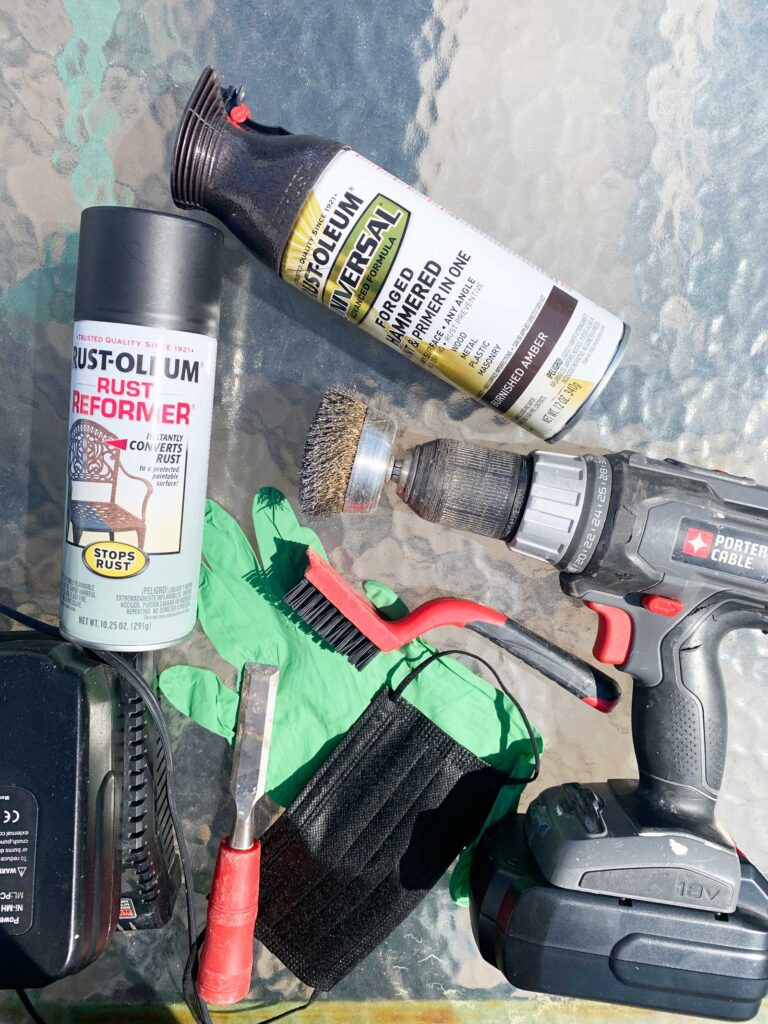
Supplies for painting metal outdoor furniture
The supplies that I used for my painted metal furniture project are:
- Battery-operated drill– I have an additional battery that sits on a charger when the other one runs out. This way I don’t waste time waiting for a battery to recharge.
- Wire brush drill attachment– these fit perfectly into a drill and, with different shapes and sizes allows you to get into all the corners and surfaces needed.
- small wire brush– once you have done all your electric sanding, these handheld brushes work great in small areas or hard-to-reach areas to brush off any excess left behind.
- Microfiber rags– Once you have brushed your surfaces off with your wire brush, I used these microfiber rags to wipe down all the surfaces to remove any lingering dust or chips of paint.
- Heavy Duty Tarp– Even though this project is done outside, spreading a tarp underneath your furniture pieces will protect any outside surfaces. I highly recommend using one. I keep mine stored in my shed, and Its always ready for my next paint project.
- Safety glasses– when you are sanding, these help protect you from any flying chips of paint.
- Rust-oleum Rust Reformer– I used this primer in areas of heavy rust. Hopefully, it will give it a good protective coat and prevent further rusting from coming through my paint job.
- Rust- oleum forged hammer spray paint– I decided on this specific finish because of all the uneven surface the old paint will leave, even with all my sanding and prepping. The color I decided on was Burnished Amber.
- Plastic gloves– I highly recommend these when using spray paint. I have ruined my share of painted nails with this! Oh, and wear shoes that you don’t mind ruining. You don’t realize it, but as you are spraying, your shoes will be in direct contact with the spray paint.
- N95 mask– yes, I know we all know what these are by now- but wear one while spray painting so you don’t inhale any paint mist!
Step 1: Clean the Metal Furniture Thoroughly
Before painting, the metal surface must be completely clean. Dirt, grease, and outdoor residue can prevent paint from bonding properly.
Wash the furniture with warm water and mild soap or a degreaser. Scrub corners, joints, and decorative details where dirt can accumulate.
Rinse thoroughly and allow the furniture to dry completely before moving on to the next step.
Clean metal surfaces ensure the primer and paint adhere properly and prevent premature peeling.
Step 2: Remove Rust and Old Paint
Outdoor metal furniture often develops rust or flaking paint over time.
Use a wire brush, sanding block, or drill attachment to remove loose rust and chipped paint. Sand the entire surface lightly so the new paint can adhere properly.
Coarse sandpaper around 80 grit works well for removing rust, while finer grit sandpaper can smooth the surface afterward.
This step takes time, but proper preparation is the key to a long-lasting finish.
Step 3: Lightly Sand the Entire Surface
Even if your furniture does not have rust, lightly sanding the metal surface helps create a texture that allows paint to grip better.
Focus on smoothing rough spots and dulling glossy finishes.
After sanding, wipe the furniture down with a tack cloth or damp rag to remove dust.
Step 4: Apply a Metal Primer
Primer helps seal the metal surface and prevents rust from forming underneath the paint.
Use a rust-inhibiting primer designed specifically for outdoor metal surfaces. Apply thin, even coats and allow the primer to dry according to the manufacturer’s instructions.
Priming is especially important if the furniture previously had rust or exposed metal areas.
Step 5: Paint the Outdoor Metal Furniture
Once the primer is dry, it is time to apply the paint.
Spray paint is often the easiest option for outdoor furniture because it reaches small details, curves, and mesh surfaces evenly.
Apply two to three thin coats, allowing each coat to dry before applying the next.
Thin coats produce a smoother finish and prevent drips or uneven coverage.
Step 6: Seal the Finish for Durability
For maximum durability, apply a clear outdoor protective sealer once the paint has dried.
A UV-resistant sealer helps protect the paint from fading and provides an extra barrier against moisture and rust.
Allow the furniture to cure completely before placing cushions or using it regularly.
Pro Tips for Painting Metal Outdoor Furniture
• Always paint on a dry day with mild temperatures
• Avoid painting in direct hot sunlight
• Apply several thin coats instead of one heavy coat
• Allow the paint to cure fully before use
Proper weather conditions and patience during drying can dramatically improve the durability of your paint finish.
Best spray paint for metal furniture
I have used a few different Rustoleum spray paints for my various painted outdoor metal furniture projects. Depending on your project, there are a few things to consider before deciding on what spray paint is right for your outdoor furniture. Two keys are: what color and what finish are you going for? You can see my Easy steps to Repurposed Patio Furniture, where I used a different color and finish for these.
Rustoleum comes in many colors and finishes and is the best choice for these projects. Take a look at Amazon to get a selection of colors and finishes.
- flat- dries flat with a matte finish, no sheen.
- satin- dries with a low sheen.
- gloss- dries with a shine.
- hammered- when dry, will have a gloss textured finish.
Best spray paint for outdoor use
Because this furniture will sit outside year-round, it’s important to make sure that the paint you use is heavy-duty. I like the Primer Plus paint series so that after I sand, I am ready to paint.
What to use for rust
In some areas of heavy rust, you may want to use a rust inhibitor to stop the erosion in places. This will coat and protect the rust areas from further rusting and give an undercoat for your top coat. I am using Rust-Oleum Rust Reformer for the first time to help stop any further rusting in the joint areas and under some of the decorative metal areas. I like the idea of this product because it’s in spray paint form, which will coat the areas the same way my top coat will finish. Being able to spray into tiny corners will help for better coverage.
Alternative to removing paint
Many years ago, I used a paint remover to remove old chipped paint from metal outdoor furniture. It was messy and hard to control. If you decide to go this route, you can use a paint stripper like Smart Strip. This may be an alternative choice for paint stripping, depending on your project.
How to paint metal furniture
When using spray paint, it is so important to first read the directions. Make sure you spend some time shaking the contents of the can before you start. Then, when applying to remember to keep about 8-12 inches away and spray in a methodical back and forward motion. If you haven’t fully covered your surface, remember that you can reapply additional coats over your first once dry. If you get too close to the paint will concentrate on the surface, and you will get drips, which is not a good look!
When I start spray painting, I start with my furniture piece upside down. This way, you can get underneath. Then I will turn it on its side and spray paint that side, then do the other side. Lastly, I will have to place my outdoor furniture right side up and spray paint that angle. This will create a seamless coat of paint from all sides. I then walk around my painted outdoor metal furniture pieces to make sure I have not missed any surface. You will be surprised that you will find missed spots by walking around and viewing from different angles. Remember to let it dry on each side so that you do not ruin the paint finish with smudges or fingerprints.
Let your outdoor furniture sit for a few hours so that the paint can set and dry before moving.
You can also see my process on how to paint wrought iron furniture. I took my wrought iron bed frame and spray-painted it black. This was much easier because it’s indoor furniture, and there was no rust or chipped paint to deal with.
Check the weather!
I know this sounds silly, but finding a less windy day will help you spray your paint onto your metal furniture and not lose it into the wind. If there is a slight breeze, try to spray in the direction of the wind for better application.
Metal mesh on outdoor furniture
Because the mesh has many openings, this area can be a little bit more challenging. However, I use the same steps as I do on the other areas of my outdoor metal furniture. It is so important that the paint chips have been removed from the mesh area. Any dust, paint, or dirt that is left behind and painted will become part of the mesh surface. This is not a good look! As with all my pieces, the same holds true for this. Turn it upside down and spray the underside of the mesh first. Then, put the mesh furniture piece right side up and spray that surface. You may have to go on an angle to make sure that you cover the mesh surface that sits just inside the open mesh pattern. Once this is done, walk around your piece and make sure you haven’t missed any surfaces.
Best practices when spray painting
Always use spray paint outside. Spray paint can get everywhere so be sure not to have anything that you don’t want a mist of paint on close by. Use a Tarp underneath your objects. This helps prevent spray painting your outside surfaces. Wear a mask. Even though you are outside, the paint mist can be easily inhaled. Wear an N-95 mask to prevent this. Gloves to prevent any excess paint from the sprayer ending up on your hands or nails.
Rejuvenating your outdoor furniture
Once you are complete with all your painting, the cushions become the finishing touch! We bought ours at Lowe’s, but you can find many options. Amazon has a great selection and fast delivery.
I had an old outdoor wrought iron table and chair set from my mom. I actually reupholstered the old wood sets. check out my post on easy steps to Repurposed Patio Furniture. This is where I show you step by step in reupholstering for outdoor use.
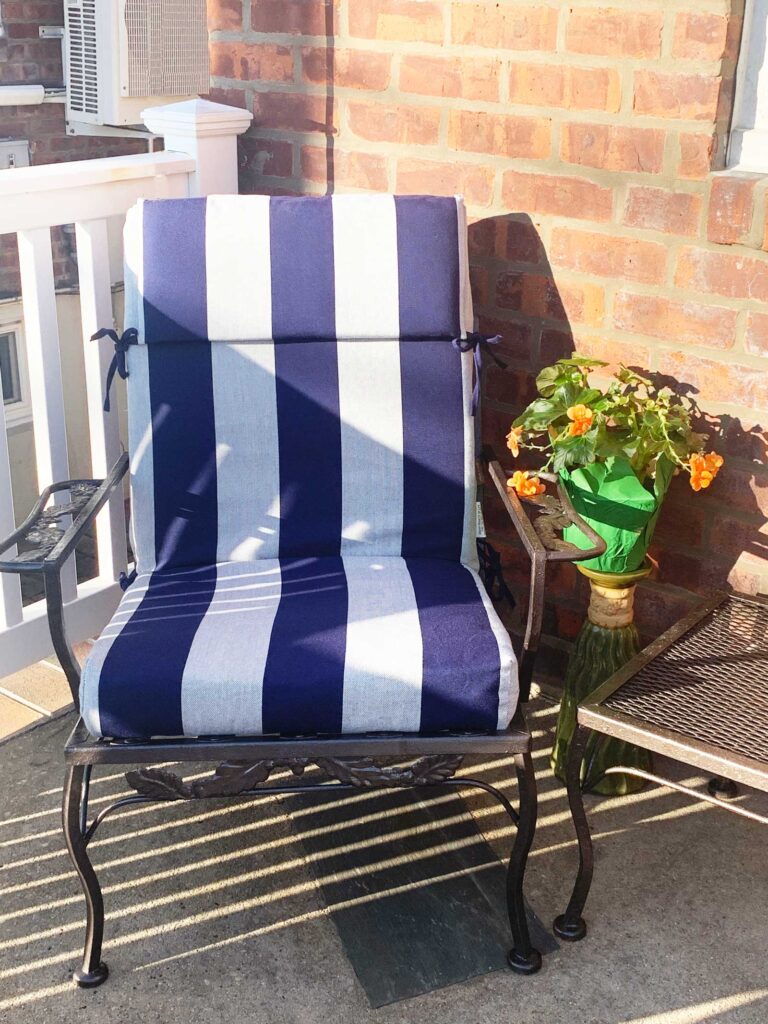
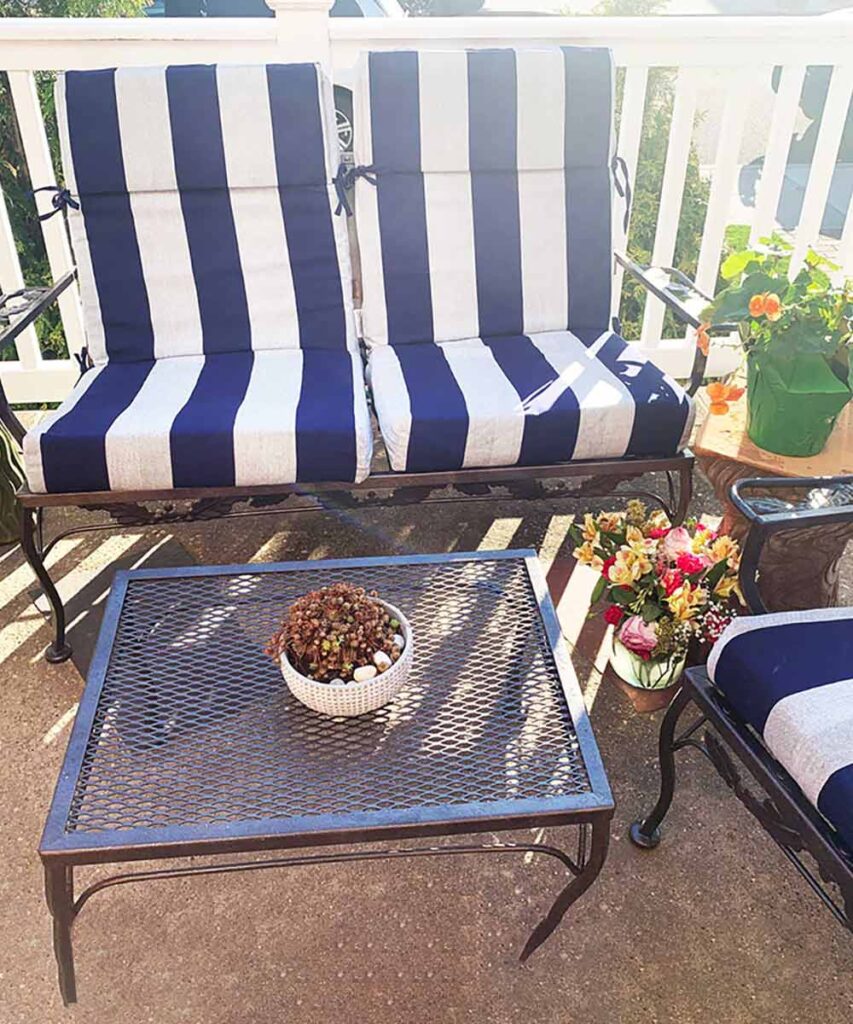
Finished results on my outdoor patio set
Once I have finished painting my outside furniture, it’s time to add cushions. There are so many choices and price points. First thing to do is measure your dimensions so that you make sure you are buying the right size. Then decide on your color scheme. For me, I loved the look of the burnished amber color of the wrought iron outdoor furniture with the light grey and navy striped cushions. So many options and combinations.
Cushion Selection
Shop below for some fun cushions for your outdoor furniture, so much to choose from. I added two stripe options below for a similar look to what I used on my own set.
Can You Paint Indoor Wrought Iron The Same Way?
Yes, you can use a very similar process for indoor wrought iron furniture, but the prep is usually lighter than it is for outdoor metal pieces. Indoor wrought iron has not been sitting in rain, sun, and humidity, so it may not have the same rust, peeling paint, or weather damage.
For my wrought iron bed frame, I took the frame apart, brought the pieces outside, and saved the screws and hardware in a bag so nothing went missing. After wiping everything clean, I used spray paint in thin, even coats and walked around each piece to cover the curves and decorative details from every angle.
The biggest difference is that outdoor metal furniture often needs more sanding, rust removal, and primer before painting. Indoor wrought iron may only need a good cleaning and a paint-and-primer spray paint if the existing finish is smooth and not chipping.
For decorative wrought iron, take your time with light coats. It is better to spray two or three thin coats than one heavy coat that drips or pools around the details. Let each piece dry fully before reassembling.
If your project also includes replacing worn seats or cushions, see my patio furniture makeover where I repaint the frame and reupholster the seats with outdoor fabric.
Maintaining your painted metal outdoor furniture
Once you have painted your outdoor furniture, you will have to touch up periodically. I am hoping that the rust Reformer will help out, but I recommend keeping an extra can of the specific paint that you used on your outdoor furniture. Each season, you may find a rust spot come through. It’s easier to spot-spray it than redo your furniture pieces completely.
Common Mistakes When Painting Metal Furniture
Even simple DIY projects can go wrong if a few key steps are skipped.
Common mistakes include:
• skipping sanding or prep work
• painting over rust without removing it
• applying paint too thickly
• painting in very hot or humid weather
Taking time during the preparation stage is the most important factor in achieving a professional-looking result. Painting metal outdoor furniture is an easy and affordable way to refresh your outdoor living space. With proper cleaning, sanding, priming, and painting, even old, rusted patio furniture can be transformed into something beautiful again. A weekend DIY project can give your patio furniture new life and extend its durability for many seasons to come.
Related posts
If you enjoy giving old furniture a fresh new look, you might also love some of my other furniture makeover projects. From painting wrought iron pieces to transforming indoor furniture with creative finishes, these tutorials show how simple DIY techniques can completely revive tired furniture. Take a look at these projects for more inspiration and step-by-step ideas for your next furniture refresh.
- How to Paint Wicker Furniture for a Beautiful DIY Makeover
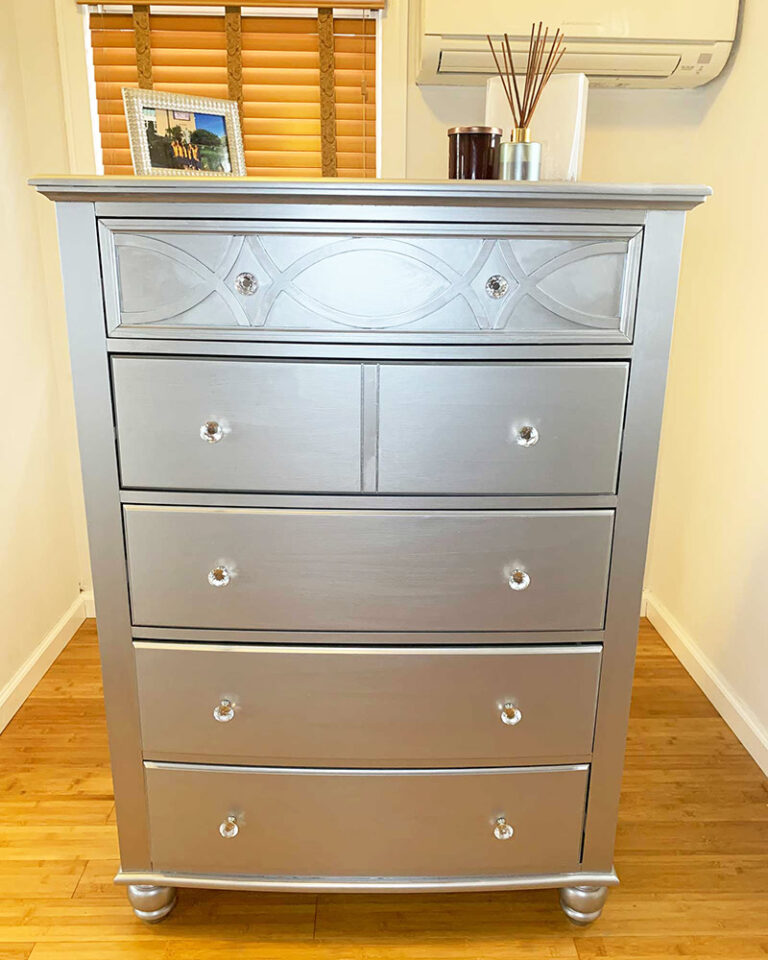
- Metallic Painted Dresser Makeover: How to Get a Stunning Silver Furniture Finish
- Dresser Refresh With Novelty Knobs, Small Detail, Big Impact!
More Outdoor Furniture Makeover Help
Keep going with these related Double Arrow Designs guides:
- How to refinish metal outdoor furniture
- How to paint wrought iron furniture
- How to paint wood furniture like a pro
- Must-have DIY tools for furniture makeovers
Thanks for stopping by!

This post is all about how to paint outdoor metal furniture.