10 Must-Have DIY Tools for Furniture Makeovers (with Budget Finds)
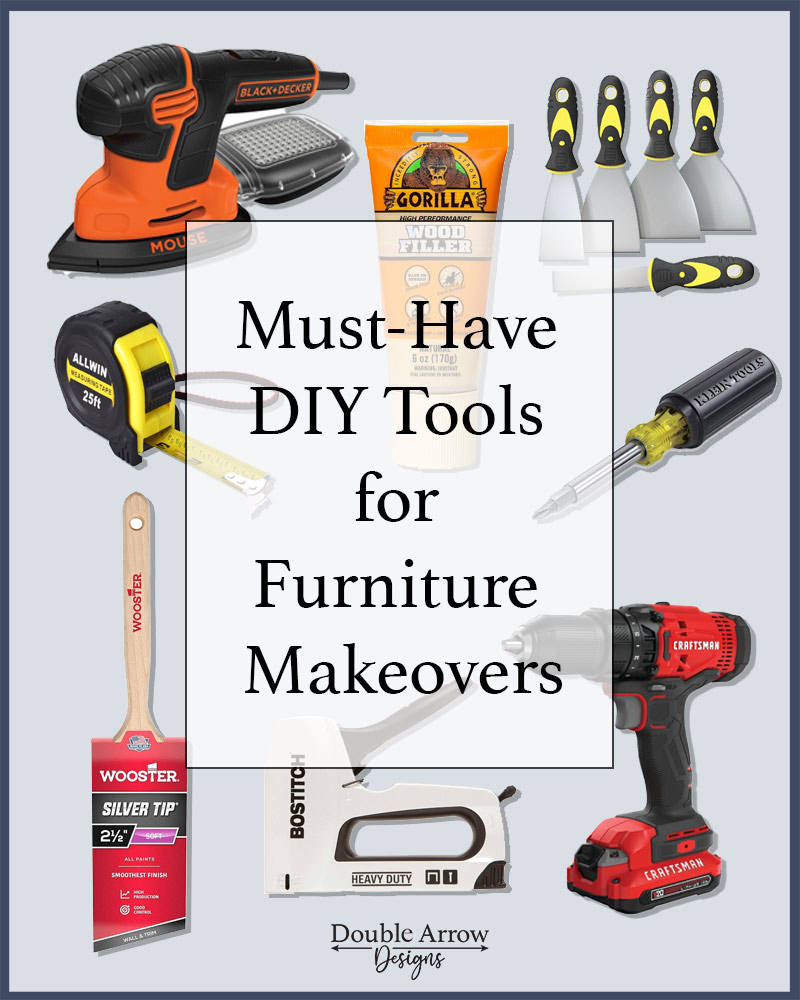
In this post, I’m diving into the 10 must-have DIY tools for furniture makeovers—the exact tools that will turn an old, tired piece into something fresh and beautiful. If you’ve ever looked at a dated dresser, a scuffed table, or a chair that’s lost its charm and thought, “I could give that a new life,” then having the right tools makes all the difference.
Think of this list as your furniture makeover starter kit. These aren’t one-time-use gadgets that will gather dust in a drawer; they’re the go-to essentials you’ll reach for over and over. Whether you’re refinishing wood, painting a smooth finish, or adding stylish details like new hardware or upholstery, these tools will save you time, help you work smarter, and ensure your projects look polished and professional.
Whether you’re brand new to DIY or you’ve already tackled a few transformations, stocking your craft room or closet with these reliable tools means you’ll always be ready for your next project. Let’s jump in and talk about the tools that will quickly become your everyday staples—and the secret weapons behind a successful furniture flip.
Why the right tools make all the difference in a DIY furniture project.
Like any project, the right tools can completely change your experience—and your results. Think of them as your secret weapon: they don’t just make the work easier, they make the outcome better. Instead of struggling with uneven finishes, messy edges, or wobbly hardware, the right tools allow you to work with confidence and achieve that polished, “can’t-believe-it’s-DIY” look every time.
The best part? You don’t need to invest in an overwhelming arsenal of gadgets or expensive pro-only equipment. The tools I’m sharing here are budget-friendly, versatile, and practical staples you’ll actually use again and again—not just for one project, but for dozens. They’re the kind of tools that earn a permanent spot in your craft room or closet because they truly make the process smoother, faster, and a whole lot more fun.
Whether you’re sanding down a thrift-store find, painting a family heirloom, or adding new details to a piece you already own, these essentials will give you the confidence to take on your project from start to finish—and enjoy the process along the way.
Tools for Prepping & Refinishing Wood
I redid my china cabinet, and these tools were my go-to. You can see everything I used in this project here: From Formal to Fabulous! Repurposed China Cabinet Makeover, where you can get in-depth details from start to finish!

- Orbital sander (or sanding block for small projects)
- Putty knife + wood filler
- Screwdriver set (flathead + Phillips)
1. orbital sander
If there’s one tool that will save your arms (and your patience), it’s the orbital sander. Hand-sanding an entire dresser or table is exhausting—not to mention inconsistent. An orbital sander does the hard work for you, giving a smooth, even surface in minutes. Use it to strip away old finishes, smooth out rough patches, or prep wood for paint.
Pro tip: keep a few different grits of sandpaper blocks on hand—start coarse to remove finishes, then finish with fine for that silky surface.
This SKIL 5” Random Orbital Sander with Cyclonic Dust Box has all the same features as the above, however comes in at half the price. Best practice is to check reviews and by what best fits your budget.
No products found.
Sander that I use
I have been using a BLACK+DECKER Detail Sander because I love the pointed tip that helps me get into small areas or spaces. This is a little pricier, but it has been useful on most of my furniture projects.
No products found.
2. Putty knife and wood filler
Every makeover has a few “uh-oh” moments—chips, dents, and scratches that make your piece look more shabby than chic. That’s where a putty knife and wood filler come in. With a quick swipe, you can patch imperfections so they practically disappear once painted or stained. The trick is to slightly overfill, let it dry, then sand it flush. It’s the little fix that makes your furniture look brand new.
No products found.
No products found.
3. Screwdriver set
It sounds basic, but you’d be surprised how often you’ll reach for a screwdriver. Whether you’re removing old knobs, tightening loose hinges, or adding new hardware, having a good set on hand is a must. Go for a set with multiple heads so you’re covered for both flathead and Phillips screws. It may seem small, but clean, sturdy hardware changes everything about how finished your project looks.
No products found.
Tools for Painting & Finishing Furniture
- Quality paintbrushes (different sizes for details vs. large surfaces)
- Foam roller or paint sprayer (optional upgrade)
- Painter’s tape for clean edges
4. Best Paintbrush
I use the Purdy brand for all my painted furniture projects. I love how they apply paint, the angle of the brush and the overall quality. Because of this, I have had mine for years! They are a bit more costly, but I have stated in a few of my posts that if they are washed and taken care of correctly, they will last a long time. Comes in different sizes depending on the surface you are painting.
No products found.
No products found.
Budget-friendly
If you are looking for a more budget-friendly product, then I would recommend Wooster Brush 2-1/2 Silver Tip Angle Sash Paintbrush. This brush comes in a variety of sizes. Known for ultra-smooth finishes with minimal brush marks on furniture-grade coats.
No products found.
5. Foam rollers and Paint sprayers
When you’re tackling large, flat areas like tabletops or cabinet doors, foam rollers are your best friend. They lay down paint evenly and give that professional-looking finish with minimal effort. For an upgrade, a paint sprayer can be a game changer—especially if you plan on doing multiple furniture flips. It creates a smooth, factory-like finish in a fraction of the time. Don’t be intimidated—practice on scrap wood first, and you’ll love the results.
No products found.
No products found.
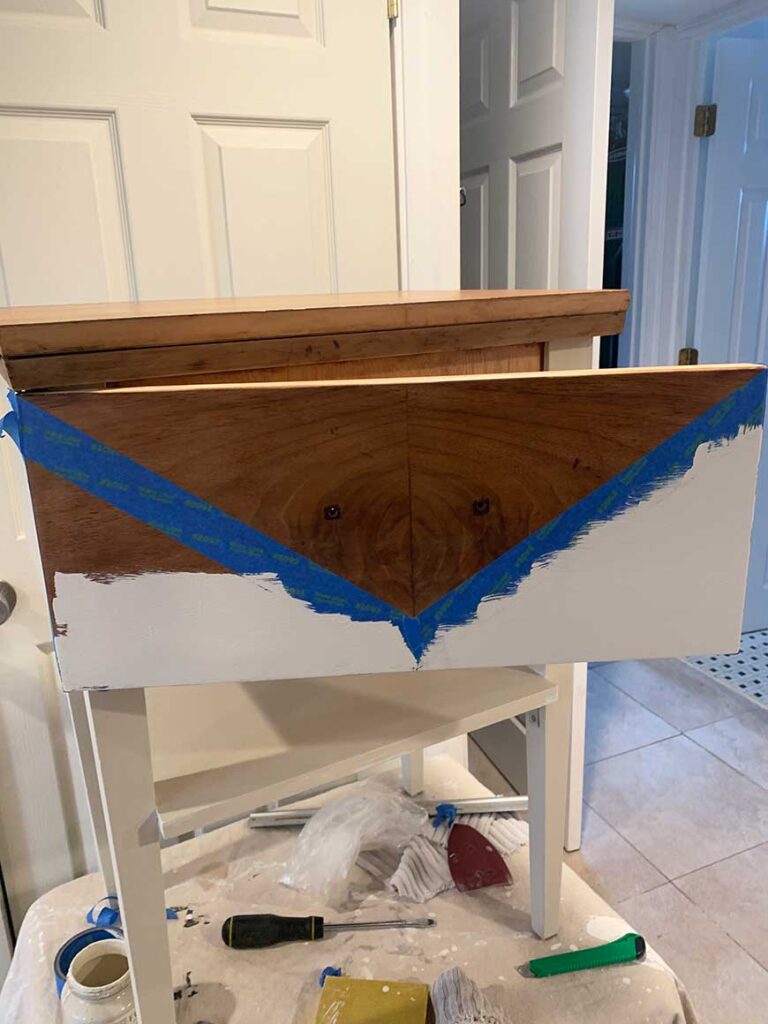
6. Painter’s tape
This is a tool that will never go to waste. It will give you clean lines every time without pulling up paint underneath. I used this on my post: Sewing Machine Cabinet Repurposed Into a Stunning Bar Cart You’ll Love. It gave me the sharp edges I was looking for on the half-painted, half-wood face of this bar cart. FROGTAPE is a multi-surface Painter’s Tape that is easy to remove without damaging the underlying surface or leaving sticky residue behind. The green color makes it easier to see.
No products found.
Tools for Adding Style & Elements

- Drill + drill bits (for swapping hardware, adding legs)
- Staple gun (for reupholstery or adding fabric accents)
- Measuring tape + level (to ensure symmetry for hardware/legs)
- Wood clamps
7. Electric drill
Your drill will quickly become one of the most-used tools in your makeover arsenal. From swapping out knobs and pulls to attaching new legs or building additions, a cordless drill saves time and effort. Bonus: With the right bits, you can also use it to pre-drill holes (a lifesaver for preventing wood from splitting). If you’ve been relying on a screwdriver alone, this will feel like upgrading from a bike to a sports car.
There are many types of drills; it just depends on your budget, needs, and what you like. I use a cordless drill that I have had, which is a CRAFTSMAN V20 Cordless Drill/Driver Kit.
No products found.
Best overall
No products found.
Budget friendly
If you’re not ready to dive into the world of heavy-duty power drills, a cordless electric screwdriver set is the perfect middle ground. Compact, lightweight, and rechargeable, this little tool packs enough power to handle most small furniture projects—like tightening or replacing legs, swapping out drawer pulls, or assembling thrifted finds.
What makes it great is that it feels approachable, even if you’re not big on power tools. No intimidating weight, no loud motor, no steep learning curve—just an easy, push-button solution that does the hard twisting for you. It saves your wrists (goodbye endless hand-screwing!) while still giving you control over delicate pieces where a full drill might feel like overkill.
Many sets also come with a variety of driver bits, which means you’ll be ready for just about any type of screw your furniture makeover throws at you. For casual DIYers, renters, or anyone who wants a tool that gets the job done without taking up much space, this is one of the most practical and user-friendly additions you can own.
No products found.
8. Staple Gun
For anyone adding fabric—whether it’s reupholstering a chair seat or attaching a dust cover under a dresser—a staple gun is essential. A manual model works great for small projects, while an electric one makes bigger jobs much faster. Pro tip: pull the fabric taut as you go, and work opposite sides in a crisscross pattern for a smooth, professional finish.
No products found.
9. Measuring tape
This is a must-have! It may seem simple, but a measuring tape is your safeguard against lopsided projects. Want new knobs perfectly centered? Need legs evenly placed on a bench? Your measuring tape ensures everything lines up just right. For extra precision, pair it with a small level. Taking a few extra minutes to measure twice before drilling or cutting will save you from frustrating re-dos.
No products found.
10. Wood Clamps
Last but definitely not least, wood clamps are the helping hands you didn’t know you needed. They hold pieces steady while you glue, drill, or assemble, giving you freedom to focus on accuracy. Whether you’re repairing a loose joint or attaching trim, clamps keep everything in place until it sets. Start with a few medium-size bar clamps—you’ll be amazed how often you use them.
No products found.
Bonus: Everyday DIY Essentials
Not every tool fits neatly into categories like sanding, painting, or assembly—but trust me, these extra items are the unsung heroes of every furniture makeover. They may not sound as exciting as a power sander or paint sprayer, but once you have them, you’ll wonder how you ever managed without them. Here are three essentials that deserve their own spotlight:
Drop Cloth
If you’ve ever dripped paint on the floor or scattered sanding dust across the room, you know why a drop cloth is a must-have. This simple piece of fabric or plastic saves your floors, protects your workspace, and makes cleanup so much easier. Go for a reusable canvas drop cloth—it won’t tear like thin plastic, and it doubles as a sturdy surface for moving furniture around without scratches.
No products found.
Caster Wheels
Adding caster wheels is one of those DIY hacks that feels small but makes a huge difference. Not only do they make heavy furniture easier to move around your home or studio. Make sure that you check the load bearing for any set that you purchase so that they are compatible with your furniture projects
No products found.
Microfiber Rags
Don’t underestimate the power of a good rag. Microfiber cloths are perfect for wiping down dust after sanding, cleaning up spills, or buffing out a newly painted surface. They’re lint-free, washable, and reusable, which makes them more reliable (and eco-friendly) than paper towels.
Pro tip: keep a stack of clean ones on hand in your craft room—you’ll find yourself reaching for them during almost every step of the makeover process.
No products found.
These “everyday essentials” may not get the spotlight, but they’re the behind-the-scenes helpers that make your projects smoother, cleaner, and more professional. Consider them the supporting cast to your big, star tools—they’ll always come through when you need them most.
Related posts
Below are some additional furniture projects that I have done using a variety of other tools and supplies as well.
- Old Desk Makeover- Bland to Boho!
- Timeless Revival: How to Refinish a Secretary Desk with Style!
- How To Upholster A Bench That’s Seen Better Days
Thanks for stopping by!
This post is all about must-have DIY tools for furniture
Last update on 2026-07-16 / Affiliate links / Images from Amazon Product Advertising API