How To Upholster A Bench That’s Seen Better Days
How to Upholster a Bench might sound like a project best left to the pros, but with a few tools, some creativity, and a little patience, you can completely transform a tired, outdated seat into a fresh and stylish statement piece. Whether you’re breathing new life into a family heirloom or giving a thrifted find a glow-up, this step-by-step guide will show you exactly how to upholster a bench with confidence—no sewing skills required.
How to Upholster a Bench
This post contains affiliate links. If you make a purchase through one of my links, I may earn a small commission at no extra cost to you. As an Amazon Associate I earn from qualifying purchases.
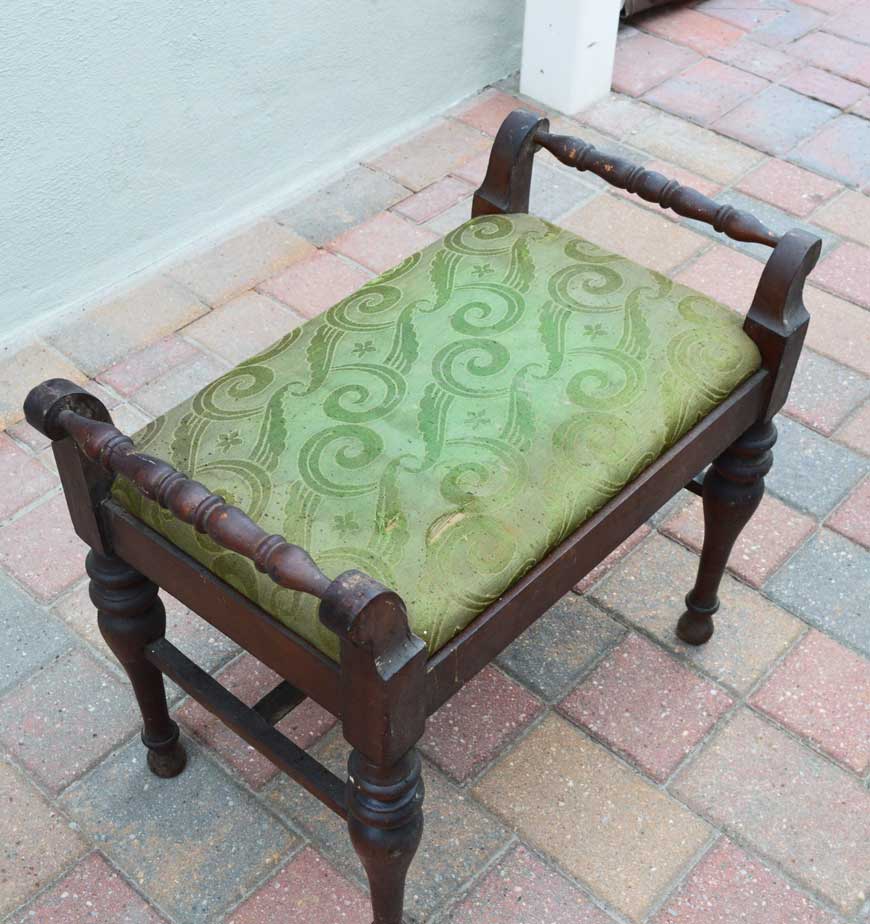
Old upholstered bench

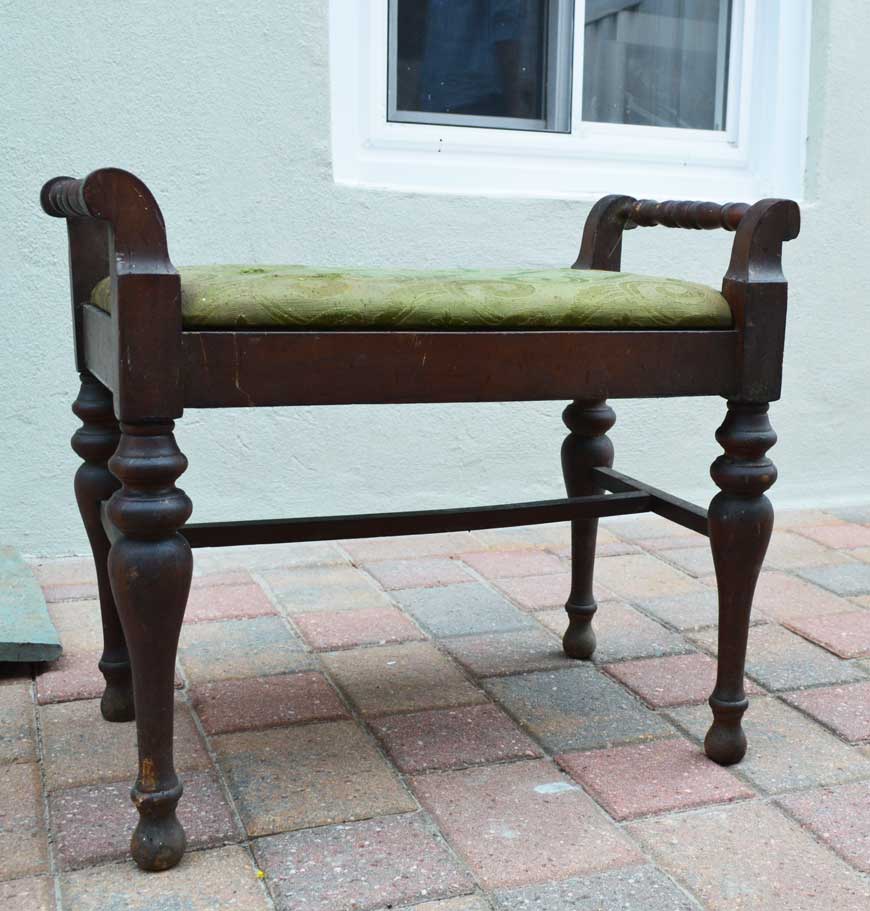
This was ready for the garbage, but I saw the potential, as you can see below, and how it was transformed into a beautiful, fresh, new upholstered bench.
Prep Work
- Work in a well-ventilated area – We took advantage of good weather and did all the prep work outside.
- Wear protective gear – Gloves and masks helped protect us from dust and debris from the old upholstery.
- Remove the seat – Detach the upholstered seat from the bench frame. Take a look underneath at the hardware to determine what screw you need.
- Strip the upholstery – Use pliers and a staple remover to pull out all the old staples.
- Discard old materials – Once everything is stripped, toss the worn fabric and disintegrating foam cushion
- Clean the frame – Scrub the wood with warm, soapy water to remove years of dirt, grime, and residue.
- Let it dry completely – Make sure the wood is fully dry before moving on to the next step.
Pro Tip: Cleaning is always the first and most important step in any furniture refresh!
Color Scheme and Vision
This 1950s bench needed a serious update to meet today’s design standards. Inspired by a French theme (you can read more about how I find my inspiration in my last post), we envisioned a fresh, charming makeover that would breathe new life into the piece. The dark wood and worn upholstery had definitely seen better days, so it was time for a bold transformation.
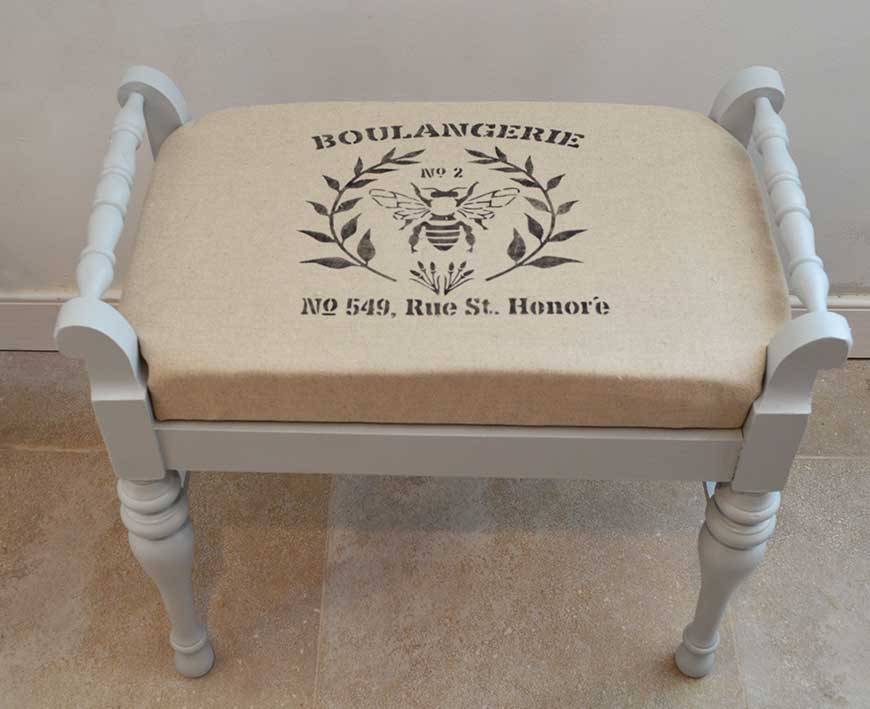
For our repurposed upholstered bench project, we went with a light, neutral color palette to brighten things up, paired with a pop of contrast for visual interest. We painted the dark wood in a soft, elegant grey, and selected a neutral stone-colored canvas for the new upholstery.
French inspiration, I designed a custom stencil with a classic French graphic. Using black fabric paint, I stenciled the design onto the canvas, creating a striking focal point that truly elevated the look of the bench.
Painting the Wood Frame
- Skip the sanding. I avoid sanding whenever possible—it’s time-consuming, especially with furniture with many curves and edges (like this bench!). Instead, I use a water-based stain-blocking primer that eliminates the need for sanding.
- Prime with stain-blocker. Because real wood can bleed through paint (due to wood grain or varnish), I always use a stain-blocking primer like Kilz.
- Apply 1–2 coats of primer, depending on how much coverage the piece needs.
- Paint after the primer dries – Wait a few hours for the primer to fully dry before painting. Apply two coats of paint—one is never quite enough for full, even coverage.
- Paint type and brand:
- A tester provides plenty of paint for two coats on a bench like this.
- They’re cost-effective.
- All testers come in an eggshell finish, which has just the right amount of sheen.
- In this project, I used Benjamin Moore’s Gray Owl—a beautiful, soft grey.
- While chalk paint is popular, I find it pricey and unnecessary for most projects. I use Benjamin Moore paint instead, and their testers are perfect for small furniture makeovers.
- Seal for durability: After letting the paint dry for at least 24 hours, I seal the piece with Minwax clear coat in a matte finish. This final step adds a protective layer and ensures a long-lasting, durable finish.
Pro Tip: Don’t rush between coats—let everything dry fully for the smoothest results!
Upholstered Cushion
- Start with the wooden seat panel
- After removing the old fabric and foam, we were left with just the wooden seat panel.
- Make sure to remove any remaining nails and staples to prep the surface.
- Cut upholstery foam to size
- Use the wooden seat panel as a stencil to cut the foam to the correct size.
- Mark the foam with a Sharpie and then cut using scissors or a sheetrock blade for clean edges.
- Prepare fabric
- Lay the canvas fabric face down on a clean surface.
- Place the foam cushion and the wooden seat panel on top to make sure everything fits perfectly.
- Cut fabric
- Trim any excess fabric, but leave enough length to cover the foam and wood panel, plus extra for stapling around the edges.
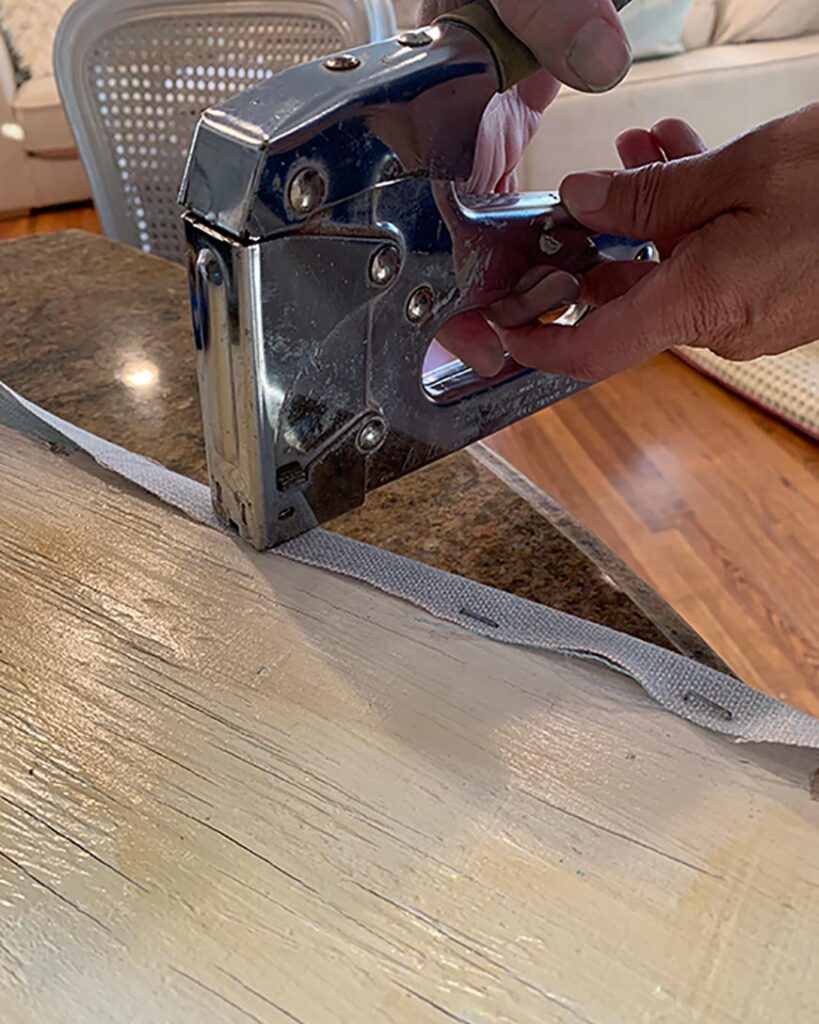
- Staple fabric
- Use a staple gun to secure the fabric to the wood panel.
- Start by stapling each side of the fabric at the center—this helps keep tension even.
- Repeat this process on all sides, then add more staples to firmly hold the fabric in place.
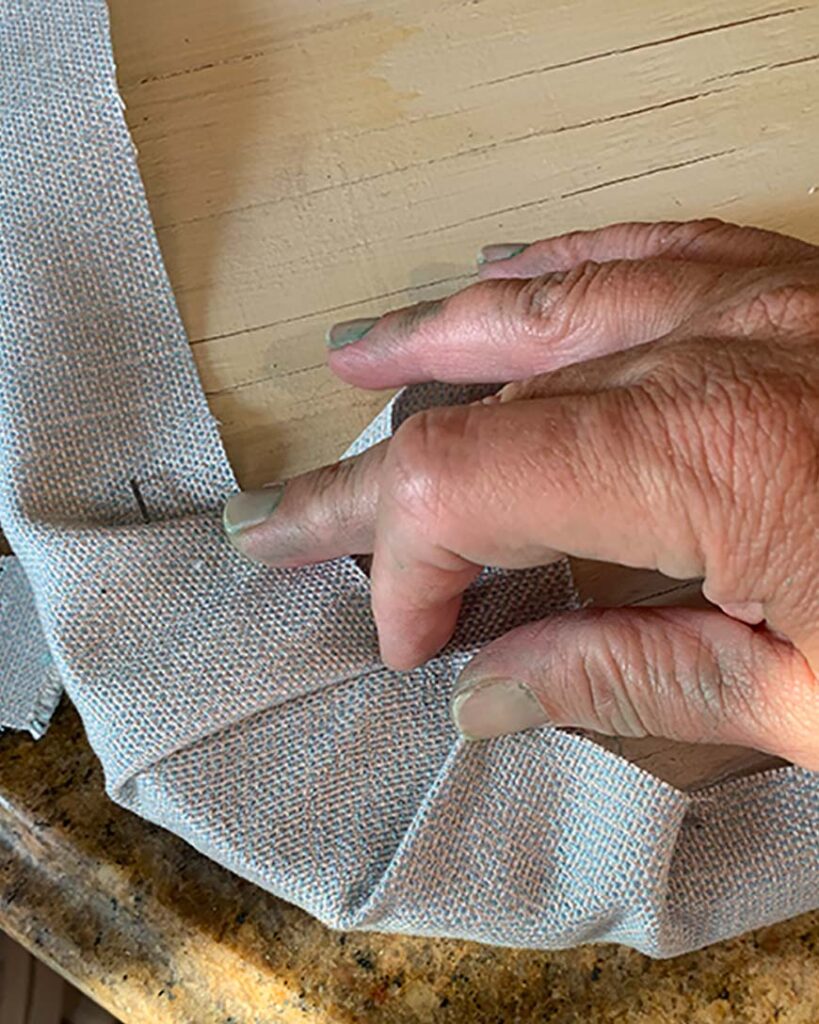
- Handle the corners
- Corners can be tricky, so you may need to trim excess fabric and fold it underneath to create a smooth, seamless look.
- Take your time with these folds to ensure a neat, professional finish.
✂️ Pro Tip: For a more detailed step-by-step on upholstery, check out how I reupholstered my patio set here.
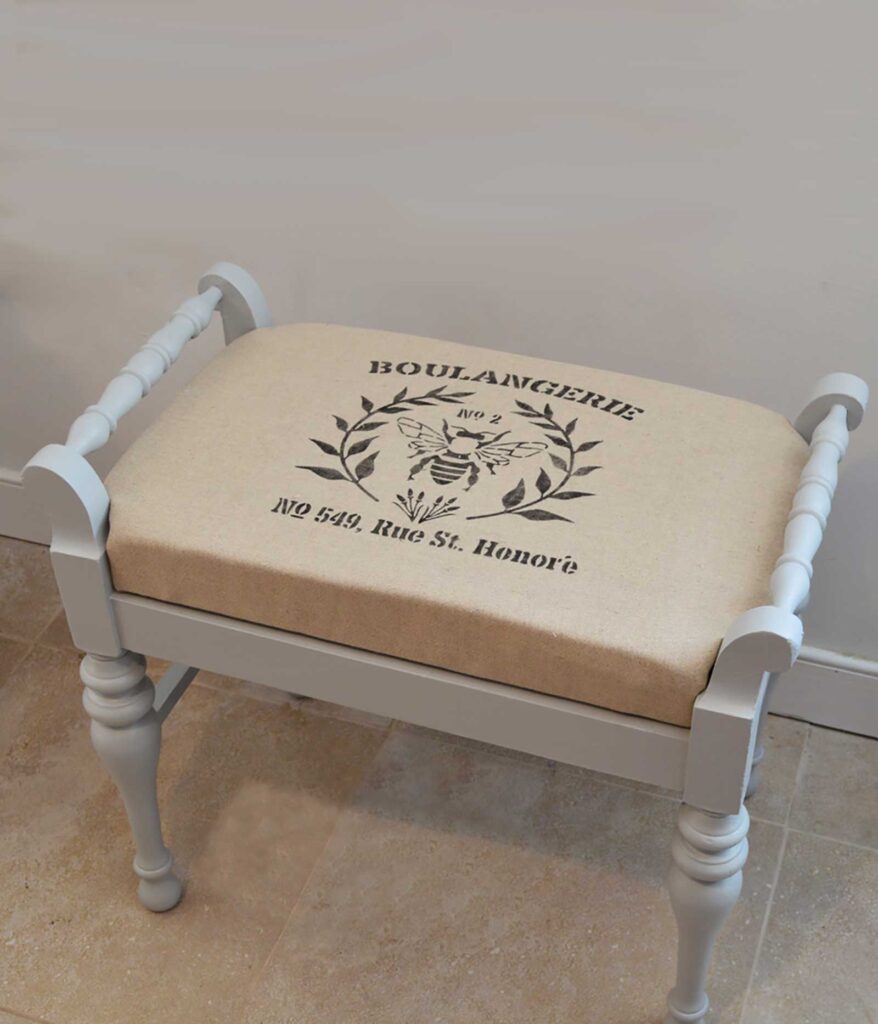
Stenciled seat cushion
As a designer and graphic artist, I was able to create a custom graphic for the cushion, which added a personal touch to the overall design. If you love this look, you can purchase this exact stencil on my Etsy store. To create the stencil, I used our Cameo machine to cut out the design from contact paper, making it easy to apply to the fabric. Before upholstering the cushion, I laid the fabric over the seat frame to better position the graphic, ensuring it was perfectly centered.
Once I was happy with the placement, I carefully applied the stencil to the fabric. Using black fabric paint and a foam brush, I gently dabbed the paint onto the fabric within the stencil’s edges. This method ensures clean, crisp lines without bleeding, and the foam brush gives the design a soft, even texture. Taking my time with each section, I made sure to avoid any smudging or over-painting, allowing the design to stand out as the focal point of the cushion.
This added graphic truly brought the piece together, creating a stunning, custom look that elevated the entire bench.
Tip when stenciling fabric: load brush with paint, then dab excess off on rag or paper towel. Then in downward motions apply thin layer, repeat process until desired coverage.
Once complete, wait for the paint to not be completely wet, then pull off the stencil. Once paint is fully dry, use an iron on the correct setting for your fabric and iron on top of the stencil. This helps to set the paint into the fabric. You can also add a fabric spray to help protect the fabric against stains.
Finishing Touch to an upholstered bench
Once the seat is upholstered, screw it back onto the base using the four existing holes, ensuring the fabric doesn’t cover them. This secures the cushion to the frame. For added protection, attach felt tabs to the bottom of each leg with a bit of wood glue. This prevents floor scratches and can help level the bench.
Recap on Repurposing an Upholstered Bench Project
What was once a discarded piece has now been transformed into a functional, stylish bench. After investing minimal money for the base piece and spending time and energy refinishing it, we were able to sell it in its new, upgraded state. I’ve found that upholstered pieces often sell the best, especially when they’re customized and unique.
Tips for Selling Repurposed Furniture:
- Focus on quality craftsmanship: Buyers appreciate well-done, durable pieces. Ensure your work is neat, the upholstery is tight, and the frame is secure.
- Highlight the transformation: Before-and-after photos are incredibly powerful. Show the difference your work has made!
- Pick appealing, on-trend fabrics: Choose neutral or timeless fabrics that will appeal to a wide range of buyers.
- Market the unique features: Emphasize custom elements, like stencils, paint finishes, or special upholstery, as selling points.
- Price competitively: Keep your costs in mind, but be aware of market trends—pricing too high can turn buyers away, while pricing too low might not reflect the effort you put in.
With these tips, repurposing old furniture not only becomes a fun, creative project but also a profitable venture!
I love a before and after shot!! Gives the full effect of where this project started and how it was totally transformed. Looks like a totally different piece that is now an updated functional bench. This is a good reminder of why I continue with Double Arrow designs. These projects give me such satisfaction. The beauty is that there will never be two alike; each project becomes its own original.
Video on stenciled upholstered seat
In this TikTok video, I take you behind the scenes of my creative process as I stencil a custom design onto the fabric for my upholstered seat cushion. You’ll see how I carefully position the stencil, apply the paint with precision, and bring a simple piece of canvas to life with a French-inspired graphic. It’s a satisfying, step-by-step look at how a personal touch can completely elevate a DIY upholstery project, one detail at a time.
Tools needed for your upholstered bench

- Felt tabs– Must have for under all furniture legs. It will protect your floors from scratches
- Upholstery Foam– Use the wood board to your seat as your template and cut out the shape needed.
- Electric Staple Gun– I love this power tool, which will staple your fabric underneath for a smooth finish
- Upholstery fabric– (this is not actual of what I used on my specific bench)
- Benjamin Moore tester (I used gray Owl)
- Wood glue– This was used for any cracks in your wood. Use a clamp to hold and let dry before you paint.
- Minwax Polycrylic Protective Finish– Once your upholstered bench is painted, this is the perfect top coat to seal everything.
- Rust-Oleum Zinsser Bulls Eye 1-2-3 Primer– I used this instead of sanding for this specific project. seals in the wood to prevent any bleeding.
- Canvas Drop Cloth – I use my canvas drop cloth repeatedly; it’s a great way to protect your surface and is durable enough for multiple uses.
- 2″ Purdy Nylox Dale Angled Sash Paint Brush– I have had mine for years. More expensive, but if you wash them, they will last a long time.
No products found.
No products found.
No products found.
No products found.
No products found.
No products found.
No products found.
No products found.
Upholstered benches for the non-DIY’ers
As always, I like to include a section for my non-DIY readers. Repurposing furniture does take time, and not everyone has the luxury of dedicating that time—or even wants to take on the task. Below are my picks for upholstered benches that I found fun. Happy shopping!

- Black Checkered Jute Handmade Upholstered Bench
- Ameelya Upholstered Storage Bench
- Mardella Polyester Upholstered Bench
- Wilma Ottoman
- Donner Cane Back Cushioned Bench
- Luxardo Bench
Where to find old benches
Great places to start when looking for furniture pieces to redo are the following:
- Craigslist– My original go-to place
- Facebook Marketplace– I have found some gems here!
- Bulk pick up days in neighborhoods– Yes! Lots of free furniture that gets discarded
Where to sell repurposed furniture
- Etsy store
- Craigs List
- Facebook Marketplace
- Word of mouth
Related posts
If you enjoyed this project, be sure to check out some of my other posts—you’ll find plenty more inspiration, DIY tips, and creative makeovers to spark your next idea. I’m always working on something new, whether it’s transforming furniture, adding personality to a space, or testing out a fresh design technique.
Want to stay in the loop? Join my mailing list and be the first to know when new projects go live. You’ll get exclusive updates, helpful how-to guides, and behind-the-scenes peeks delivered right to your inbox. Let’s keep the creativity going!
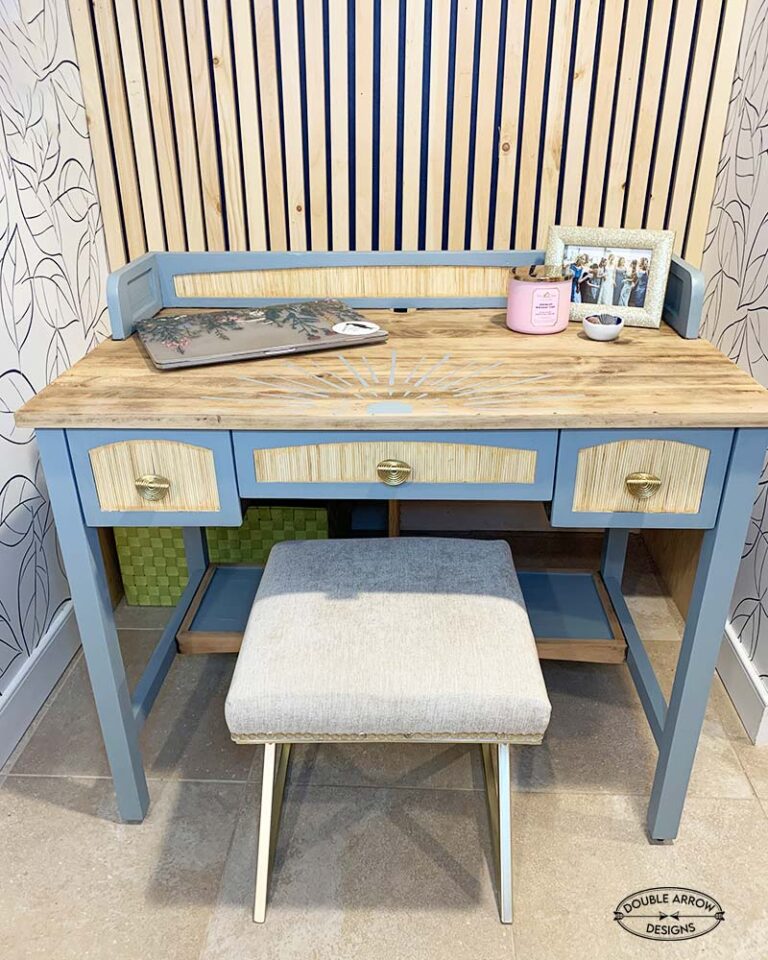
- Painted Desk That Is Perfect For A First Apartment
- Old Door Dining Table- From Salvage to Statement
- Bedroom Wallpaper Feature Wall That Looks Amazing!
Thanks for stopping by

This post is all about how to upholster a bench
Last update on 2026-07-30 / Affiliate links / Images from Amazon Product Advertising API