Old Desk Makeover- Bland to Boho!
Old desk makeover
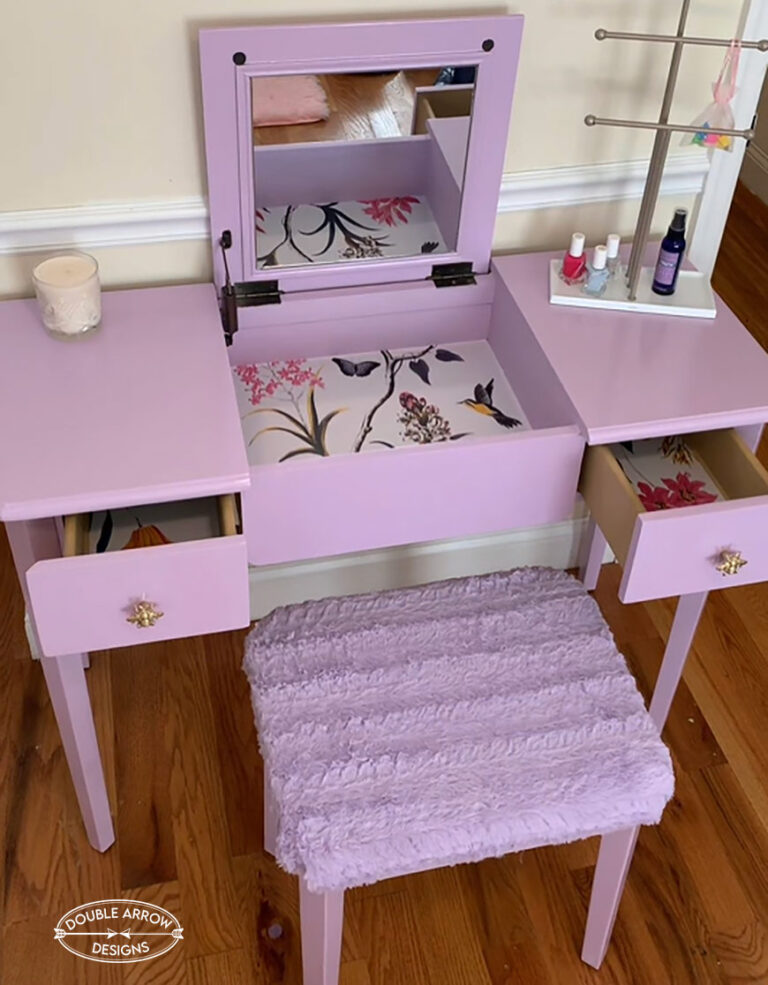
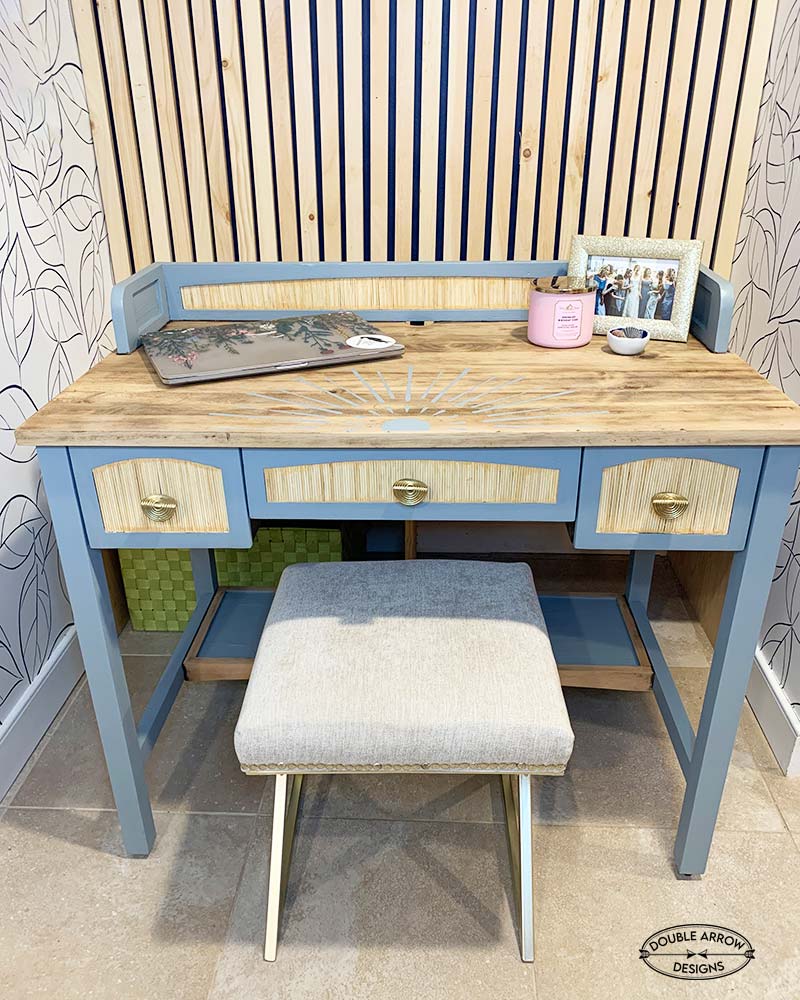
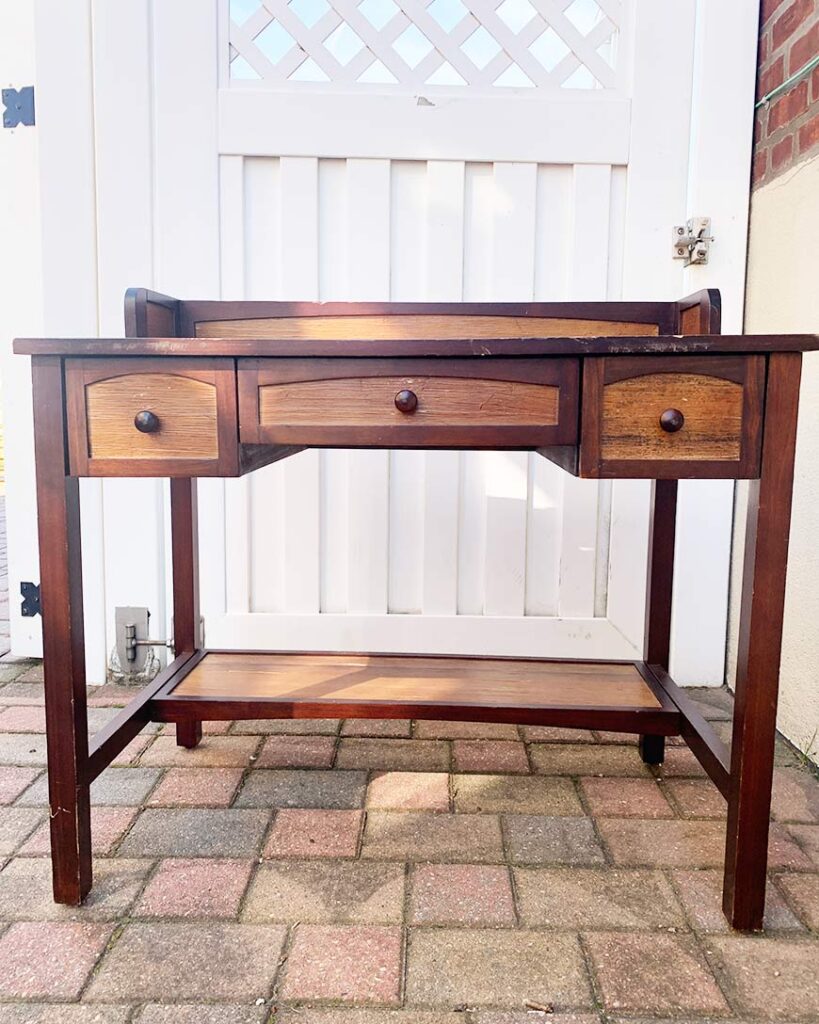
You won’t believe this desk transformation! I gave an old piece a whole new life—and it fits perfectly in the alcove of my guest/office space. It’s like it was meant to be there! Follow along as I take this old, dark, outdated desk and do an old desk makeover.
This post contains affiliate links. If you make a purchase through one of my links, I may earn a small commission at no extra cost to you. As an Amazon Associate I earn from qualifying purchases.
How to update an old desk
Old furniture often comes with dark stains, outdated hardware, and a few battle scars. Before diving into any makeover, I always assess whether the piece has “good bones.” If it’s solid and well-made, it has the potential to shine again, because quality never goes out of style.
- Swap Out the Hardware
Outdated knobs and pulls can instantly date a piece. Replacing them with modern hardware gives your desk a fresh new look. This desk had outdated, nondescript wood pulls. Need inspiration? Don’t miss my post: Choosing Furniture Pulls and Knobs That Wow - Strip Away the Dark Stain
Many vintage pieces are weighed down by heavy varnishes. Removing that old finish can reveal beautiful wood underneath, perfect for a lighter, more modern aesthetic. - Add a Fresh Coat of Paint
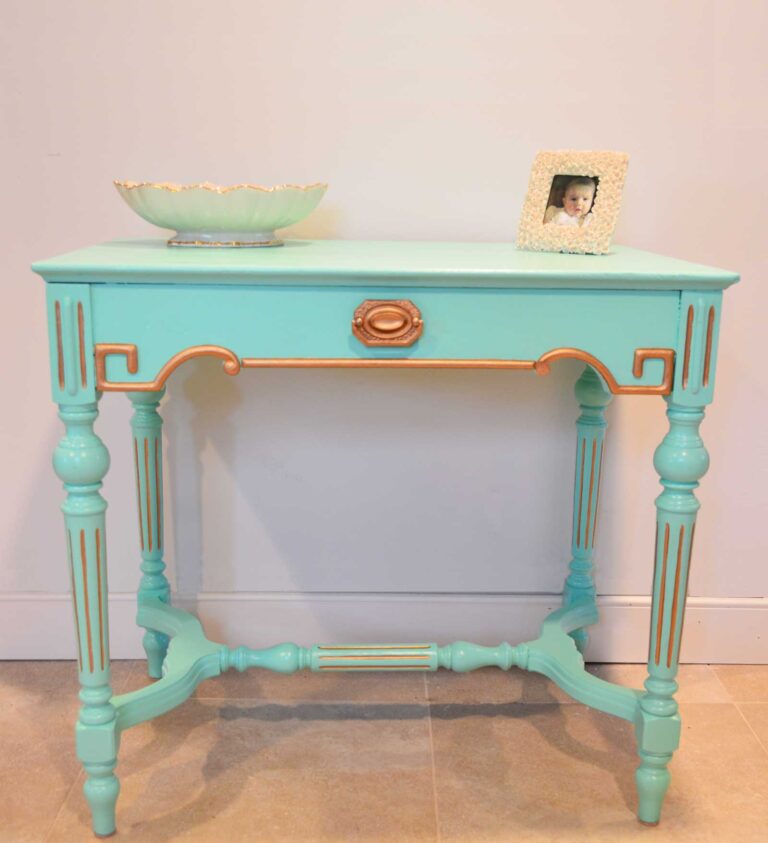
A bold or soft paint color can completely change the vibe of old wood. Whether you’re going for a pop of color or a neutral tone, paint is an easy way to update your desk. - Line the Drawers with Peel and Stick Wallpaper
Drawer liners don’t have to be boring! Peel-and-stick wallpaper adds surprise and personality inside. Check out my ideas in 9 Peel And Stick Wallpaper Ideas. - Use a Custom Stencil for Detail
On this makeover, I used a stencil of my design to give the desk a unique finishing touch. Want to try it yourself? You can purchase the exact stencil in my Etsy store!
Prep Steps for a Successful Furniture Old Desk Makeover
- Clean Thoroughly—Twice! Start with a deep clean. Use warm, soapy water and a sponge—nothing fancy required. Wipe down every surface twice to remove dust, grime, or old polish buildup.
- Make Repairs– Check for loose legs or joints. Secure them with nails or wood glue and clamps. If any laminate is peeling, glue it back down or replace it entirely.
- Remove Hardware– Take off all knobs, pulls, or hinges. If you’re not reusing them, store them in a labeled container—you never know when they might come in handy for a future project.
- Strip Old Paint or Varnish– Apply a generous coat of paint or varnish stripper. For best results, let it sit for a few hours. Depending on how thick the finish is, you may need more than one round.
- Sand Smooth– After stripping, use a hand sander to even out any rough or uneven surfaces.
- Note: If you’re working with laminate, sand very lightly to avoid damaging the surface layer.
- Protect Your Workspace– Place a drop cloth underneath the furniture to avoid scratching or staining your floors during the process.
- Add Caster Wheels– For easy movement and better access while you work, attach caster wheels to the bottom of the piece. It makes a big difference during a full makeover!
Since this was a solid wood desk, I wanted to highlight the natural beauty of the wood grain. I started by stripping off the old varnish using a paint stripper. Once the finish was removed, I used a hand sander to even out the tone, followed by a fine-grit sanding block to smooth the surface by hand. After sanding, I wiped everything down with a damp microfiber cloth to remove any remaining dust.
To protect the finish, I sealed the wood with Minwax Polycrylic in a matte clear coat—it’s one of my favorites and super easy to apply!
After stripping, I noticed the wood tone was uneven in some areas. That inspired me to paint the trickier sections to create a more polished, cohesive look overall.
Materials and Supplies used for this old desk makeover DIY

Depending on your project, some supplies or materials may differ. For this specific project, this is what I used:
- Stripper– I have used a few brands and found this brand to be very effective
- Handheld sander– This is one of my go-to power tools. The shape allows e to get into tight corners.
- Sanding blocks– These come in a variety of grits. I start with a coarse grit at the beginning of my projects, then move to a finer grit to smooth out my finished surfaces
- Polycrylic– clear matte is my preferred finish, you can also go with a shinier finish using an eggshell or gloss finish.
- Sponge brushes– I use these mostly for my top coat on finished furniture
- Paintbrush– I always use the Purdy brand. It costs more, but if you wash regularly, they will last a long time.
- Knobs– The ones I used are sold out, but check out all the other unique ones that Anthropologie has.
- Peel and stick wallpaper– This is an example of one that can easily finish the inside of drawers.
- Bamboo skewers– What I used on this project. I cut the ends, then meticulously glued them to my surface.
- Wood glue– The title speaks for itself, and what I used to glue down my skewers
- Drop cloth– Investing in a canvas one means you can continue to reuse and keep this in your supply closet for future projects.
- Furniture felt tabs– This helps protect your floors from getting scratched.
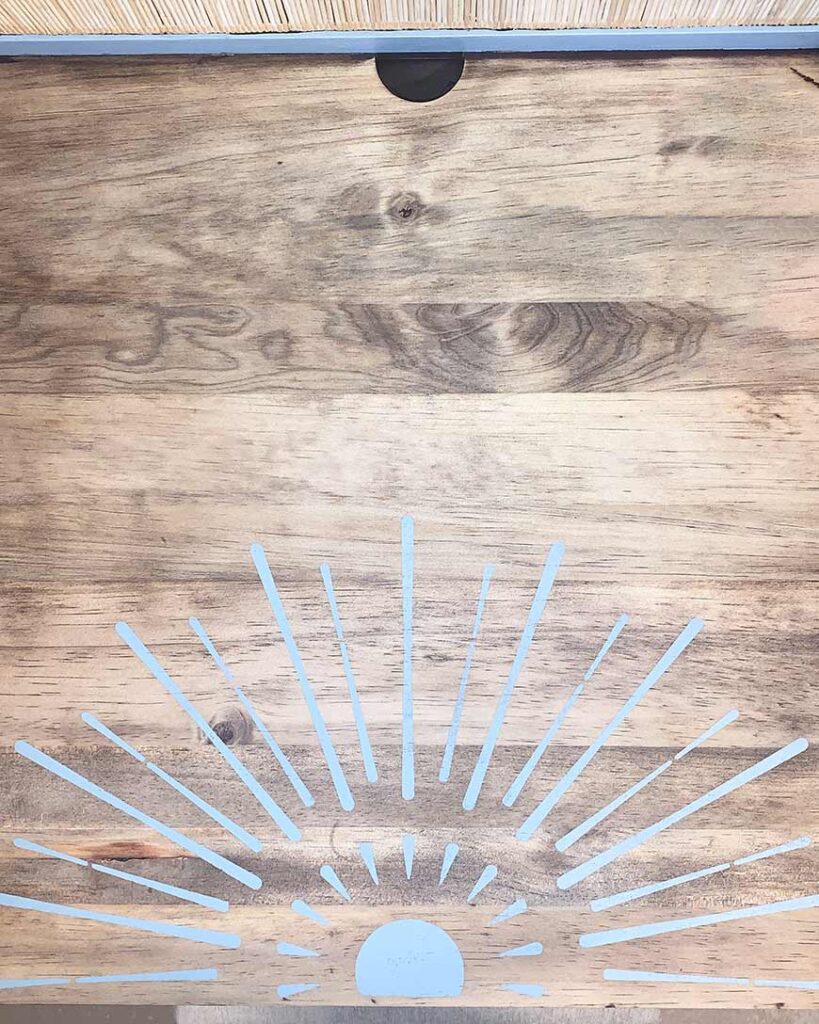
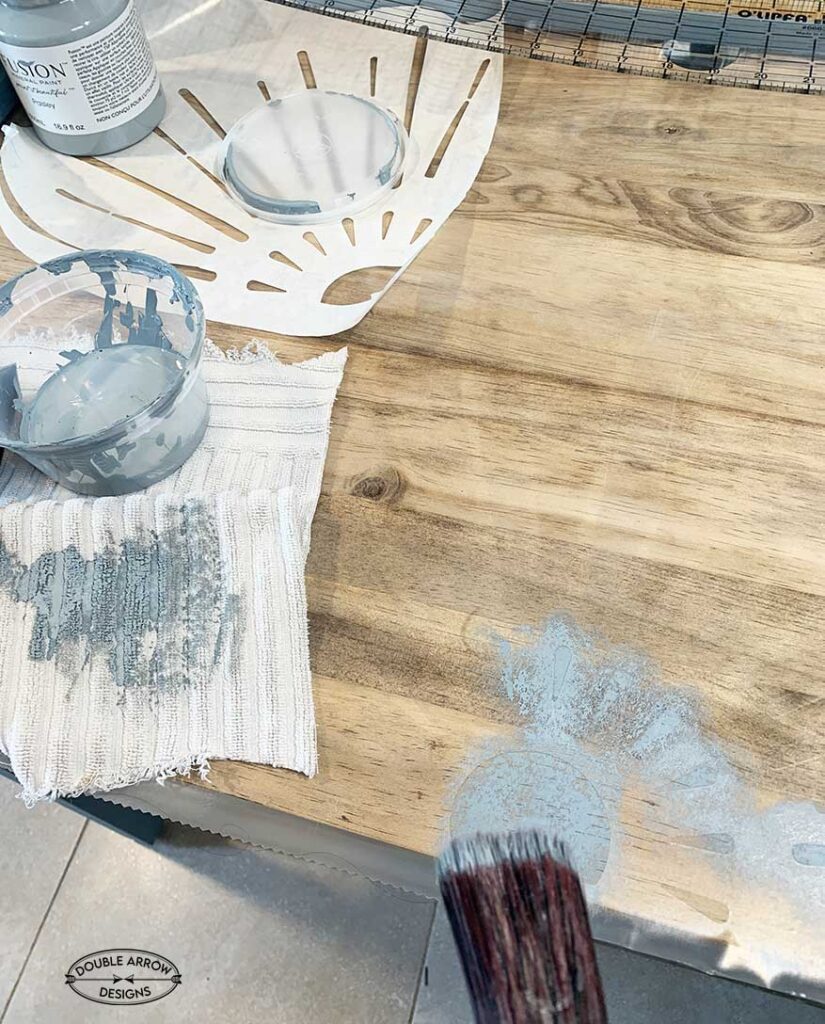
Decorative stencil for wood furniture
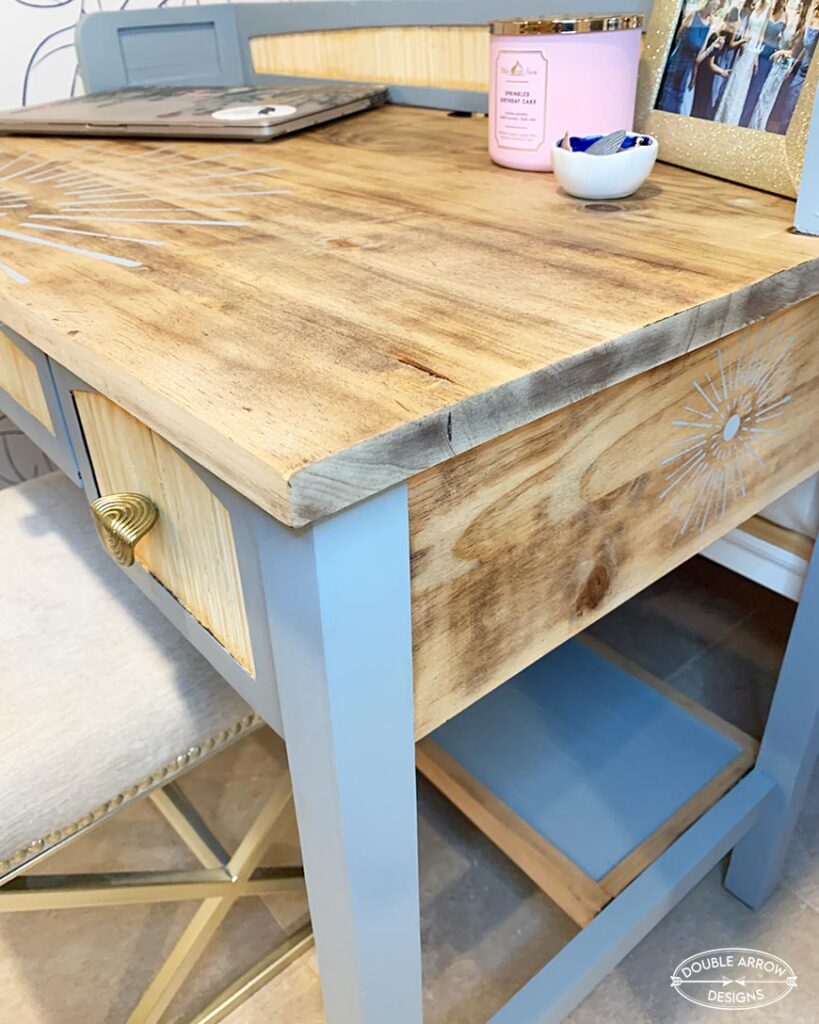
For this piece, I envisioned a large sunburst on the top of the desk. I created this sunburst stencil specifically for this project and can be sized up or down depending on what it needs to be used for. For the top of the desk, I used half the stencil to create this design. Then I used the full stencil for the sides of the desk.
Additional Stencils for wood furniture
Many of my furniture projects include a stencil. I love the idea of adding a stencil for a finished custom look to a lot of my repurposed furniture pieces. Take a look below for some fun stencils for wood furniture that I created!
Check out my Double Arrow Designs Etsy store to purchase this. It can easily be used with your Cricut or Silhouette Machine.

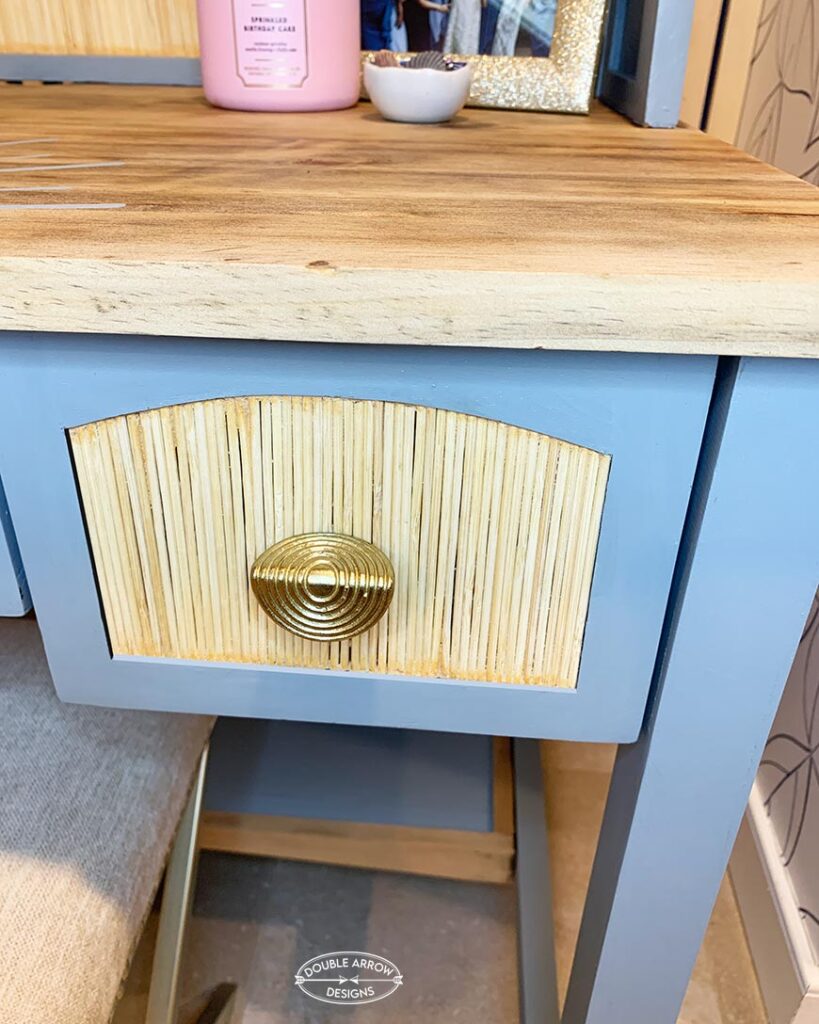
Adding Texture with Bamboo Skewers
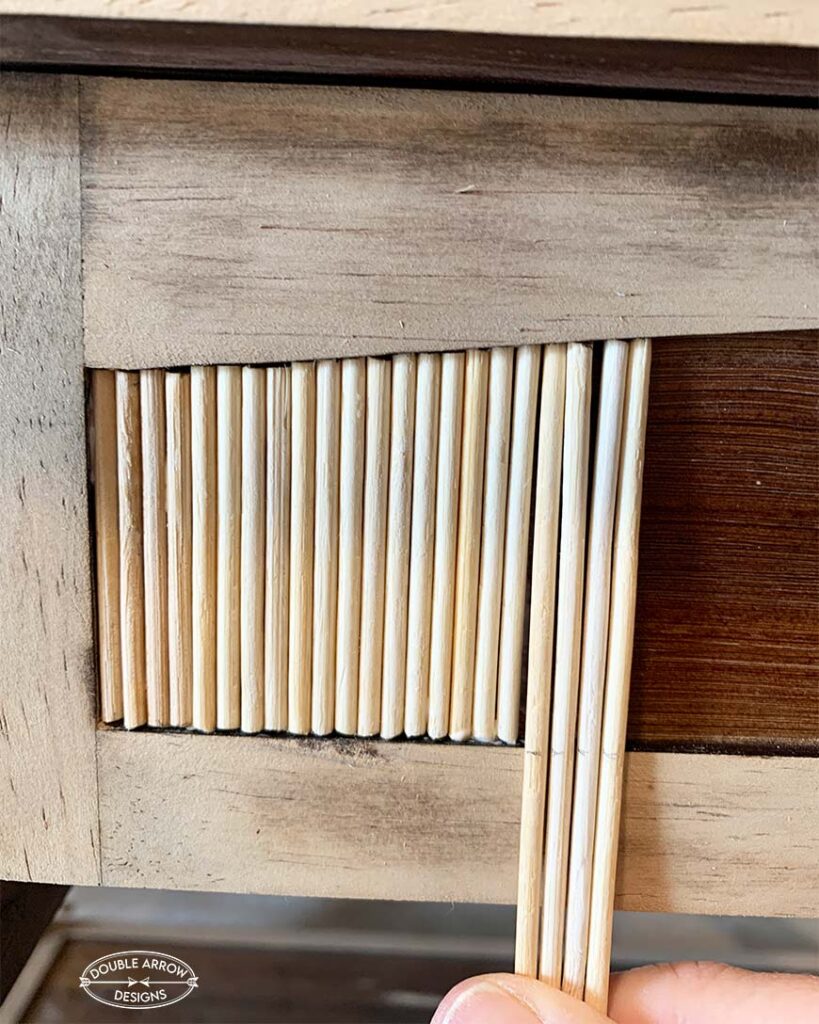
This particular desk had beautiful inlaid drawer fronts that felt like the perfect opportunity to add texture. With the rising trend of wood slats (I even created a Wood Slat Accent Wall – Easy DIY in my own home!), I decided to replicate that look on a smaller scale.
To achieve this, I used bamboo skewers. Their slim size made them ideal once trimmed down to fit. I cut four skewers at a time using garden shears. To size each one precisely, I held the skewer against the drawer’s inlay edge, marked the cut line with a pencil, and trimmed accordingly.
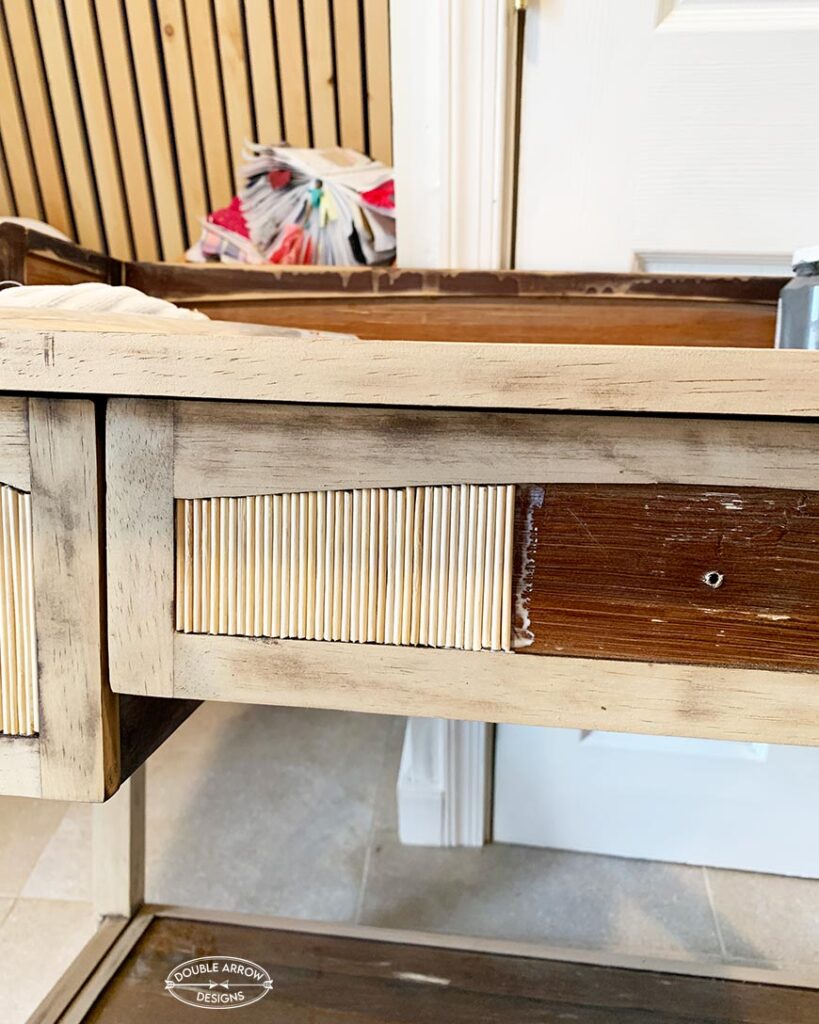
How I added the skewers
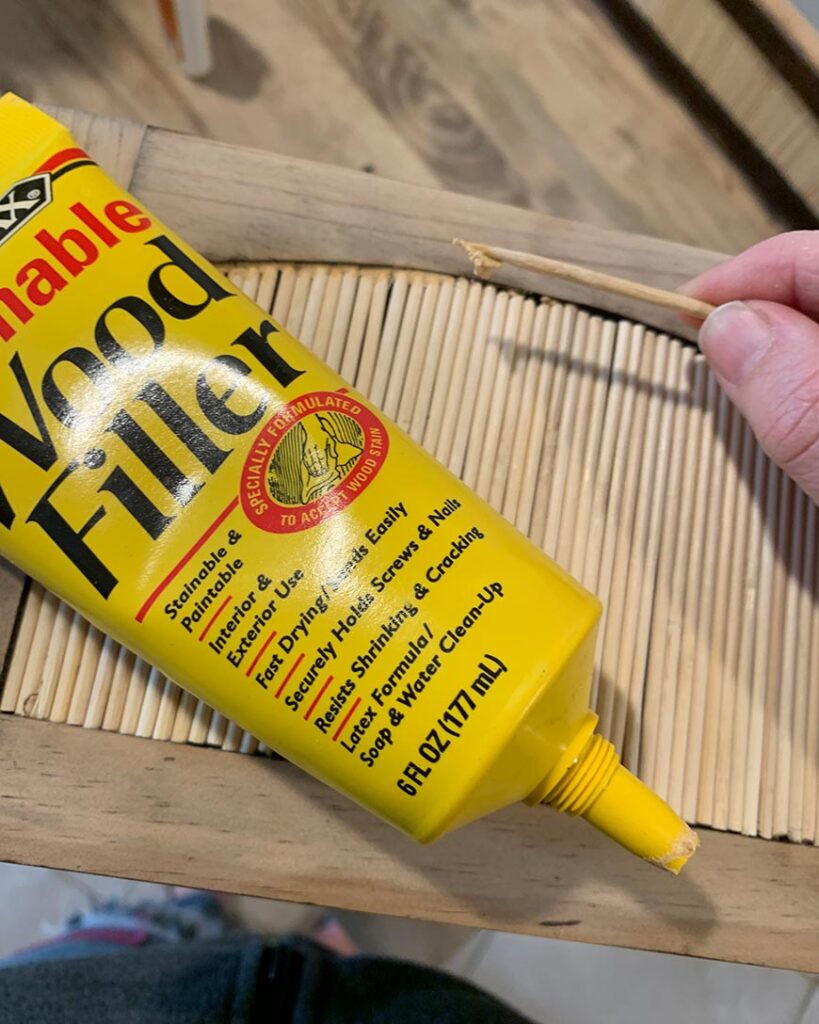
Using a Q-tip and wood glue, I carefully adhered each skewer to the drawer face. Once everything was in place, I applied wood filler at the top and bottom edges to create a seamless look.
To finish it off, I’ll be sealing the drawer fronts with Minwax Polycrylic to unify the look of the natural wood and bamboo, while also protecting the surface.
- Measure and Mark– Hold a bamboo skewer in place along the drawer’s inlay and use a pencil to mark the exact length needed. For efficiency, measure one and cut four skewers at a time to match.
- Cut to Size– Using garden shears, cut the bamboo skewers to the marked length.
- Glue in Place– Apply wood glue to the back of each skewer using a Q-tip or small brush, then press them into place along the inlay.
- Fill Gaps– Use wood filler to fill in any small gaps at the top and bottom edges of the skewers for a seamless, finished look.
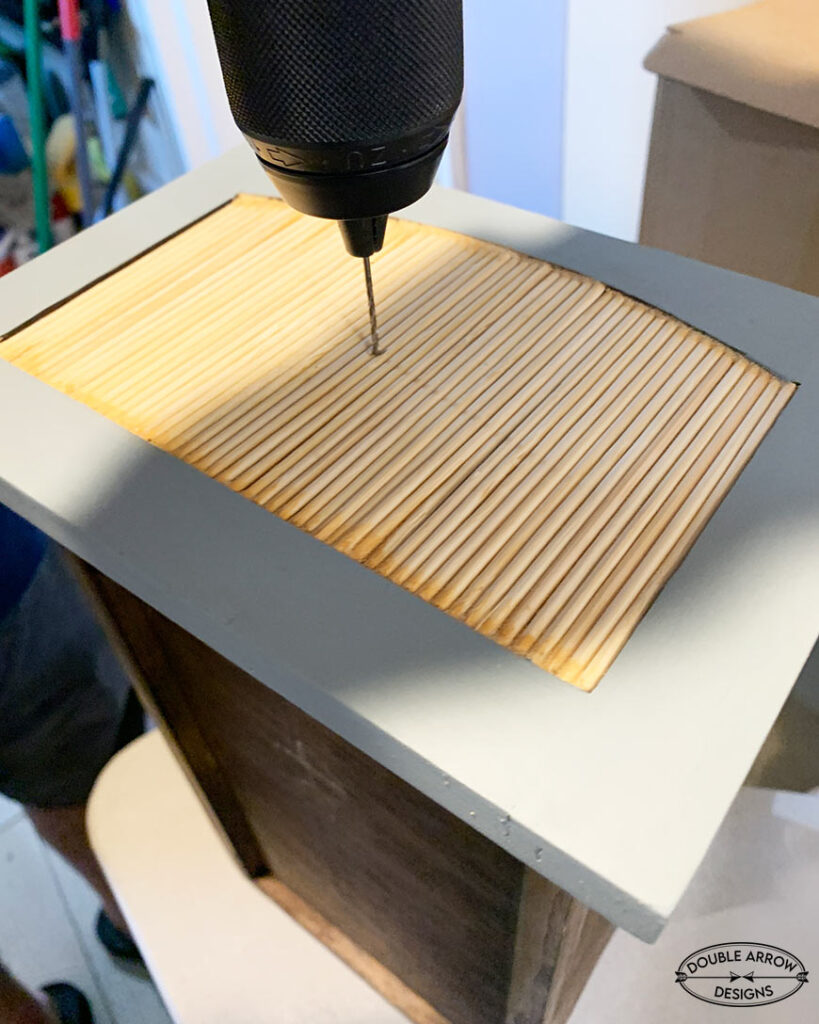
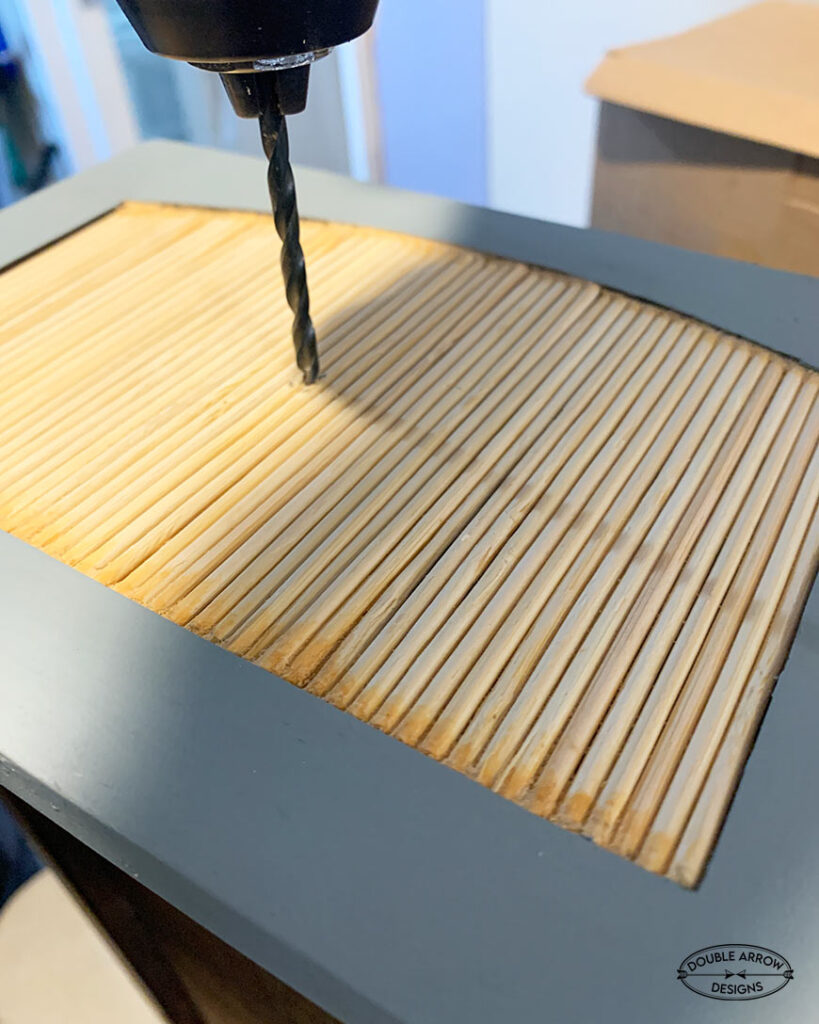
- Pre-Drill Carefully– To prevent splintering the bamboo, use a very small drill bit to start a pilot hole through the skewer area where your drawer pull will go.
- Drill to Final Size– Once the pilot hole is in place, switch to the correct drill bit size needed for your drawer pull screw and finish drilling through.
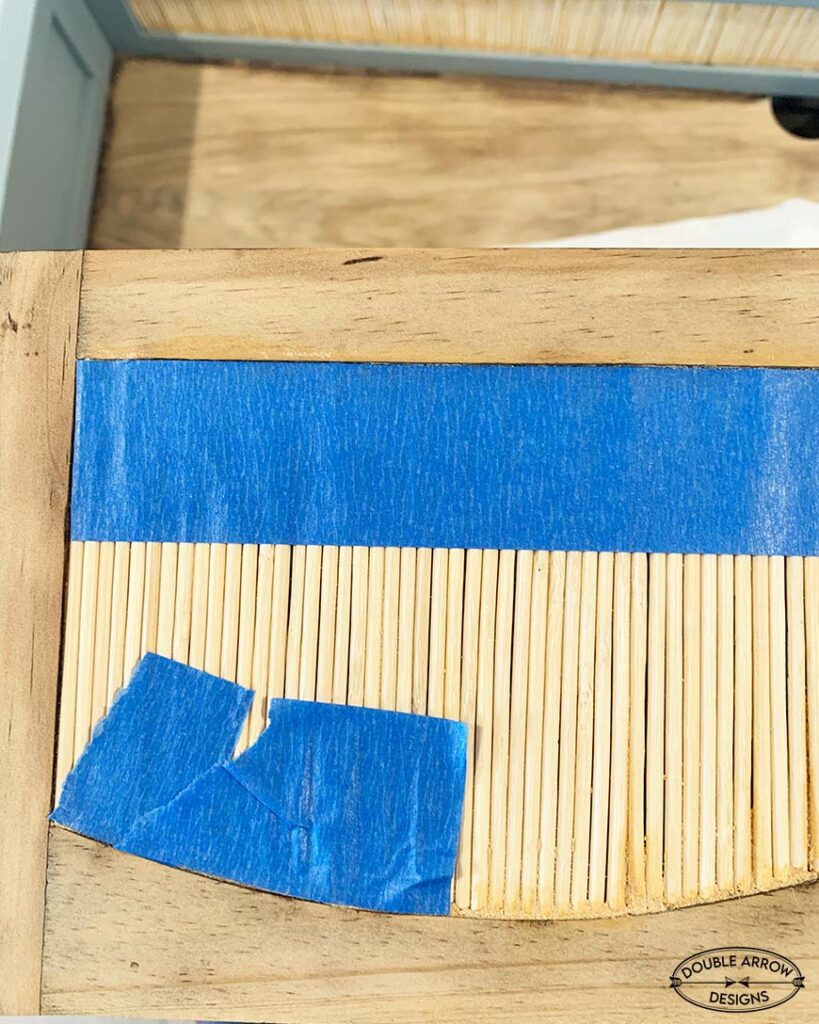
- Protect with Painter’s Tape– Before painting or sealing, apply painter’s tape around the skewers to keep the surrounding wood clean and defined. Re-painting drawer faces.
Painting wood furniture
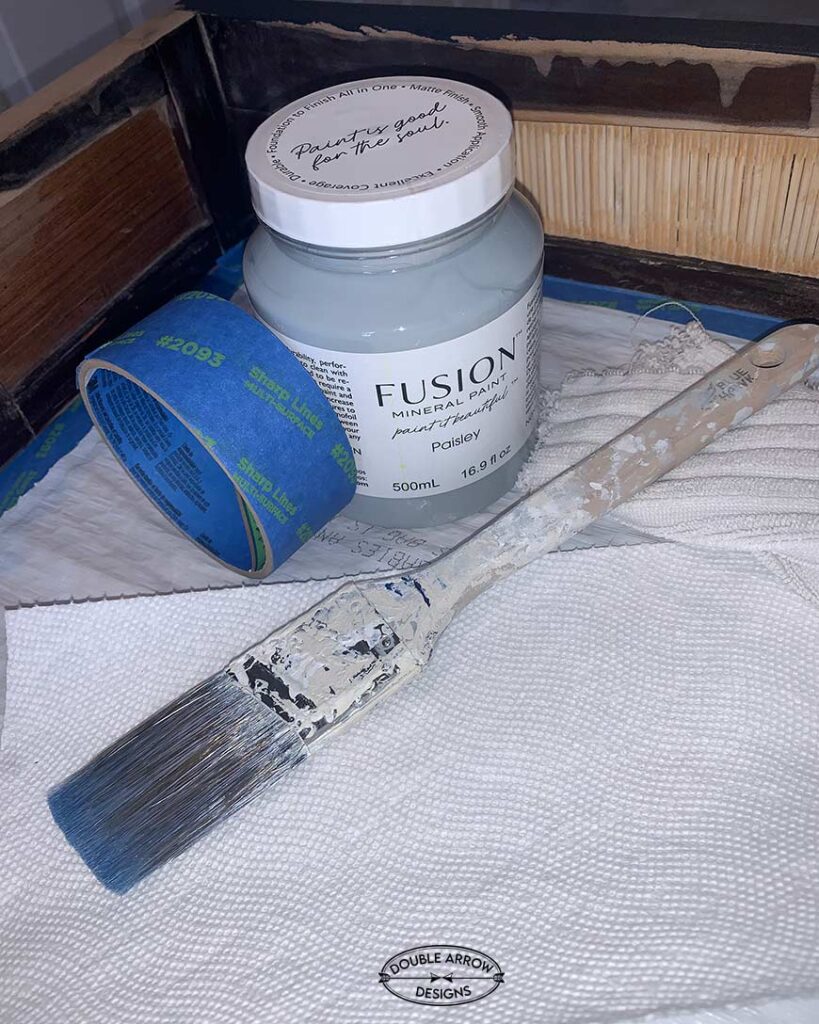
I loved the natural wood, skewer faced drawers and the knobs for this piece. Lending itself to a Boho feel. I decided to incorporate a few areas of painted wood to add another dimension to this piece. I have fallen in love with Fusion paint. It’s more expensive than the usual indoor paint I had been using on previous projects, but the results are amazing!
Painting Wood Furniture, Blending Natural Beauty with Color
For this piece, I wanted to strike a balance between natural texture and modern style. The natural wood, bamboo skewer-detailed drawers, and simple knobs already gave the desk a beautiful, organic Boho vibe. Rather than covering it all up, I chose to enhance it by adding painted accents—just enough to bring in depth and contrast without overwhelming the natural elements.
I’ve recently fallen in love with Fusion Mineral Paint, and it was the perfect choice for this project. While it’s pricier than the typical indoor latex paint I used in past makeovers, the difference in quality and finish is worth it. Fusion offers a built-in topcoat, rich pigments, and a smooth, almost buttery consistency that glides on beautifully with minimal brush strokes. I am in LOVE!
Final touches, completing an old desk makeover
With all the major steps complete, it’s time to add those finishing details that bring the entire makeover together—both for durability and a polished look. These final touches elevate your makeover from good to great—sealing in your hard work while making the piece both functional and beautiful.
1. Smooth the Surface– Once your painted stencil is dry, lightly sand the desktop using a fine-grit (220) sanding block. This helps smooth out any texture from the paint and seamlessly blends it into the natural wood surface.
2. Wipe Clean- Use a damp, lint-free cloth to remove all dust and debris left from sanding. This ensures a clean surface for sealing.
3. Seal the Finish- Apply Minwax Polycrylic to seal and protect the wood and painted areas. You can use either the spray version or apply it with a sponge brush straight from the can.
For this project, I used the spray, but I prefer the sponge application—it offers fuller, more even coverage and better control over drips and pooling.
4. Choose Your Hardware is where the piece gets its “jewelry.” Because the right knobs or pulls can completely transform the personality of your furniture. For inspiration, be sure to check out my post: Furniture Pulls and Knobs That Can Transform Any Piece.
5. Protect Your Floors- Don’t forget to add felt tabs to the bottom of your desk legs. This small step prevents scratches and makes it easier to slide the desk across hard flooring without damage.
Note: While Fusion Mineral Paint includes a built-in topcoat, I always recommend adding an extra layer of sealer on high-use surfaces (like desktops) to increase durability and prolong the life of your paint job.
Video of one of my furniture projects
I recently completed another exciting desk makeover, and I documented the entire transformation step-by-step! From the initial design inspiration to the final reveal, you can watch how I brought this tired old desk back to life. Check out the video below to get a closer look at the process, pick up some helpful tips, and maybe even spark a little inspiration for your own DIY project.
RELATED POST
Check out some additional painted furniture projects that I have done. Hope you enjoy!
- Repurposed China Cabinet – I used Fusion Midnight blue on this, and it looks amazing
- How to Refinish A Secretary Desk– I bleached the wood to give this piece a whole new look.
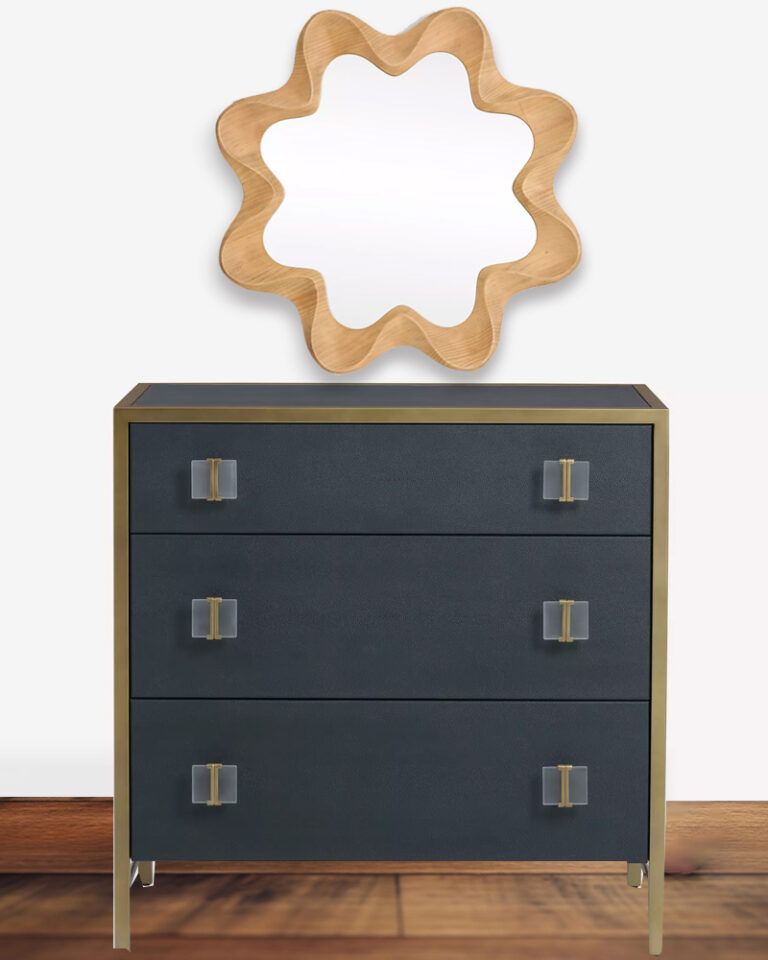
- How to Paint A Metallic Dresser– Total glam piece!
Thanks for stopping by!

This post is all about an old desk makeover