How to Decorate Floating Shelves. The Rule of Three & Other Pro Styling Tricks

This post contains affiliate links. If you make a purchase through one of my links, I may earn a small commission at no extra cost to you. As an Amazon Associate I earn from qualifying purchases.
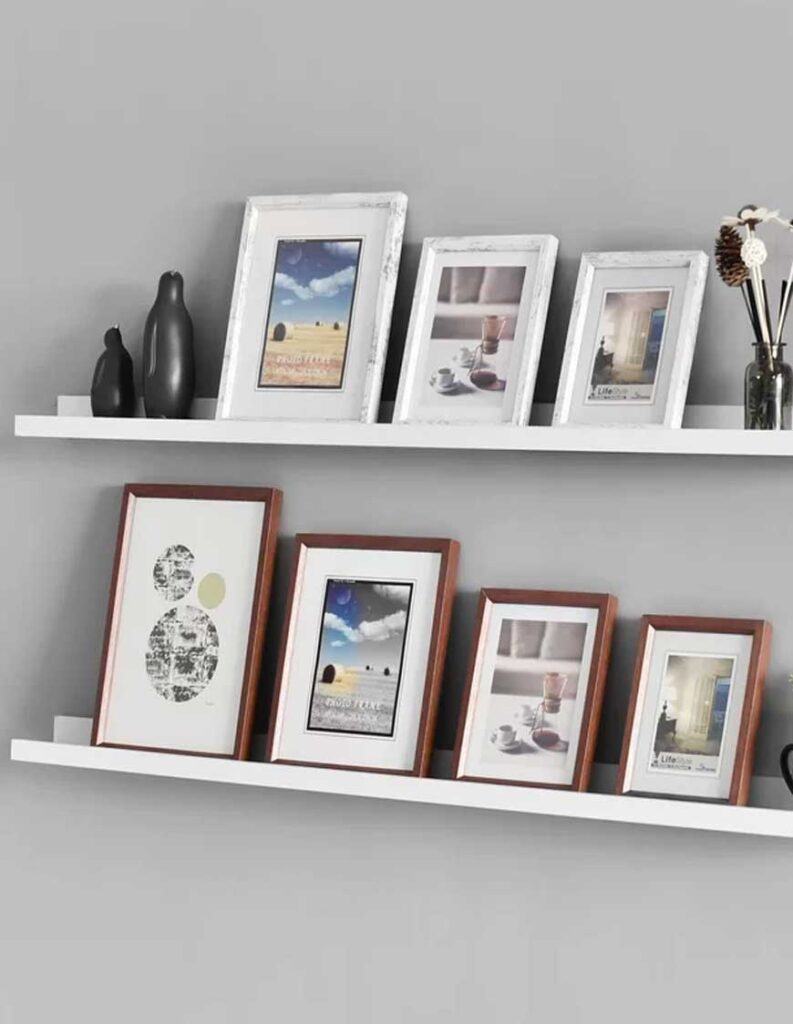
Floating shelf decor ideas
- Bristol glass bud vase-This clay vase is made with soda glass.
- Ginny Aluminum Tabletop Candlestick – This holds a 3” wide pillar candle or LED light.
- 7” Faux Succulent Plant in Stone Pot-These plants are of excellent quality and will not fade or wither, they will remain fresh year after year
- ” Delicate Coral II ” by Isabelle Z, Painting Print-a reproduction printed with premium inks on wrapped canvas for a gallery-worthy look
- Heulwen Entertainment Decorative Book-Features a blend of five authentic hardback books. The blended green and tan color tones make these books an inspired choice for any room. Enhance a coffee-table, side table, or bookshelf with these decorative books.
- Wyeth Abstract Figurines & Sculptures-Interesting figurines are the spice that completes a room décor. They can be added to a shelf, placed on top of a mantel, or set next to other objects.
- Malta Portuguese Fine Stoneware Large Serve Bowl-glazed stoneware
Today, I’m diving into how to decorate floating shelves—specifically for a dining space—but these ideas can work in any room! From curated collections to functional styling tips, I’m sharing everything you need to turn simple shelves into a stunning focal point. Let’s get started!
Why Floating Shelves Are the Perfect Dining Room Upgrade
Let’s talk about the ultimate space-saving, style-boosting solution: floating shelves. As part of my dining room makeover, I decided to ditch my bulky old china cabinet and swap it for something sleeker, more modern, and just as functional—floating shelves! Not only do they open up the room visually, but they also give me the flexibility to combine both storage and décor in one streamlined display.
Ready to Try Floating Shelves?
If you’re thinking about adding floating shelves to your dining room—or any room—you’re in luck. Below, I’ve linked some of my favorite easy-to-install options to get you started. Once they’re up, it’s all about the fun part: decorating!
How to Decorate Floating Shelves with Style and Function
Floating shelves aren’t just for show—they can do double duty. In my case, these shelves are my new china cabinet. That means they’re not only pretty, but practical. I’ll be styling mine with a mix of everyday essentials and decorative pieces that make the space feel curated but lived-in. Here’s a peek at what I’ll be displaying:
- abstract metal decor
- Serving bowls and platters
- Vintage candlesticks
- Decorative vases
- A statement clock
- Framed photos or art
The key? Balance and versatility. Items that are beautiful and useful should have a place here. Don’t be afraid to mix materials—glass, wood, metal, and ceramic all play well together and add layers of visual interest.
Expert Tips for Floating Shelf Styling
1. Repetition is your friend
Use repetition to create cohesion—repeat shapes, colors, or materials across the shelves. For example, pair a trio of ceramic vases in different heights with artwork in similar tones.
2. Vary height and depth
Mix tall and short items, layer pieces by placing small frames in front of larger ones, and use stacks of books or trays to elevate smaller objects.
3. Leave room to breathe
Don’t overstuff your shelves. Negative space is powerful—it gives the eye a place to rest and lets each item stand out.
4. Think seasonal or themed
Floating shelves are made for seasonal refreshes. Try layering in fall florals, winter greens, spring ceramics, or summer glassware, depending on the time of year. It’s an easy way to keep your dining room feeling fresh.
Your Style, Your Shelves
The best part? No two floating shelf displays will look the same. Your shelves should reflect your style, needs, and personality. Whether you’re a minimalist or a collector, you can tailor them to suit your space—and change them up anytime you like.
So grab your favorite décor pieces, mix in a few essentials, and start styling. Trust me—floating shelves are about to become your new favorite decorating canvas.
Choose a Color Theme for a Cohesive Look
One of the easiest ways to make your floating shelves feel intentional—not random—is to choose a color theme. A consistent color palette ties everything together and helps your shelves look styled rather than cluttered.
You can go in a few different directions depending on your space and personal style:
Neutral & Natural
Think whites, creams, taupes, and natural woods. This palette feels calm, airy, and timeless—perfect for farmhouse, Scandinavian, or minimalist interiors—layer in textures like ceramic, rattan, and linen to keep it interesting without introducing bold color.
Monochromatic Pop
Choose a single hue—like blue—and play with various tones and textures within that color family. From navy glassware to pale blue pottery, this look feels curated and chic. It’s a great way to add color without overwhelming the space.
Seasonal Color Shifts
You don’t have to stick with one theme year-round. Use your shelves to reflect the season—warm rusts and amber for fall, deep greens and metallics for winter, pastels in spring, and brights or coastal blues in summer. This approach gives your room a fresh vibe with minimal effort.
Metallic Accents
Even if you’re working with mostly neutral pieces, adding in a pop of gold, brass, or matte black hardware or frames can act as a unifying visual thread throughout the shelves.
Color is a powerful styling tool. When used with intention, it transforms your shelves into a cohesive, eye-catching display that enhances the entire room.
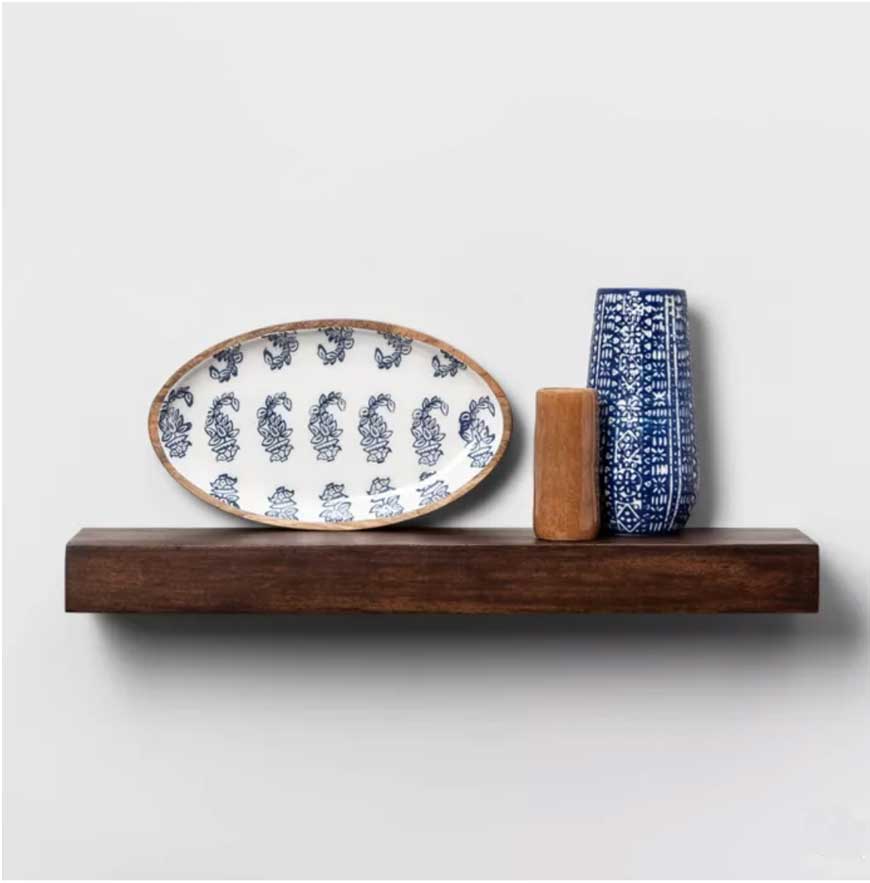
Wooden plank and dark brown finish, can stack a few of these for additional shelving
Double up on your floating shelves
Two floating shelves will work well together. Either one on top of the other or asymmetrical. Either way they will work well together!

Create a Focal Point That Draws the Eye
Whether you’re working with one floating shelf or several stacked or staggered, every well-styled shelf needs a focal point—that one standout piece that anchors the look and gives your eye a place to land.
What Is a Focal Point?
A focal point is the visual centerpiece of your shelf. It might be a bold piece of artwork, a sculptural vase, a framed photo, or even a large decorative plate. It should be larger, more colorful, or more eye-catching than anything else on the shelf, and it typically sits in the center if you’re styling a single shelf.
Once your focal point is in place, the rest of the shelf should be styled to support and enhance it—not compete with it.
How to Style Around Your Focal Point
- Use symmetry or soft balance: Flank your focal piece with smaller items—like candlesticks, stacked books, or vases—on either side. These items should complement the focal point in color, material, or shape, but not steal the spotlight.
- Play with height: Vary the height of supporting pieces to create movement and dimension. This helps the eye travel around the shelf but naturally returns to the center.
- Layering adds depth: Layer smaller frames or accessories partially in front of the focal piece. This creates a more dimensional, collected look.
- Keep it uncluttered: Give your focal item space to breathe. Avoid overcrowding or placing too many similar-sized items next to it—it should stand out at first glance.
Examples of Great Focal Points
- A vintage clock or statement mirror
- A large framed art print
- An oversized decorative bowl or plate
- A chunky piece of driftwood or sculptural object
- A bold-colored glass vase or ceramic piece
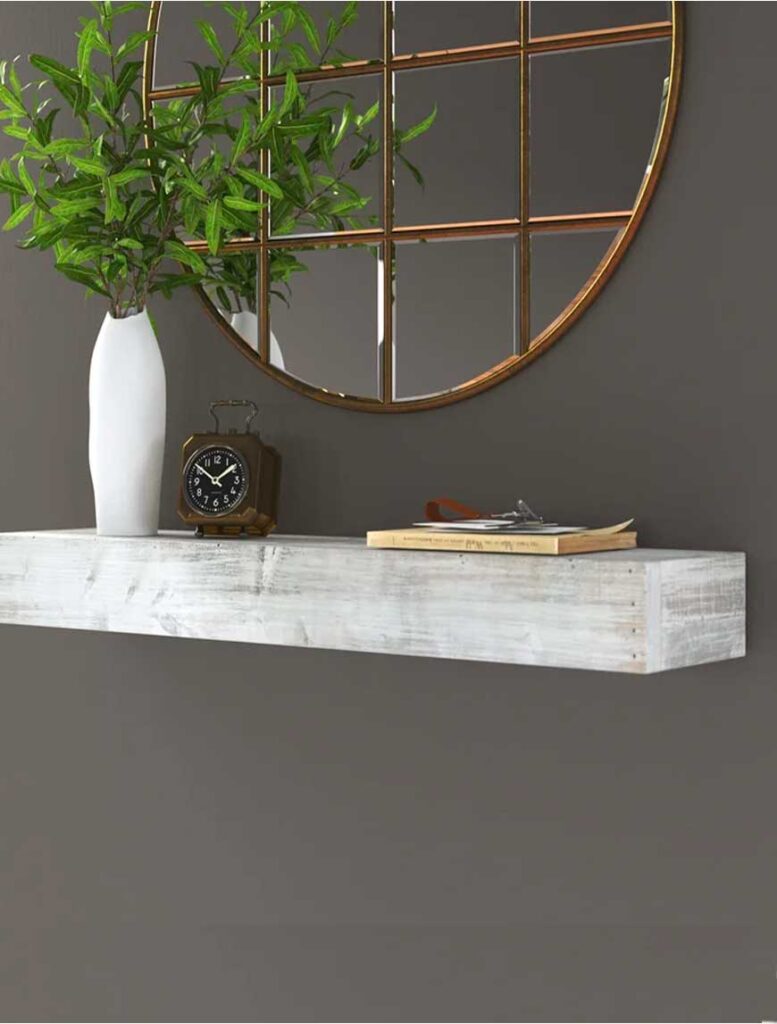
Made from solid pine wood and features a distressed white finish for a vintage look. This shelf is available in different sizes.
Use a Variety of Heights to Add Interest and Depth
One of the most important design principles when styling floating shelves is visual rhythm—and nothing creates that better than incorporating a variety of heights. When every item is the same height, your shelf display can look flat, repetitive, or uninspired. Varying the scale of your objects instantly brings the shelf to life.
Why Height Variation Matters
Just like a well-composed photograph or a well-designed room, a shelf display needs contrast and movement. Different heights guide the eye across the shelf, helping your display feel more dynamic and intentional. This variation also creates depth and layering, which adds sophistication and makes even simple objects feel artful.
How to Use Height Creatively
1. Mix tall, medium, and short objects
Start by choosing one or two tall pieces (like vases, candlesticks, or framed art), then fill in with medium-height and smaller accessories. The balance between these creates a natural flow.
2. Stack to create height
Not every item has to be tall on its own. You can create height by stacking books, placing a small sculpture on a pedestal, or even layering frames behind shorter items.
3. Anchor each shelf with a tall piece
If you’re styling multiple floating shelves, place a tall object on each one, but stagger the placement. For example, a tall vase on the left of the top shelf and another on the right of the lower shelf creates movement without looking uniform.
4. Layering = depth
Use height not only vertically but also in depth. Taller items in the back, shorter ones in front. This creates a layered look that feels curated and gives your shelf dimension.

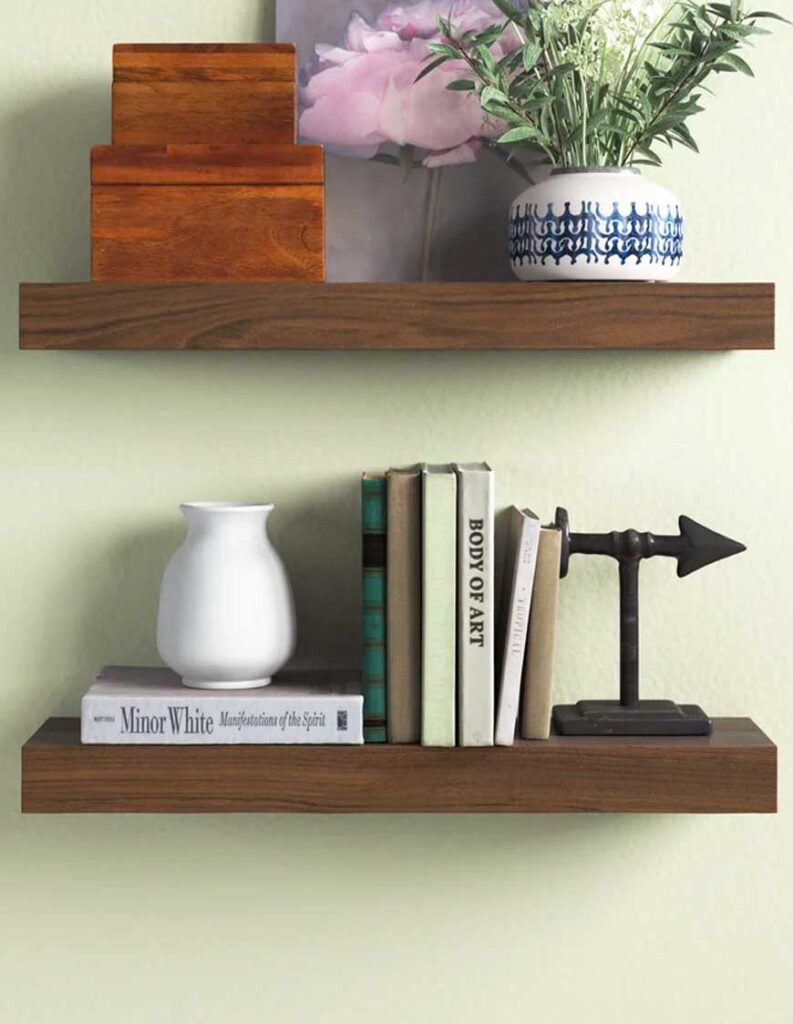
Ayansh 2 Piece Alder Floating Shelf (Set of 2)
Layering Objects Like a Pro: The Secret to Depth & Dimension
Layering is the design trick that takes your shelf from “nicely arranged” to stylistically stunning. Instead of lining up objects like soldiers, think in overlapping layers, stacked heights, and mixed orientations—that’s how you create depth, texture, and a truly curated look.
Stack & Layer with Intention
Start by stacking similar objects—from largest to smallest. This could be a trio of books topped with a decorative object, or nesting bowls in descending sizes. The key is to build visual weight at the base and lighten up as you move upward. This creates a grounded, balanced look that feels natural.
Next, think about layering objects in front of each other. Place a small frame or ceramic piece in front of a taller one. Let some items partially obscure others—it mimics the way we decorate in real life and makes the shelf feel lived-in and intentional.
Sleek, Authentic rough-cut floating Shelves will add a rustic yet modern feel. Easy to mount with hardware included.
Mix Vertical and Horizontal Elements
To keep the eye moving and avoid a flat, one-dimensional look, include both vertical and horizontal shapes:
- Vertical items (like tall vases, candleholders, or framed art) add height and drama
- Horizontal items (like stacked books or wide trays) ground the display and create balance
- Combine both on the same shelf for contrast and harmony
For example, in a lower shelf setup, you might have a tall vase on one side, a stack of books in the middle, and a framed photo leaning behind a small bowl. That contrast in direction adds so much visual interest.
Pro Styling Formula:
- Layer front to back: Depth is key. Place taller pieces in back, with smaller, low-profile items in front.
- Stack bottom to top: Use books, boxes, or trays as a base to elevate smaller decorative items.
- Alternate orientations: Don’t line everything up—angle or offset items slightly for a relaxed, curated vibe.
Design Tip: Think in “Visual Stories”
Each shelf should tell a mini story. Layer items that relate in color, material, or mood. For example, a stack of cookbooks, a ceramic berry bowl, and a vintage spoon rest grouped feels like a collected moment—not random clutter.
With thoughtful layering, you’ll turn your floating shelves into a design feature instead of just extra storage. Have fun with it—move pieces around, step back, and tweak until it feels just right.

Add lighting to your floating shelves
Once these floating shelves are installed, you can stick battery-operated puck lights on the underside of these shelves. With just a touch, or a remote nearby, they will illuminate underneath, giving you a dramatic finishing touch to these floating shelves. Below are some options:
- Wireless LED Puck Lights with Remote Control 6 Pack
- Touch Light LED Puck Lights Portable Under Cabinet Lighting
Related posts
Check out these additional posts! Each week I continue to add new posts, Bookmark my site so you can easily check back to find new posts each week.
- 9 Peel And Stick Wallpaper Ideas
- Decorative Throw Pillows for The Couch
- Candles in Vintage Glassware that you will love!
Thanks for stopping by!
This post is all about how to decorate floating shelves