How to Paint Wood Furniture Like a Pro: Easy Steps for a Smooth, Lasting Finish
Originally published on September 14, 2020. Updated on October 21, 2025, with refreshed content, photos, and helpful tips for today’s DIYer.
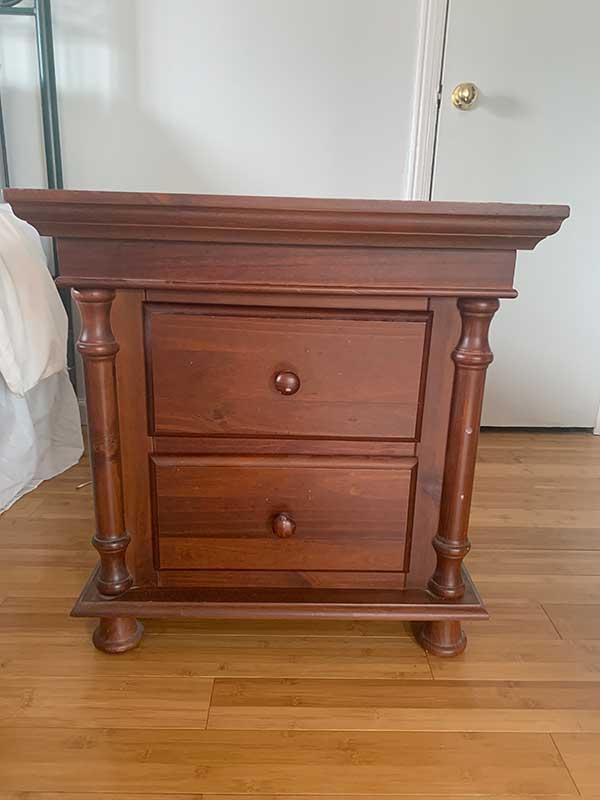
If you have a mix of mismatched furniture or older wood pieces that need a refresh, painting them is an easy and affordable way to create a cohesive, stylish look. In this post, I’ll walk you through my full process on how to paint wood furniture like a pro, from cleaning and priming to sealing and adding those beautiful finishing touches.
Skill Level: Intermediate DIY Project
This project is perfect for anyone comfortable with basic painting techniques and looking to take their DIY skills up a notch. It doesn’t require professional experience, but attention to detail and patience are key to achieving a smooth, durable finish. If you’ve completed a few smaller projects, like painting décor or simple furniture pieces, you’ll find this an enjoyable and rewarding next step.
This post contains affiliate links. If you make a purchase through one of my links, I may earn a small commission at no extra cost to you. As an Amazon Associate I earn from qualifying purchases.
Clean your piece
Before you start painting, it’s essential to thoroughly clean your furniture. Use a wood cleaner or a damp cloth to remove dust, grime, or any residue. A smooth surface ensures your primer and paint adhere properly; painted dust is definitely not a look you want. I use a mild soap with warm water with a large sponge to really get underneath the piece and more rounded areas that need to be cleaned.
Sanding
On any wood pieces, I will either do a deep or a light sand, since I will be priming this piece due to the dark wood stain I will lightly sand so that the primer can lay on the wood better. Choosing your sandpaper. I use foam sading blocks. You can get them in a package that will give you a range of grit. Lower numbers are for coarse sand, and lower numbers indicate a finer sand. You can also use an electric sander, which can also be used with sanding pads that range in coarseness as well. See below for both examples.
No products found.
No products found.
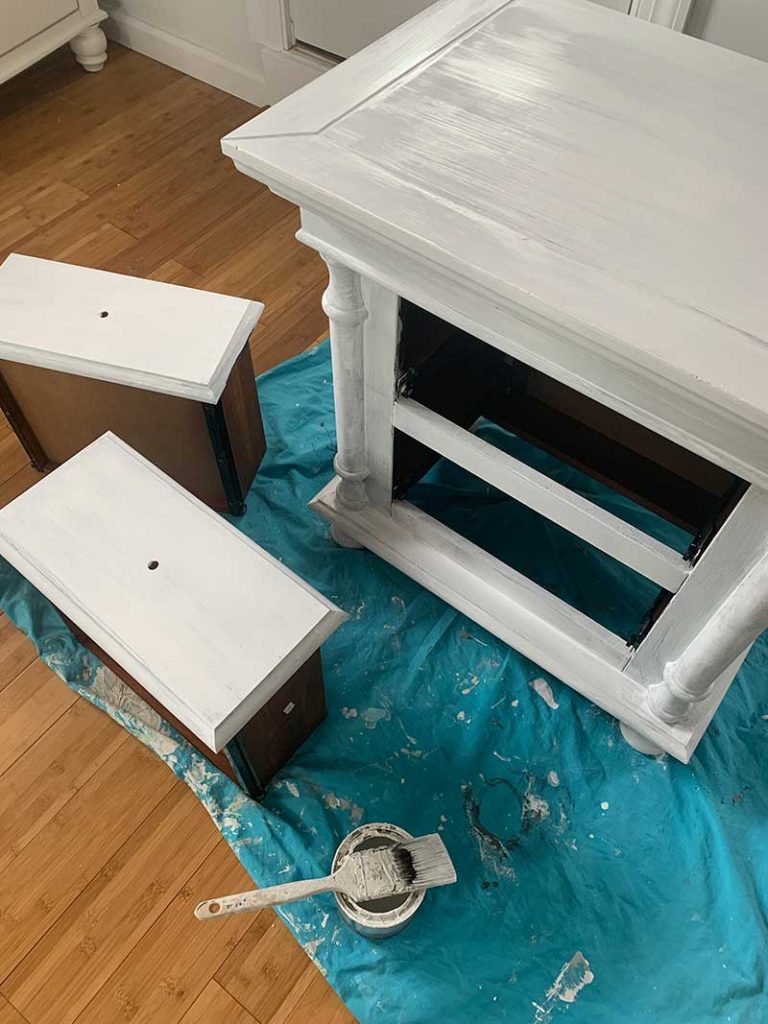
Prime It
I always start with a quality primer. Primer blocks stains or wood tannins from bleeding through and gives your paint a smooth, durable base. It’s also a major time-saver, if you are going with full coverage paint on your piece.
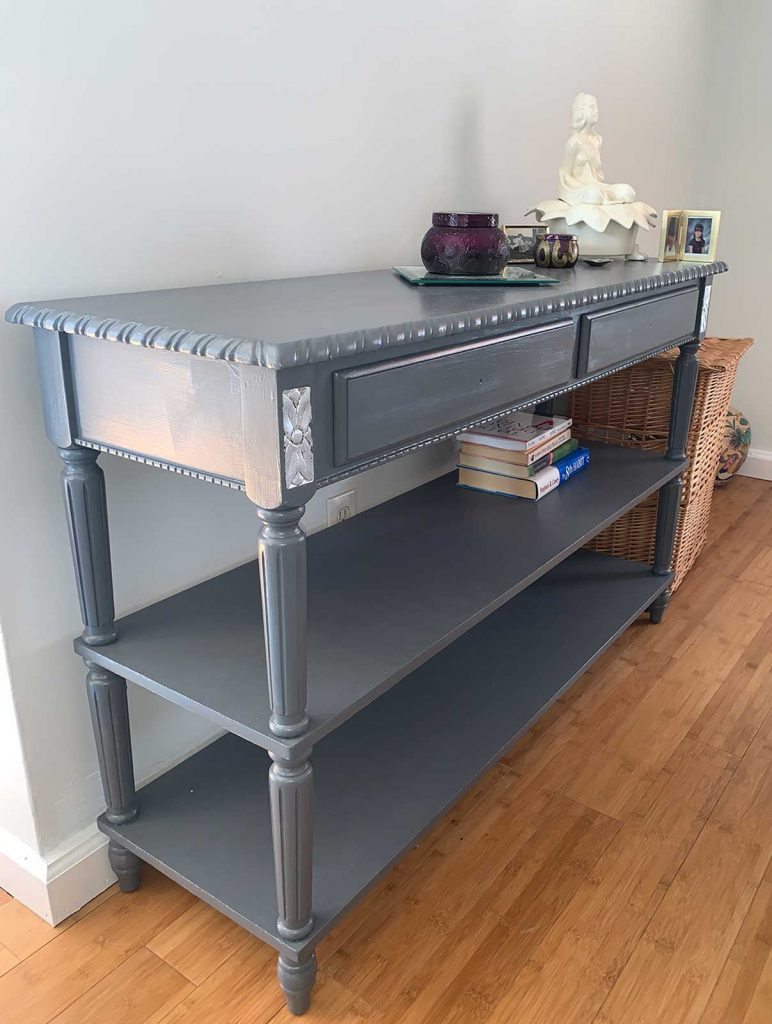
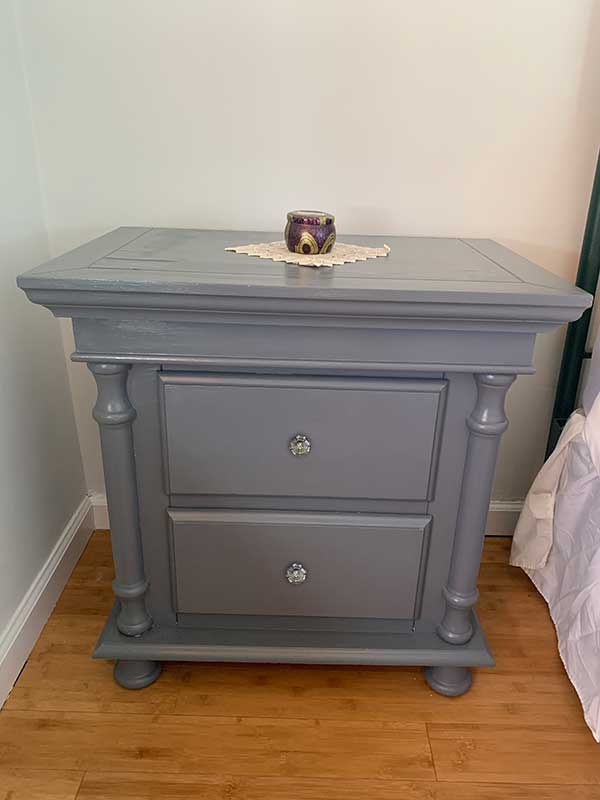
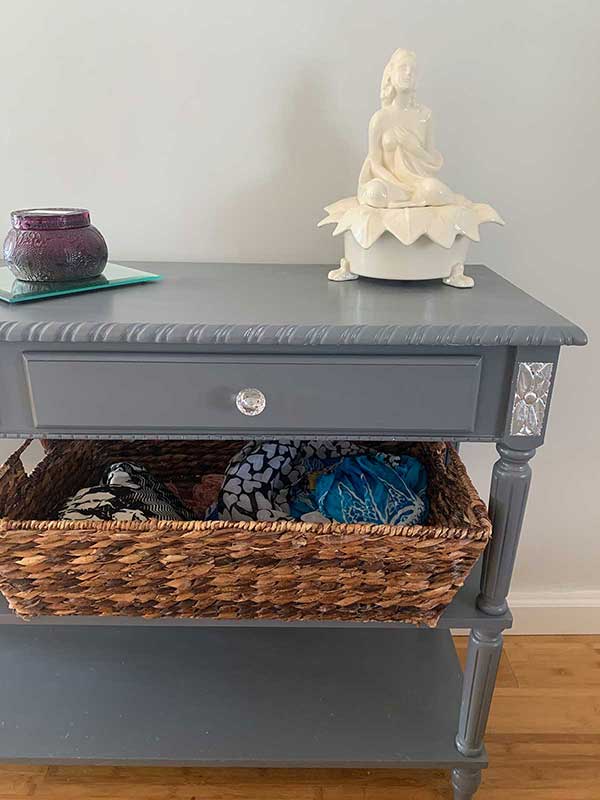
For this project, I used “Paper White” by Benjamin Moore for my walls and “Ashland Slate,” a deep gray, for the furniture pieces. I also updated my wrought iron bed with black pearl-finish spray paint for a cohesive look. Once your primer is dry, apply two coats of your chosen paint color using a good-quality brush. I recommend Purdy brushes; they’re an investment that lasts for years if you clean and maintain them properly.
Choosing the Right Paint
While many people love chalk paint, I prefer using regular house paint for furniture. Here’s why:
- You can choose from a wide range of colors.
- The small Benjamin Moore tester sizes are affordable (under $10) and go a long way—enough to paint an entire dresser with two coats.
- The tester paints come in an eggshell finish, which provides a soft sheen that looks beautiful on furniture.
- You can also use their paint specifically for cabinets.
Once I have chosen my color, I will apply two coats of paint over my primed piece. I prefer to use Purdy brushes. Buying a pack with different sizes will help when painting different areas. They are a little more expensive, but I have had mine for years. As long as you maintain and clean them, they will last a long time.
Seal Your Painted Furniture
After applying two coats of paint, it’s time to protect your work. I seal my furniture with Minwax Polycrylic in a matte finish. This topcoat seals the paint, protects against wear, and leaves a lovely eggshell appearance. Apply it evenly with a clean brush, allowing each coat to dry completely and lightly sand before applying the second coat.
No products found.
Add Hardware for a Custom Look
New knobs or handles can make your painted furniture look completely custom. For my bedroom pieces, I chose 30MM crystal knobs I found on Amazon, which tie my credenza and nightstands together beautifully. Hardware is a small detail that makes a big impact. For additional knob ideas and resources, check the following:
No products found.
- Choosing Furniture Pulls and Knobs That Wow
- Acrylic Knobs and Pulls That Will Update Any Furniture
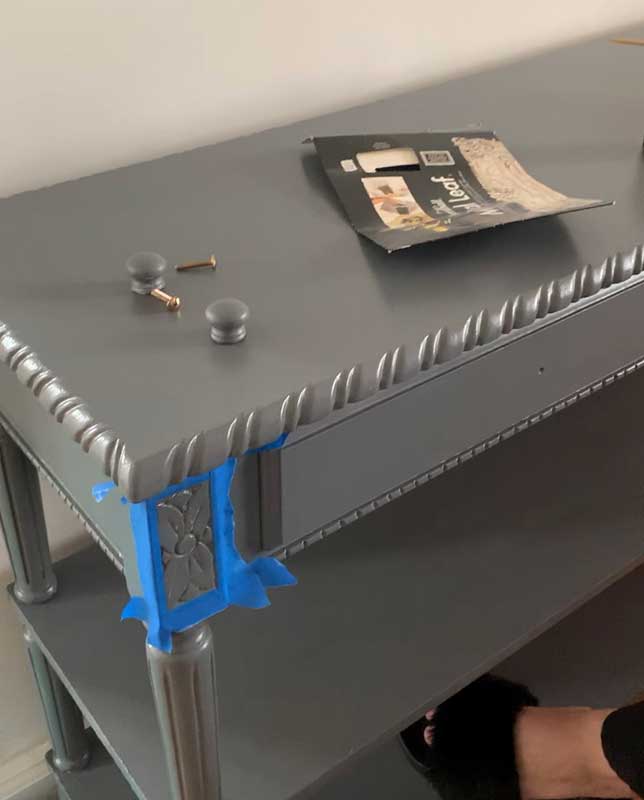
Finishing Touches – Silver Leaf Accent
For an elevated designer look, consider adding a bit of silver leaf detailing. It’s a subtle yet stunning way to make your painted furniture stand out.
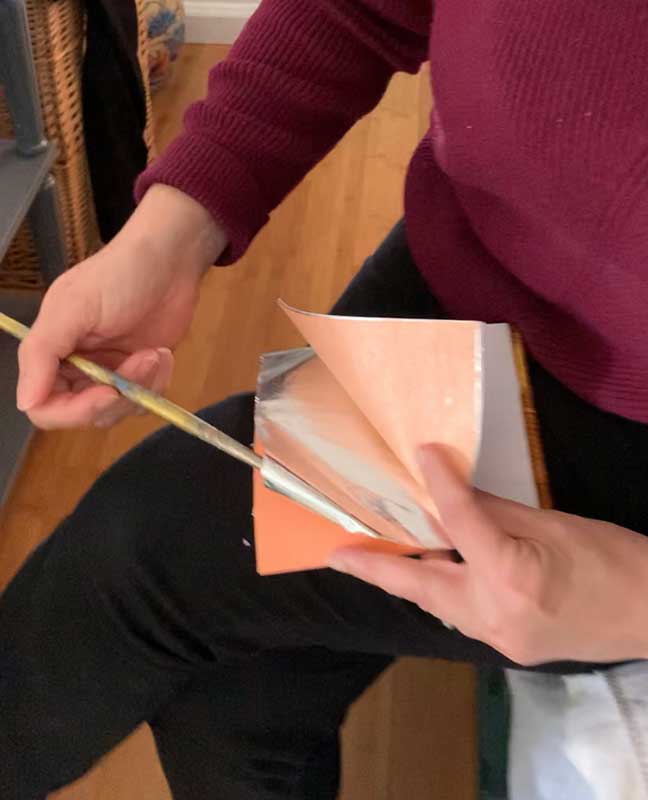
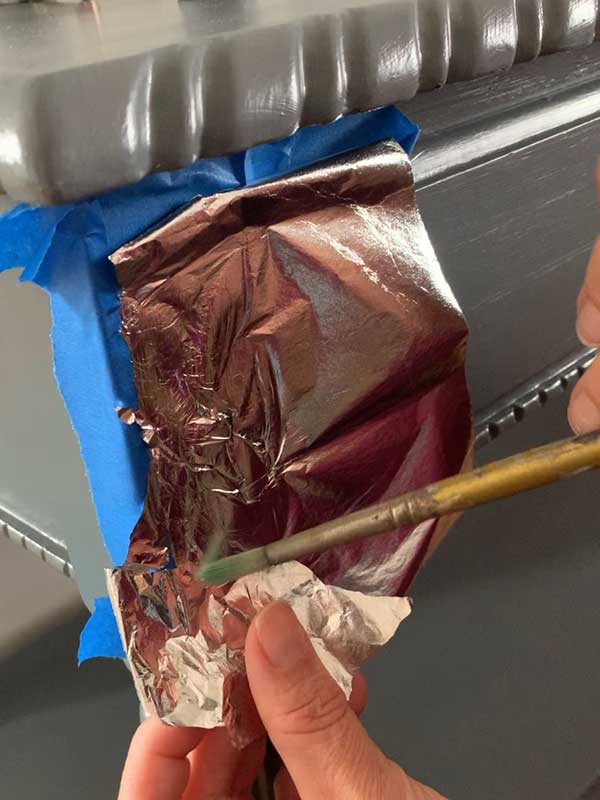
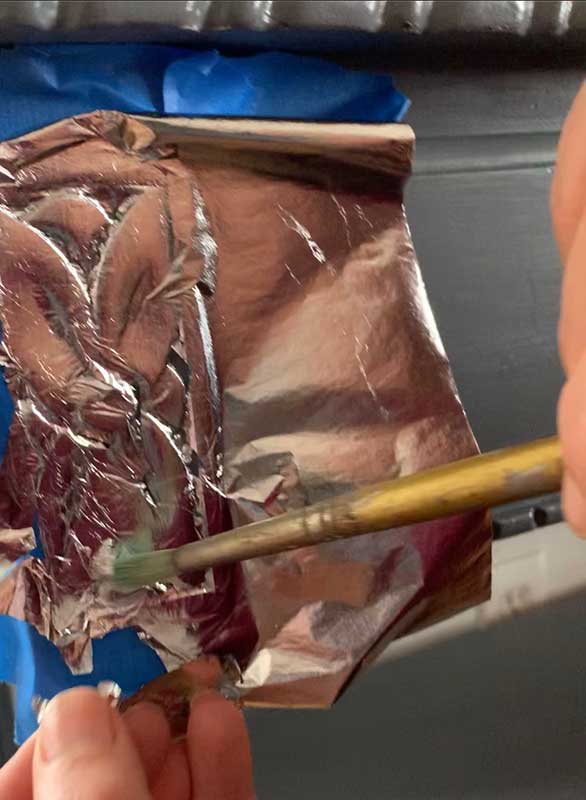
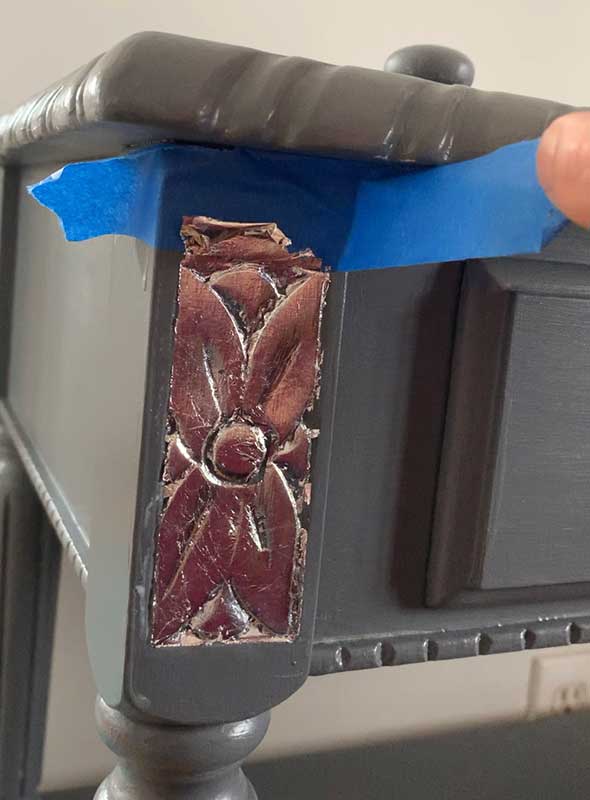
I use Barnabas Blattgold genuine silver leaf sheets and Speedball Mona Lisa Adhesive. With a small brush, apply the adhesive to the area you want to highlight, let it become tacky, and carefully press the silver leaf onto the surface. Use painter’s tape to achieve crisp, clean lines. The result is a touch of shimmer that transforms your piece from ordinary to exceptional.
No products found.
No products found.
Final Thoughts
Painting wood furniture is one of the easiest and most rewarding DIY projects you can do. With the right prep, products, and patience, you can turn mismatched or outdated pieces into beautiful, cohesive furniture that fits perfectly in your home.
I’ll be sharing a follow-up post soon with the full reveal of my bedroom makeover—stay tuned! In the meantime, check out my other post where I transformed an old wrought iron patio set with paint.
Adding hardware
I love to change or add knobs where I can; this adds a whole new look to a newly painted piece. For my credenza, I chose 30MM crystal knobs 12-pack that I bought on Amazon, which will carry out to my night tables so that they all have a cohesive look.
Now this is where I can add a finishing touch that can make an ordinary painted wooden furniture super special. This process, when used sparingly, can add a pop to any piece. I use Barnabas Blattgold’s genuine silver leaf. I like the sheets because they’re easier to manage, and you do not need a lot! First, I use Speedball Monalisa Adhesive. Use a small paintbrush and paint the area you want the foil to adhere to. Let the glue dry slightly so it’s tacky, then with a clean, small brush, carefully apply the foil to the glued area. I use painter’s tape to give myself a sharp, clean edge.
There you have it! My whole process on my painted bedroom pieces. I will follow up when I have the whole room redone. My end result will be spectacular! Check out my other post here, where I paint an old wrought iron patio set!
Supply List

- Silver leaf Sheets
- Metal Leaf adhesive
- Gliding Brush
- Purdy Brushes
- Painters Tape
- Poly acrylic sealer
- Benjamin Moore sample colors in grey
- Knobs Diamond Shaped Crystal Glass 30mm Cabinet Knobs
Extra Tips for Painting Wood Furniture Like a Pro
Before you begin, make sure to work in a well-ventilated area to avoid paint fumes and ensure faster drying time. If your piece has hardware, drawers, or doors, remove or label them before painting. This will help you achieve clean edges and an even finish.
When applying paint, use long, smooth brushstrokes and avoid over-brushing, this can cause visible lines or texture. Allow each coat to dry completely before adding another, following the drying times listed on your paint can. Patience here really pays off with a professional, durable finish.
If your furniture has any dents or scratches, take a few minutes to fill them with wood filler and lightly smooth the surface once dry. This small step makes a huge difference in the final look.
Finally, always allow your newly painted piece to cure for several days before heavy use. Even though paint may feel dry to the touch, it needs time to fully harden. This ensures your hard work lasts for years and continues to look freshly painted.
Additional DIY resources
Take a peek at some of my favorite DIY tools and supplies! These are the ones I reach for again and again in almost every project. Over time, I’ve built a collection of go-to essentials that make every DIY easier and more enjoyable.
Whether you’re just starting out or have a few projects under your belt, having the right tools can make all the difference. From reliable brushes and primers to sealers and finishing touches, these products help achieve professional results without the stress. I’ve tested and trusted each one through my own DIY journey, so you can feel confident using them in yours.
If you’re ready to get started on your next project—or simply want to upgrade your toolkit—head over and explore the items I swear by. They’re the same ones that help bring all my design ideas to life.
Video on silver leafing
In this video, you can watch how I silver leaf the detailed areas of my painted furniture project
Related posts
Here are some other posts you may find interesting if you liked this one!
- Sewing Machine Cabinet Repurposed Into a Stunning Bar Cart You’ll Love
- The Staircase Makeover That Transformed My Entire Home
- From Formal to Fabulous!Repurposed China Cabinet Makeover
More Furniture Painting and Makeover Help
Keep going with these related Double Arrow Designs guides:
- Furniture makeover ideas and before-and-afters
- How to paint outdoor metal furniture
- How to paint wicker furniture
- Metallic painted dresser makeover
- Choosing furniture pulls and knobs
Thanks for stopping by!

This post is all about how to paint wood furniture
Last update on 2026-07-25 / Affiliate links / Images from Amazon Product Advertising API