The Staircase Makeover That Transformed My Entire Home
Staircase Makeover
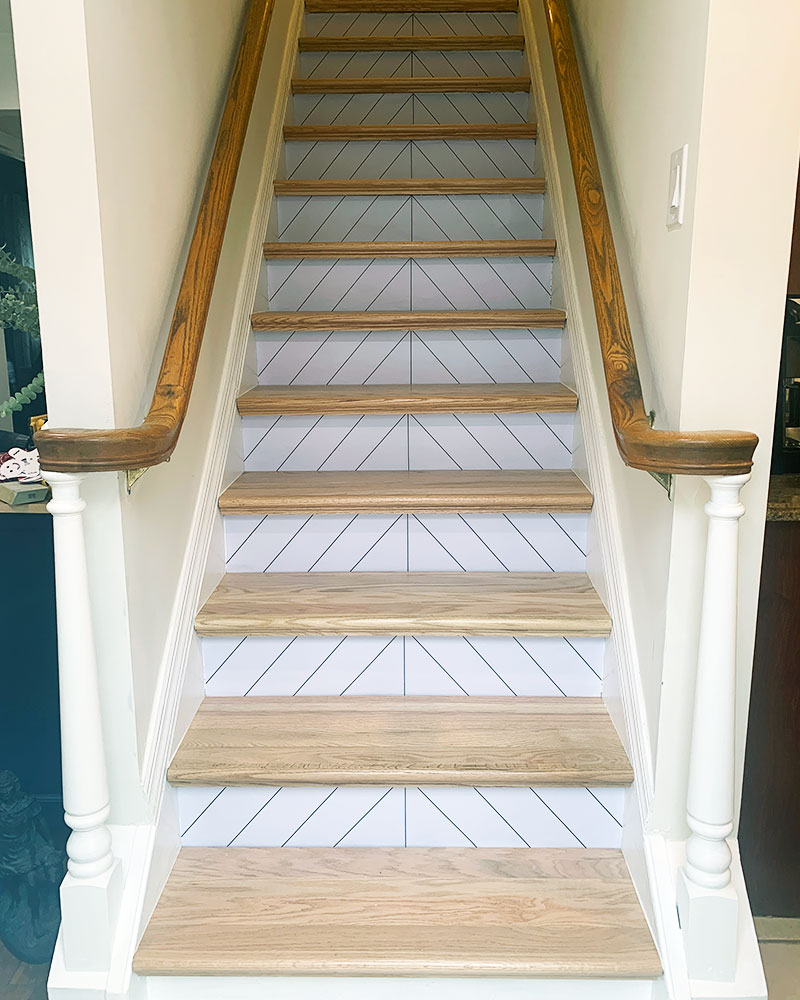
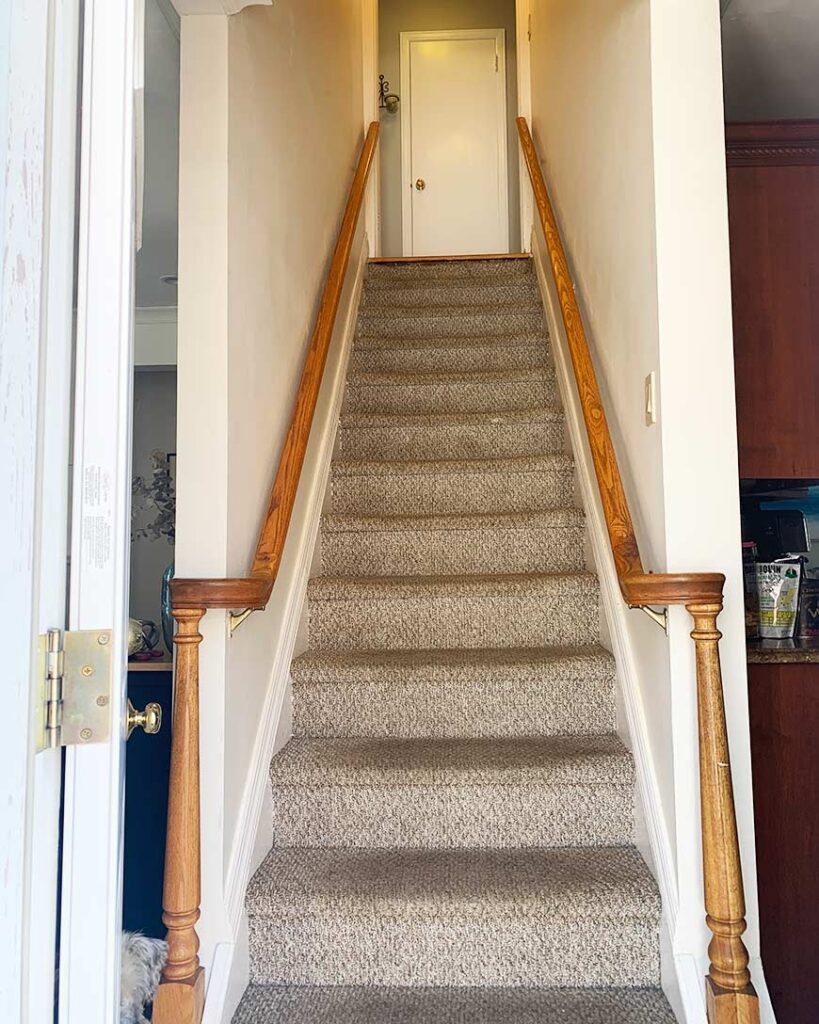
After living in my home for over 25 years, I decided it was finally time for a staircase makeover. My goal was to transform a dated, carpeted stairway into a bright and modern space that reflects the rest of my home’s style.
If you’ve been thinking about giving your stairs a refresh, follow along as I share the complete process—from painting and removing old carpet to installing new stair treads and adding peel and stick wallpaper to the risers.
My blog periodically contains affiliate links, meaning that if you make a purchase, I might make a small commission at no extra charge to you. Purchases made through them are greatly appreciated.
Skill Level: Intermediate DIY Project
Why: This staircase makeover involves multiple steps—painting, carpet and linoleum removal, light carpentry, and installing retrofit treads. While it doesn’t require professional experience, it does call for patience, basic tool knowledge, and careful measuring. If you’re comfortable with hands-on home projects, this one is definitely doable and incredibly rewarding.
Painting staircase walls
The first step in my staircase makeover was painting the stairwell.
Wall prep is key:
- Fill cracks with spackle
- Remove switch plates
- Cover banisters and trim with painter’s tape
I made these fun polymer clay light switch plates that I have now added to my staircase makeover. Take a look on how to make them in this post. Turn Plain Into WOW: DIY Polymer Clay Light Switch Covers
Since I planned to remove the old carpet, I left it in place to act as a drop cloth—it caught all the paint drips!
Painting is one of the quickest and most affordable ways to refresh any space, and this instantly brightened my staircase.
Materials and supplies for staircase makeover
Below are all the materials and supplies I used for this makeover. Take a look below for what I used and where to get the same or similar materials.
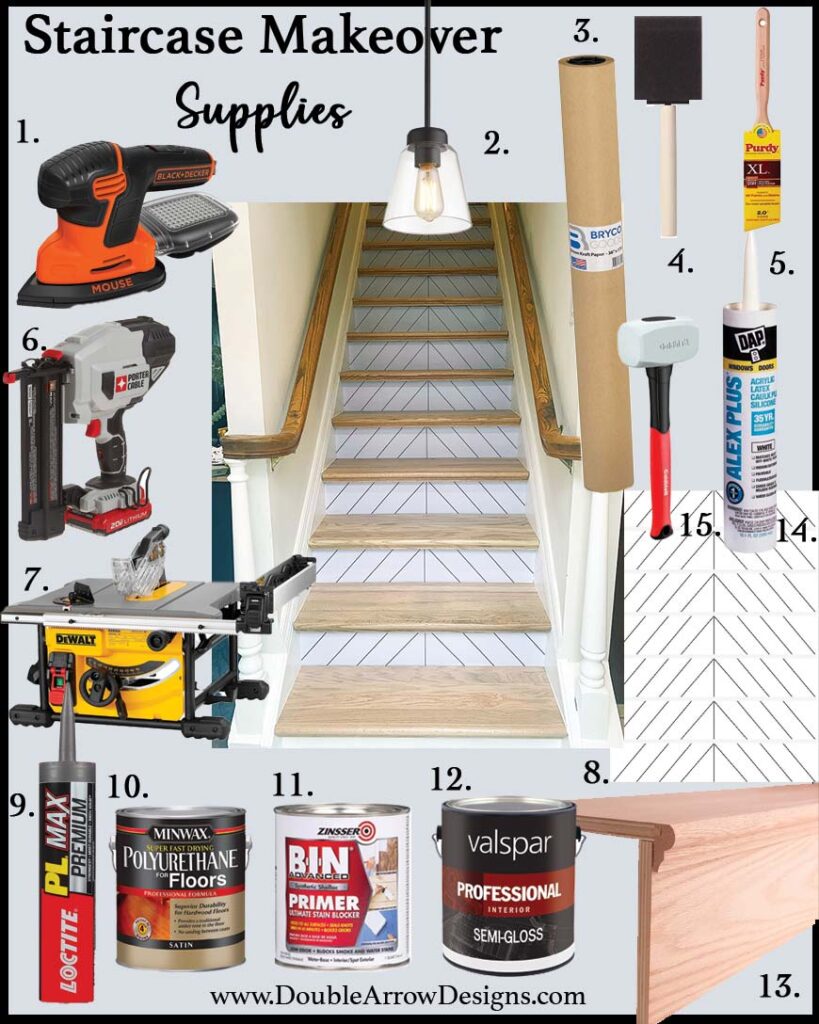
|| 1 || 2 || 3 || 4 || 5 || 6 || 7 || 8 || 9 || 10 || 11 || 12 || 13 || 14 || 15 ||
- Benjamin Moore paint- Swiss coffee
- Bin Primer
- Lighting- glass orb with retro bulb
- Mouse- sander
- Paint scraper
- Minwax-polyurethane
- Semigloss white paint
- Peel and stick wallpaper
- Table saw
- Sponge brushes
- Purdy brushes
- Retrofit wood steps
- Loctite PL Premium Max Construction Adhesive
- Porter-Cable nail gun
- Large Brown Kraft Paper Roll
- White Alex Plus Acrylic Latex Caulk with Silicone
- Rubber Mallet
This is my go-to power tool! I used it to refinish wood furniture and comes in handy as I do my staircase makeover. The pointed nose helps to get into corners and has a filter that catches some (not all!) of the dust.
No products found.I love my purdy brushes! Yes, they are more expensive than other brushes; however, if you clean and hang them to dry, these brushes will last you a long time. The angled head helps to make clean painter’s cuts for corners and next to moldings.
No products found.This is a similar light fixture that I installed in my hallway. This retro glass fixture was the perfect size for the top of my stairs. I installed a retro” Edison Bulb” to carry this feeling throughout. Just the right touch for the top of my new staircase!
Staircase Color Scheme
Before getting started, I looked to Pinterest staircase makeovers for inspiration. I chose Swiss Coffee by Benjamin Moore, a creamy white shade that I’ve used throughout my first floor. It keeps the stairwell bright and cohesive with the rest of my home.
Updating Staircase Lighting
My stairwell had an outdated chandelier at the top, so I swapped it for a sleek glass shade to modernize the space. I also replaced old switch plates with lighter-colored ones to blend better with the new paint.
Removing Old Carpet from the Stairs
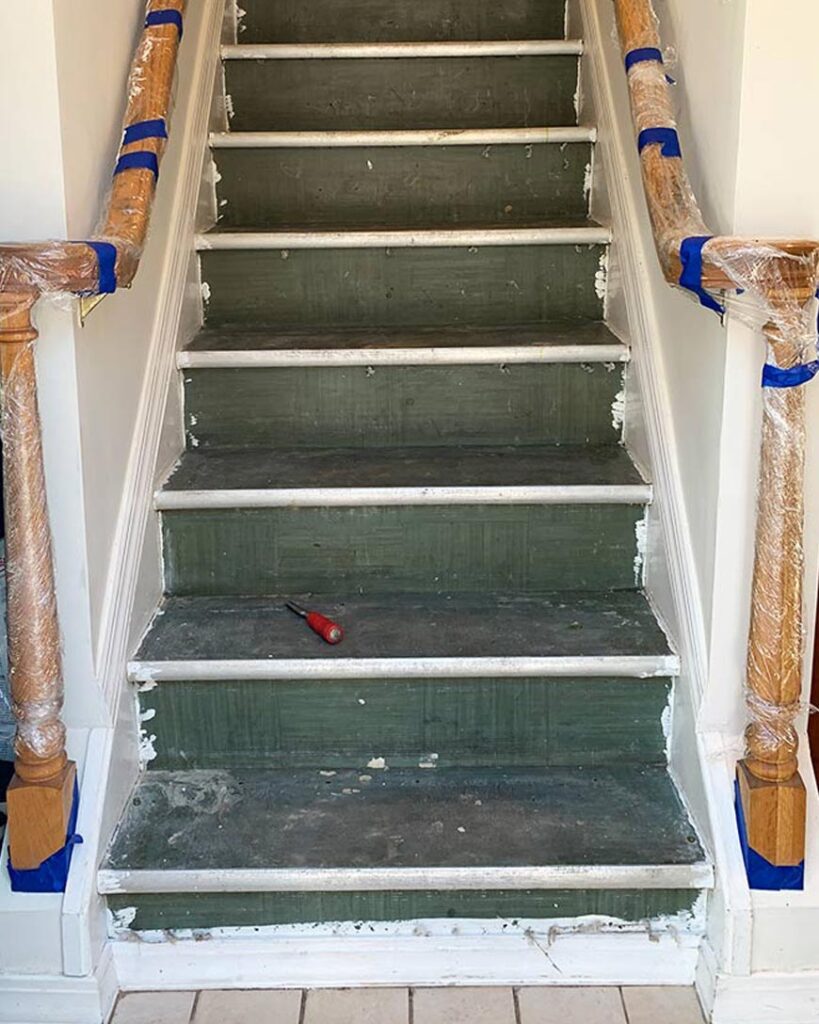
Once the walls were painted, I tackled the carpet removal. With gloves and goggles on, I carefully pulled up the carpet and padding, rolled it up, and set it out for curbside pickup.
Underneath, I found linoleum tiles—very 1950s, which makes sense since my house was built then.

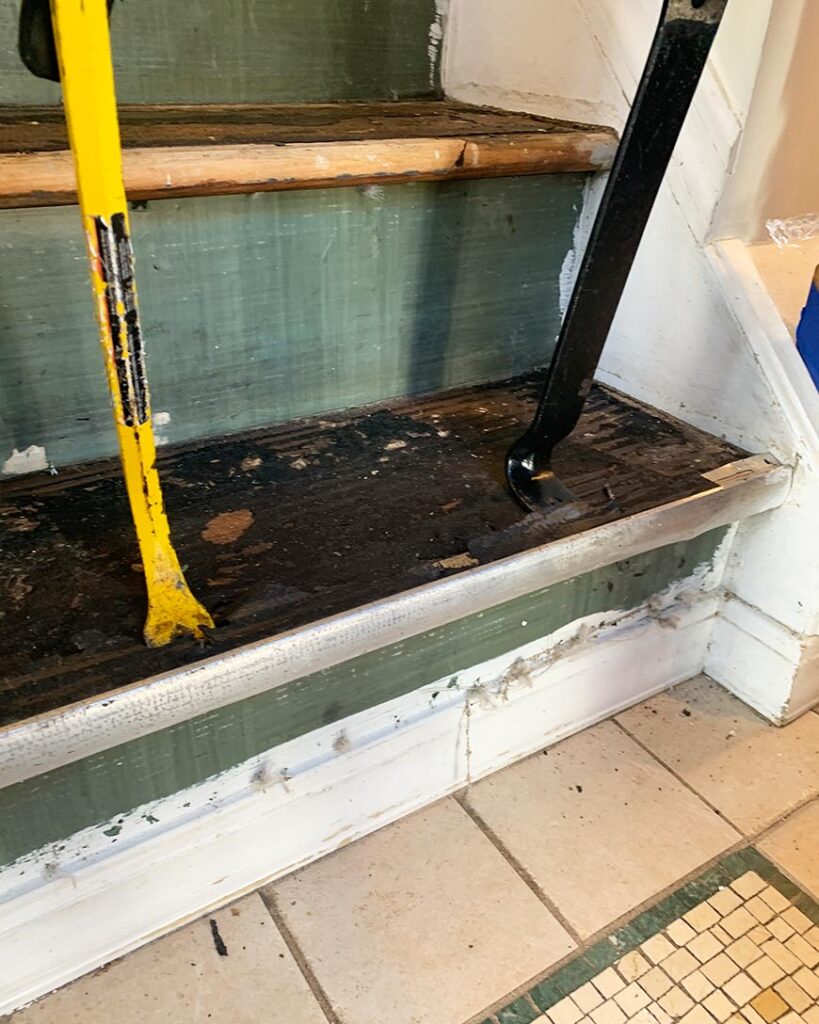
Removing Linoleum from the Staircase
My husband Brian and I worked together to remove the linoleum tiles and metal stair-edge guards using a crowbar. Because this was a big job, we decided to leave the linoleum on the risers (the vertical parts of the stairs) and cover them later with peel and stick wallpaper for a modern look.
To protect our floors from the tar residue underneath, we taped down 36″ wide construction paper to catch debris as we worked.
How to refinish stairs
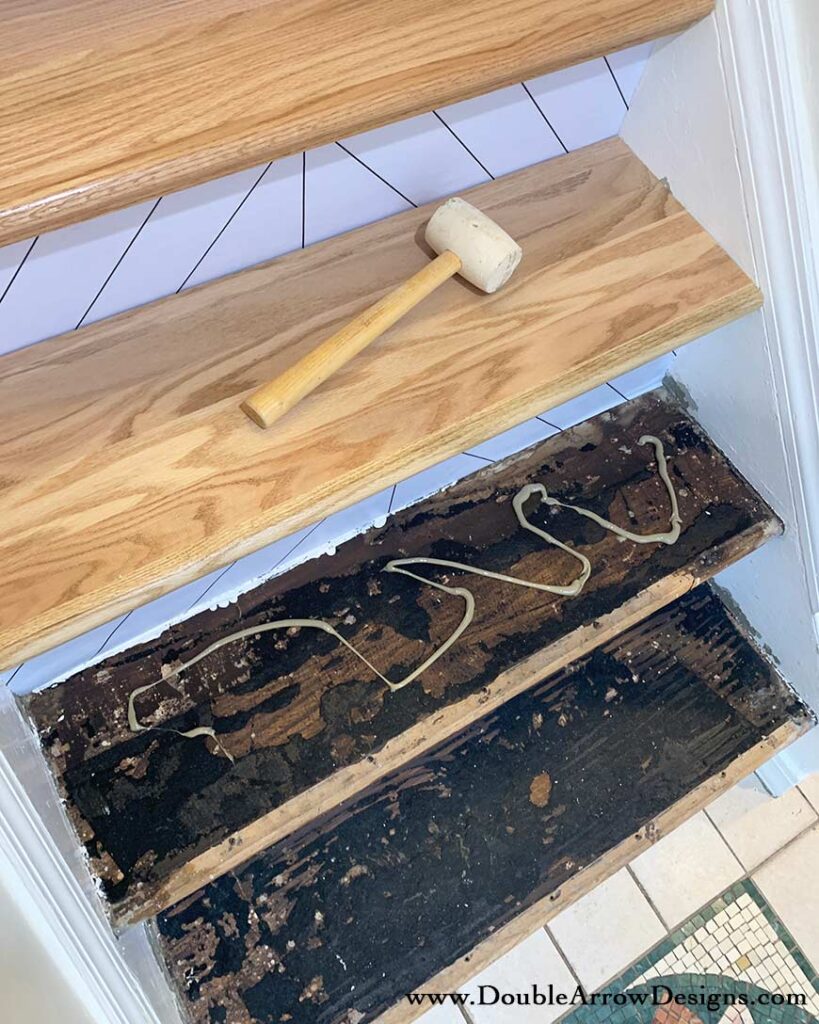
My first plan after removing the linoleum was to use a heat gun and tackle the tar paper and glue that was slathered on generously to hold down the linoleum tiles. But after seeing that these beautiful wood stairs were beyond glue stripping I went to plan B.
No products found.Since removing all of this would not guarantee a consistent look on my wood stairs, I decided to purchase retrofit stair treads. I bought mine at Lowe’s. Above are similar retrofit stair treads that you can buy on Amazon.
The shortest I was able to find was 35″. My stairs length measures 34 3/4″ (on most!,) which was the smallest length I could find, so I will have to cut these down to fit.
Refinishing and Installing New Stair Treads
Originally, I planned to strip the glue and tar paper with a heat gun. But once I saw the condition of the wood beneath, I switched to Plan B: retrofit stair treads.
I found beautiful options at Lowe’s and on Amazon. Each tread needed to be cut to fit my 34¾” stairs. With the help of my neighbor’s table saw, we measured and cut each one, then installed them using:
- Wood glue
- Rubber mallet for tight fits
- Nail gun with 4–6 nails per step
Because the stairs weren’t perfectly square, I sealed the edges with two coats of acrylic/silicone caulk for a clean, finished look.

Sealing the New Wood Stairs
Before installing, I pre-finished the treads with two coats of satin polyurethane, formulated for hardwood floors. This gives a durable, low-sheen protective finish without needing sanding between coats.
Pro tip: Use sponge brushes for smooth coverage and easy cleanup!
Adding Peel and Stick Wallpaper to Stair Risers
With the stairs complete, I moved on to the stair risers. I primed them with Zinsser BIN Primer and one coat of semi-gloss white trim paint for a clean base.
Then, I applied peel-and-stick wallpaper—a quick and creative way to add personality. The set I used was precut for stair risers, but you can use any pattern you like. Just remember to:
- Trim edges with a sharp blade
- Match the pattern at the center of each riser
- Smooth with a wallpaper tool
This is what I used on my specific project. I bought peel-and-stick wallpaper that was designed and made specifically for stair risers; however, you can use any peel-and-stick wallpaper you like, but you will have to consider these points below if you do. Since this product was precut for standard risers, all I had to do at the end was trim the length once I adhered them to my risers:
- Match the pattern by penciling the middle of each step & riser to match all the lines
- Once smoothed on using a peel and stick smoother, use the edge of this and a blade and trim both side edges.
staircase Makeover Video
I did a TikTok video where you see from beginning to end my staircase DIY project.
Staircase Makeover Maintenance, Cost, and Design Tips
Once your staircase makeover is complete, it’s important to protect your hard work so it continues to look great for years to come. Here are a few helpful maintenance, cost, and design tips to keep your new stairs looking beautiful and functional.
Staircase Maintenance Tips
- Clean regularly: Use a soft microfiber mop or vacuum attachment to remove dust and debris from the treads and risers. Avoid excess water when cleaning to prevent warping or bubbling under the wallpaper.
- Protect high-traffic areas: If your stairs get a lot of use, consider adding small stair treads or non-slip runners. These protect the wood and add safety.
- Check for wear: Every few months, inspect the caulk seams and reapply if necessary. This prevents gaps that can collect dust or moisture.
- Touch-up paint: Keep extra paint and wallpaper scraps on hand for quick fixes if scuffs or scratches appear.
- Touch-up paint: Keep extra paint and wallpaper scraps on hand for quick fixes if scuffs or scratches appear.
- Cost Breakdown and Budget Tips
- One of the best parts about this DIY staircase makeover is that it’s budget-friendly compared to a full renovation. While costs can vary, here’s an approximate breakdown for a mid-size staircase:
- Paint and primer: $50–$75
- Retrofit stair treads: $200–$400 (depending on number of steps)
- Peel and stick wallpaper: $25–$50
- Polyurethane and brushes: $40
- Caulk and adhesives: $20
- Overall, this entire transformation can be completed for under $600–$700, far less than hiring a professional for thousands.
- Design and Style Considerations
- Your staircase connects multiple levels of your home, so think of it as a design bridge between rooms. Choose colors and finishes that complement adjoining areas.
- Neutral tones like whites, creams, and warm woods help create an open, cohesive look.
- Patterned risers with peel-and-stick wallpaper add a pop of personality without overwhelming the space.
- Lighting upgrades can make a narrow stairwell feel larger and more inviting.
- If you’re short on natural light, use a semi-gloss paint finish on your walls—it reflects light beautifully and keeps the stairwell bright.
Three other options for your risers:
- Finish the wood risers and seal- You can also stain this portion a darker color to add some dimension
- Paint the risers either in a white or a pop color and leave them solid or add a stencil.
- Use peel-and-stick wallpaper for a fun pattern on the risers. Check out this post here for using peel-and-stick wallpaper on your staircase or other design projects. 9 Peel And Stick Wallpaper Ideas.
Other riser ideas:
- Stain or seal wood for a natural look
- Paint with a bold color or stencil design
- Mix patterns for a unique statement staircase
You can explore more ideas in my post: 9 Peel and Stick Wallpaper Ideas for Your Home
Download my free stencils if you are up for a bigger challenge and own a Cricut or Silhouette machine to make your own stencils.
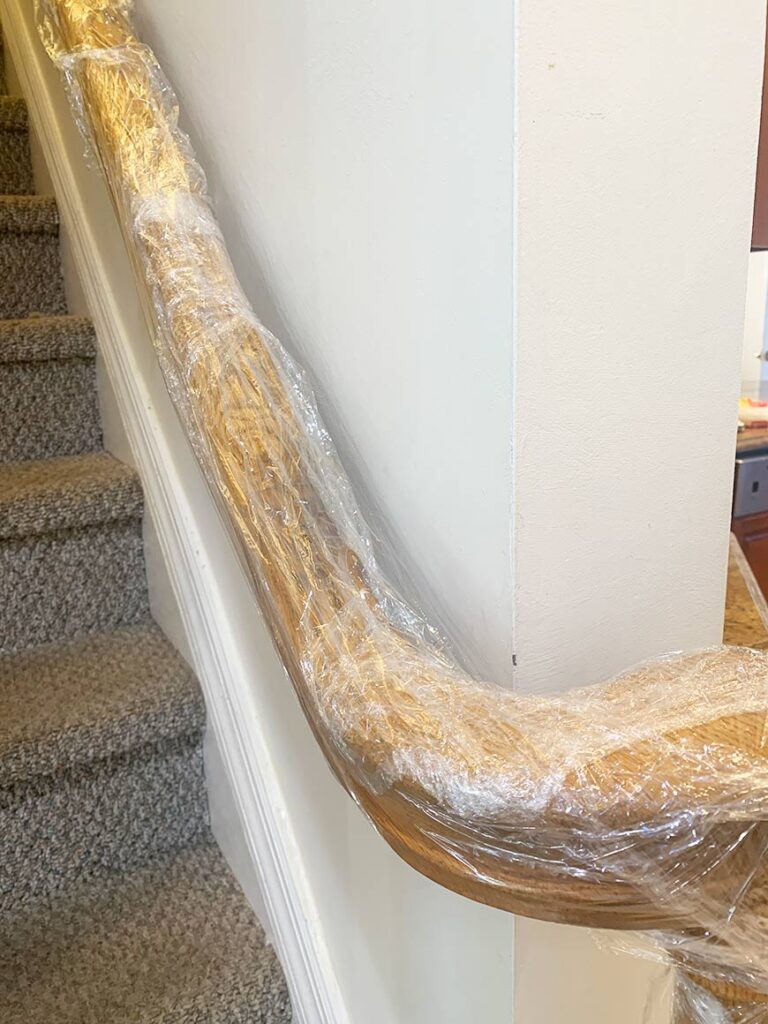
Refreshing the Staircase Banisters
My banisters run up both sides of the wall. Since I had added new treads, I decided to leave the natural wood but painted the base supports trim white to break up the brown tones.
You can also choose to paint, stain, or refinish your banister depending on your design style.
Final staircase makeover results
There you have it! Took a few weeks and some hard work, but love the finished results of my staircase makeover.
Redoing a staircase is a transformative home improvement project that can significantly enhance both the aesthetic and functional value of your home. Whether it’s through simple updates like repainting or refinishing, or more extensive changes such as installing new treads, risers (adding peel-and-stick wallpaper to them!), or handrails, a staircase makeover can breathe new life into your space. Thoughtful material choices, attention to design, and a balance between style and safety ensure that the staircase becomes a standout feature in your home while complementing the overall décor. Ultimately, this project offers a great return on investment, elevating both the look and feel of your interior spaces.
Final Thoughts: Why a Staircase Makeover Is Worth It
Redoing a staircase is a truly transformative home improvement project. Whether you paint, refinish, or completely rebuild, a staircase makeover enhances both the style and function of your home.
By combining DIY creativity, smart material choices, and a touch of personal design, your staircase can go from overlooked to eye-catching—adding beauty, value, and a sense of pride to your space.

RELATED POSTS
If you found this post useful, then check out some additional posts below that you may find interesting! Or go to Double Arrow Designs’ main page and explore all of the projects that I have created in the last few years.
- 9 Peel and Stick Wallpaper Ideas That Will Make Your Space a Wow Factor
- Bedroom Wallpaper Feature Wall That Looks Amazing!
- Repurposed China Cabinet
Thanks for stopping by!

This post is all about staircase makeovers
Last update on 2026-07-14 / Affiliate links / Images from Amazon Product Advertising API