DIY polymer clay Coasters Inspired by Vintage Playing Cards
These fun graphic polymer clay coasters were created as a gift. Making these was a lot of fun and will add a great little statement to any bar cart or living space. They are incredibly easy to make, especially with the stencils I have created specifically for these. I decided on 2 black and 2 red cards for a fun “mini deck” to keep the look cohesive yet playful.
Whether you are looking for a unique handmade gift for a card player or just want to level up your own coffee table decor, these DIY clay coasters are the perfect weekend project.

Why You’ll Love This Clay Project
Clay is one of my favorite mediums because it is so forgiving for beginners. Using a “mini deck” theme (two red suits, two black suits) creates a professional, curated look that fits perfectly in a modern home or a classic game room. Plus, with the custom stencils, you don’t need to be an artist to get those crisp, graphic lines!
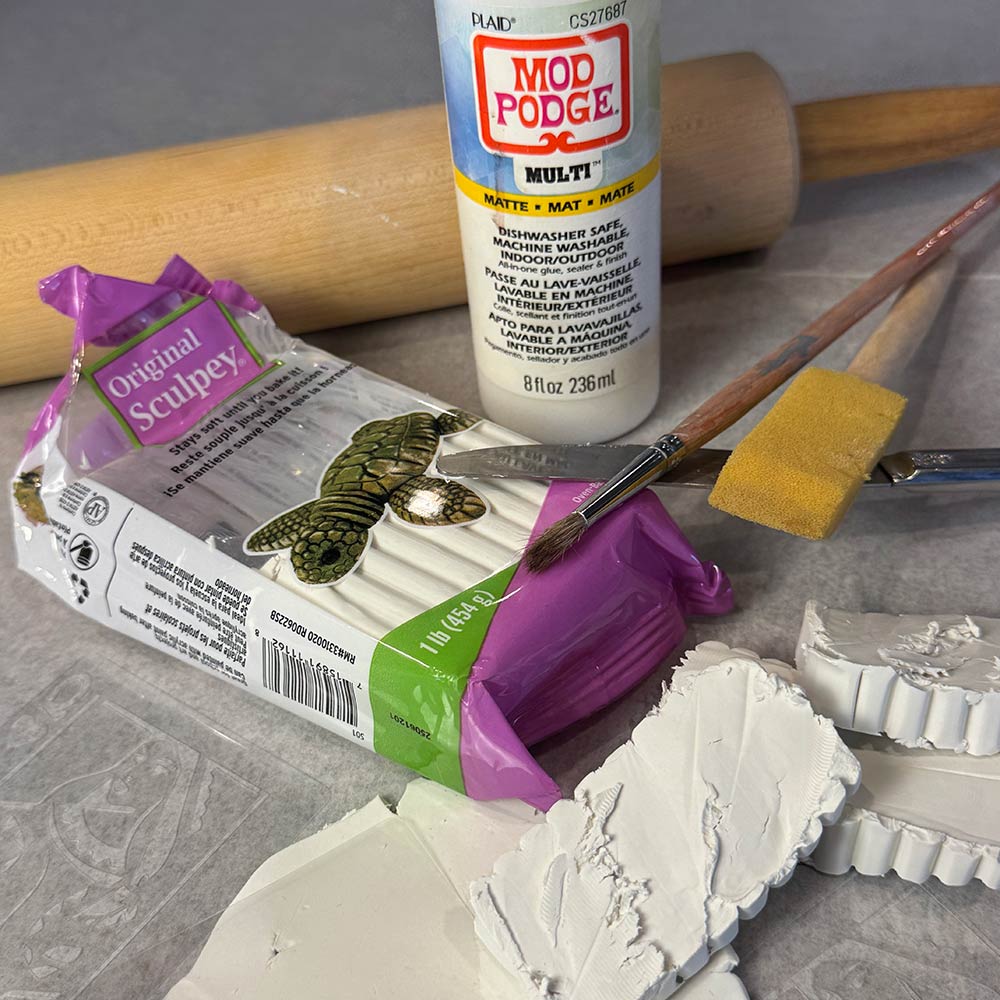
Supplies You’ll Need
- Air-Dry Clay or Polymer Clay I have been using Sculpey polymer clay
- My Custom Playing Card Stencils (Available for download here!)
- Rolling Pin (or an acrylic set)
- Craft Knife– you can also use an exacto or small knife
- Acrylic Paint (In “True Red” and “Lamp Black”)
- Fine-Grit Sandpaper– to smooth out edges or surfaces
- Mod Podge– to seal stencils
- Waterproof Sealer– I use Monwax polyacrylic sealer you can also decide on a glossy or matte finish
No products found.
No products found.
No products found.
No products found.
No products found.
No products found.
No products found.
How to Make Clay Playing Card Coasters
Step 1: Roll and Prep
Start by conditioning your clay until it’s soft. Roll it out to an even thickness—about 1/4 inch is ideal for a sturdy coaster.
Pro Tip: Use two flat wood strips or pencils on either side of your clay while rolling to ensure the thickness is perfectly even across all four coasters.
Step 2: Cut the “Cards”
Place your rectangular card stencil over the clay. Using your craft knife, carefully cut out four identical rectangles. Gently smooth the edges with a wet fingertip to save yourself sanding time later if using air dry clay.
Step 3: Let Them Dry
If you are using air-dry clay, let it sit for 24–48 hours. If you are using polymer clay, bake it according to the package instructions. For these playing cards, I bake for 15 minutes at 275 degrees farhenight. To avoid curling, I place a heavy pan on top while cooling for about an hour, then I rebake for another 15 minutes, again adding a heavy pan on top. The second baking helps to really cure the clay. Once they are completely hard, use your fine-grit sandpaper to smooth out any rough edges or bumps.
Step 4: Stencil the Suits
This is where the magic happens! Lay your suit stencils on top of the baked shapes. Then mod podge over the stencil, this creates a seal. Let this fully dry so that when you stencil on the paint, it does not bleed under the stencils

Stencilng, using acrylic paint and a flat head brush or sponge brush. important to dab, stipple paint in layers. let dry then do another layer of paint to make sure areas are covered. Before last coat of paint dries, use either a tweezer or utility knife and gently pull stencil off.
- For the Red Cards: Use your red acrylic paint for the Hearts and Diamonds.
- For the Black Cards: Use your black paint for the Spades and Clubs. Use a dabbing motion with a sponge brush to prevent the paint from bleeding under the stencil.


Step 5: Seal for Protection
Since these will be holding drinks, you must seal them! Apply a thin layer of waterproof sealer. I prefer a glossy finish because it mimics the look of a real laminated playing card. Minwax polyacrylic sealer works great! You can take this a step further and use a cork layer on the bottom, I did not on mine.
No products found.
Get the Look: Shop the Stencils
Ready to start your own mini-deck? Head over to my Etsy store to grab the stencils I designed specifically for this project. Don’t forget to use code SAVE20 for your discount! I have created 4 designs, Ace of hearts, Ace of Diamonds, Queen of Spades and Queen of Clubs. If you are looking for any additional playing card stencils, please email me and I can create them!
[ SHOP THE PLAYING CARD STENCILS HERE ]
Making these coasters was such a blast, and they look so high-end on a bar cart. If you make a set, I’d love to see them! Tag me on Instagram or leave a comment below with which suit is your favorite.
Playing card coasters
Not everyone is a DIY fan, and that’s perfectly okay! If you’d rather skip the clay and stencils, you can still get that high-stakes look for your home.
Below are some of the best playing card coasters available to buy right now. Whether you want the classic feel of absorbent clay or the sleek look of glass and wood, these are perfect for adding a little “statement” to your bar cart or living space.
Top Picks for Every Style
- The Playing Card Coaster Set –For a Sleek, Modern Look: is made from fused glass with a clear cap. They are sturdy, have a nice weight to them, and are even dishwasher safe, making cleanup a breeze.
- Ace Playing Cards Coaster Set– 3D Printed set of four with their own holder for a neat display.
- Playing Cards Stone Coasters Set-Each tumbled stone coaster is unique and customizable. You might see visible imperfections, as it is the nature of the coasters. Thus, it creates a hazy texture on each tile.
- Play my Ace mug rug – a handmade punch needle coaster? obsessed. cute, functional, and the perfect little desk accessory to keep things looking good while staying protected.
Ready made playing card coasters
If you’re ready to add a touch of Vegas style to your home without the DIY effort, there are some incredible ready-made options available. From highly absorbent bisque clay that mimics a hand-sculpted feel to sleek, modern glass designs that look stunning on a contemporary bar cart, these professional sets offer durability and high-end finishes. Whether you prefer a vintage distressed look or crisp, graphic suits, buying a pre-made set ensures your furniture is protected with style while you focus on hosting the perfect game night. Check these out below for some fun options.

There is something incredibly satisfying about setting a drink down on a piece of decor you made with your own two hands. These clay playing card coasters aren’t just functional; they are a conversation starter. Whether they are sitting on your coffee table during a quiet morning or styled on a lively bar cart during game night, they add that perfect touch of whimsical, handmade charm that big-box stores just can’t replicate.
I hope this tutorial inspired you to roll out some clay and get creative! DIY projects like this are a reminder that you don’t need a massive studio or expensive equipment to create something that looks professional and high-end. With just a bit of patience and the right stencils, you can create a customized “mini deck” that makes for an unforgettable gift—or a treat for yourself.
If you’re ready to start your own set, don’t forget to head over to my Etsy store to grab the exact stencils I used. Use the code SAVE20 at checkout to enjoy 20% off your order as a special thank you for being a part of this community.
I can’t wait to see how your coasters turn out! Be sure to share your photos and tag me so I can see your beautiful “mini decks” in action. Happy crafting, and may your next game night be your most stylish one yet!
Related posts
Explore More Creative DIY Projects
Love getting crafty? If you enjoyed making these clay coasters, you will love these other fun, graphic DIY projects! Whether you’re looking for more home decor ideas or the next perfect handmade gift. If you’re ready to keep the creative momentum going, there is no shortage of ways to use your craft supplies to transform your home. From exploring different textures to mastering new painting techniques, these projects are designed to be approachable, stylish, and completely customizable to your unique aesthetic. check out these reader favorites:
- Turn Fall Postage Stamps Into Adorable DIY Polymer Clay Magnets
- Turn Plain Into WOW: DIY Polymer Clay Light Switch Covers
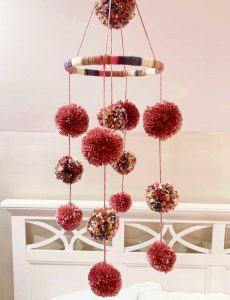
- How to Make the CUTEST Pom Pom Mobile, the Sweetest DIY for Kids Rooms or Nurseries
Thanks for stopping by!

This post is all about DIY clay playing card coasters
Last update on 2026-07-30 / Affiliate links / Images from Amazon Product Advertising API