How to Refinish Metal Outdoor Furniture for a Fresh Look
How to refinish metal outdoor furniture
Let me show you how I revived a tired, rust-covered patio set and gave it a fresh new life with just a little prep work, some paint, and a whole lot of love. I will show you how to refinish metal outdoor furniture in steps below. Also, how to re-upholster cushions to complete the set!
Note: My blog periodically contains affiliate links meaning that if you make a purchase, I might make a small commission at no extra charge to you. Purchases made through them are greatly appreciated.
Starting Point: A Rusty Relic
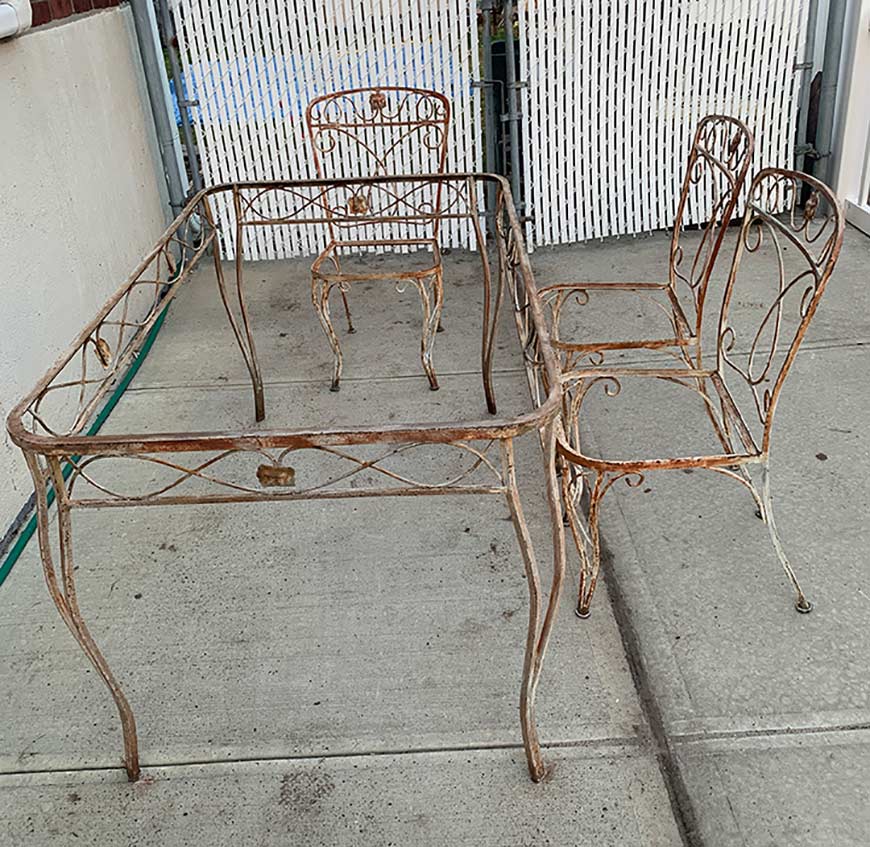
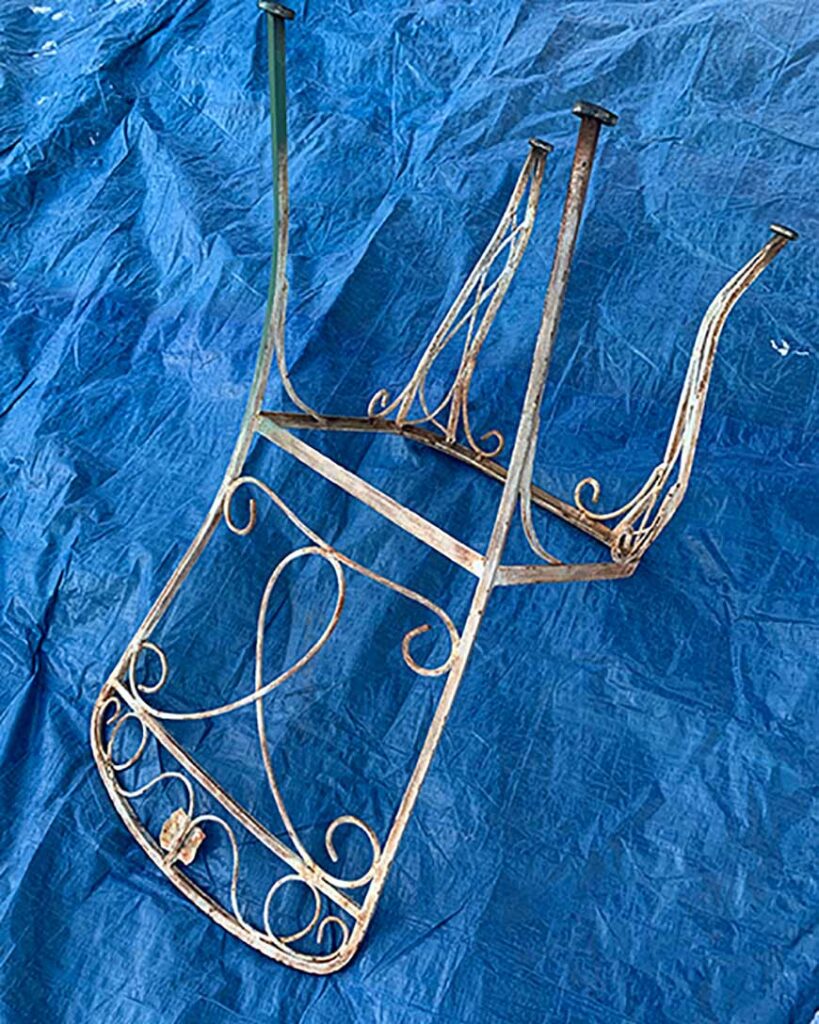
This set had never been repurposed. It still wore its original coat of white paint—what was left of it anyway. Years of weather exposure left a patina of rust across every inch. The old wooden seats were bare, with no cushions in sight. It needed some TLC. But I loved the wrought iron design and knew I could make this into a gem!
Side note: This was a piece from my childhood, so it had extra special sentiment and motivation to make this metal patio set redo!
STEPS TO REPURPOSING A PATIO SET
Prep Is Everything
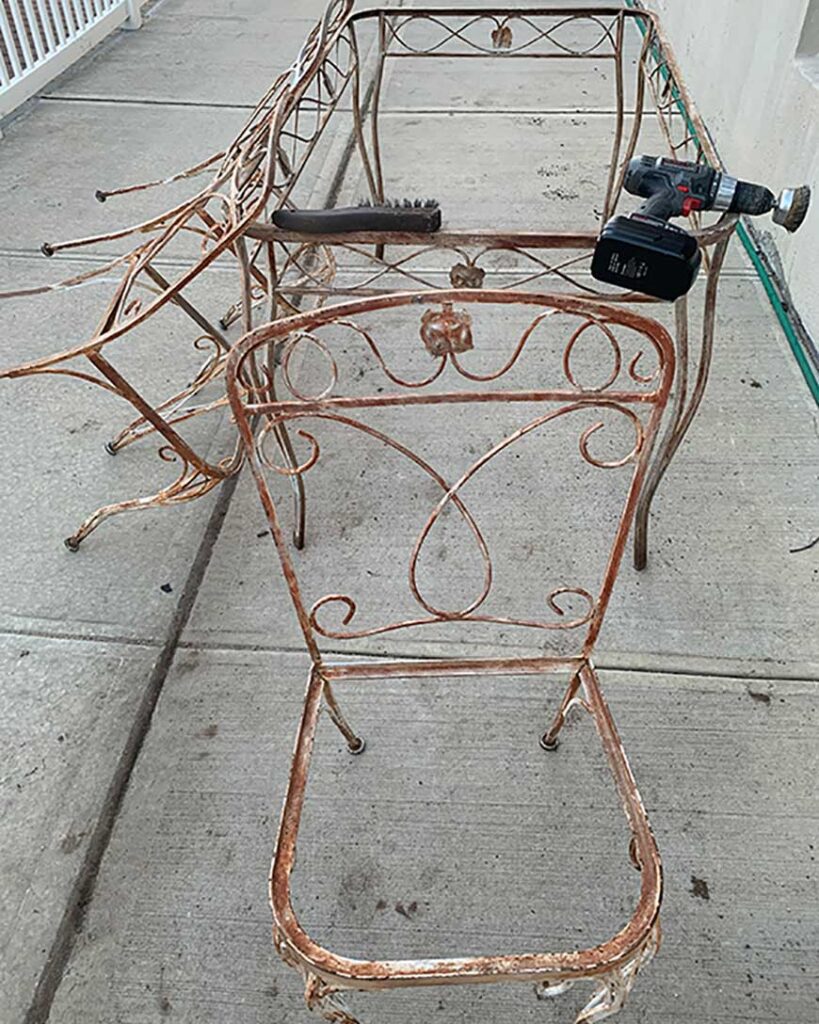
Don’t skip this part! Good prep work is the secret to a smooth, lasting finish. Wipe everything down with a damp, clean rag to get rid of lingering dust or flaking paint. Use a wire brush for smaller areas or a power tool with a wire brush attachment to remove peeling paint and surface rust. Also, depending on your piece, you can use a paint remover.
Time to Paint
Here’s where the magic happens.
- Lay a tarp outside and place each piece of the patio set upside down.
- I used Rust-Oleum spray paint—and trust me, this stuff works. Spray in light, even strokes to avoid pooling and drips. You can always add more coats as needed.
- Flip the pieces right-side up and repeat for full coverage.
- Then turn it on its side and keep spraying. Make sure that you walk around the piece to find any surface that may have been missed when being sprayed.
- Work in layers; this will help avoid the buildup of spray paint, which can lead to drips on the surface.
No products found.
No products found.
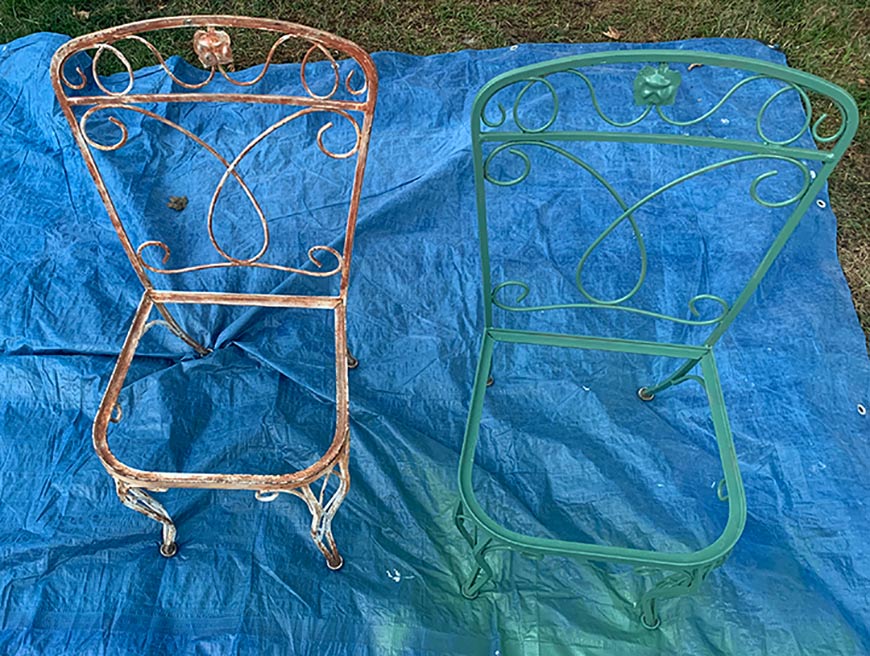
Color Choice
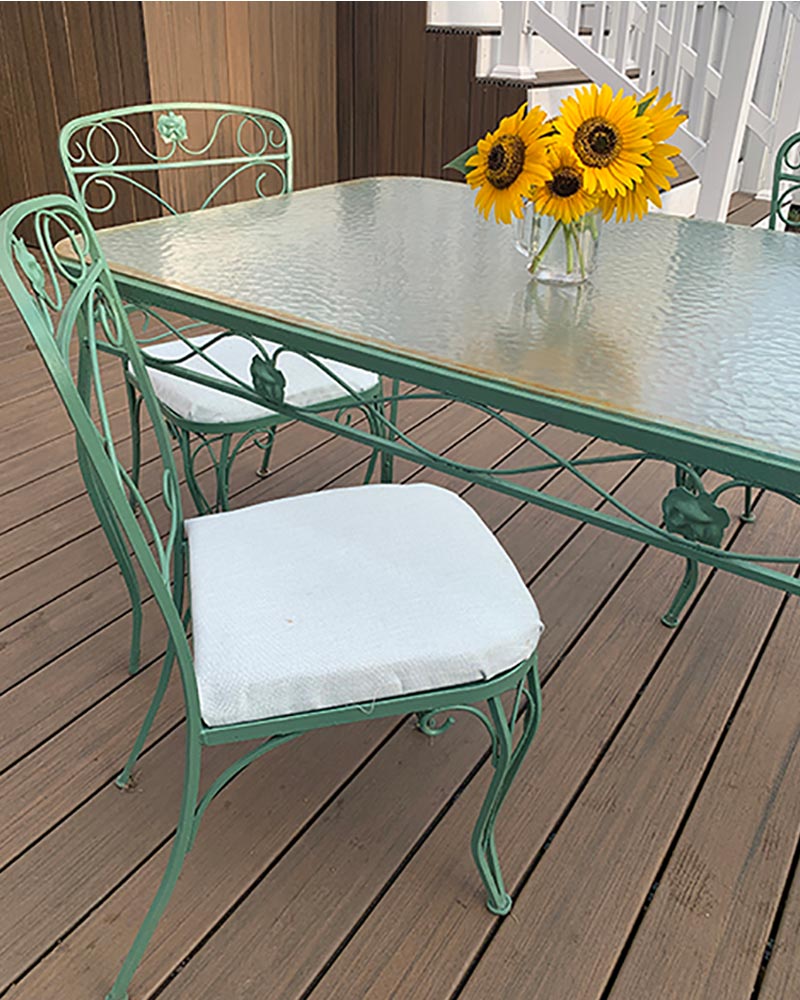
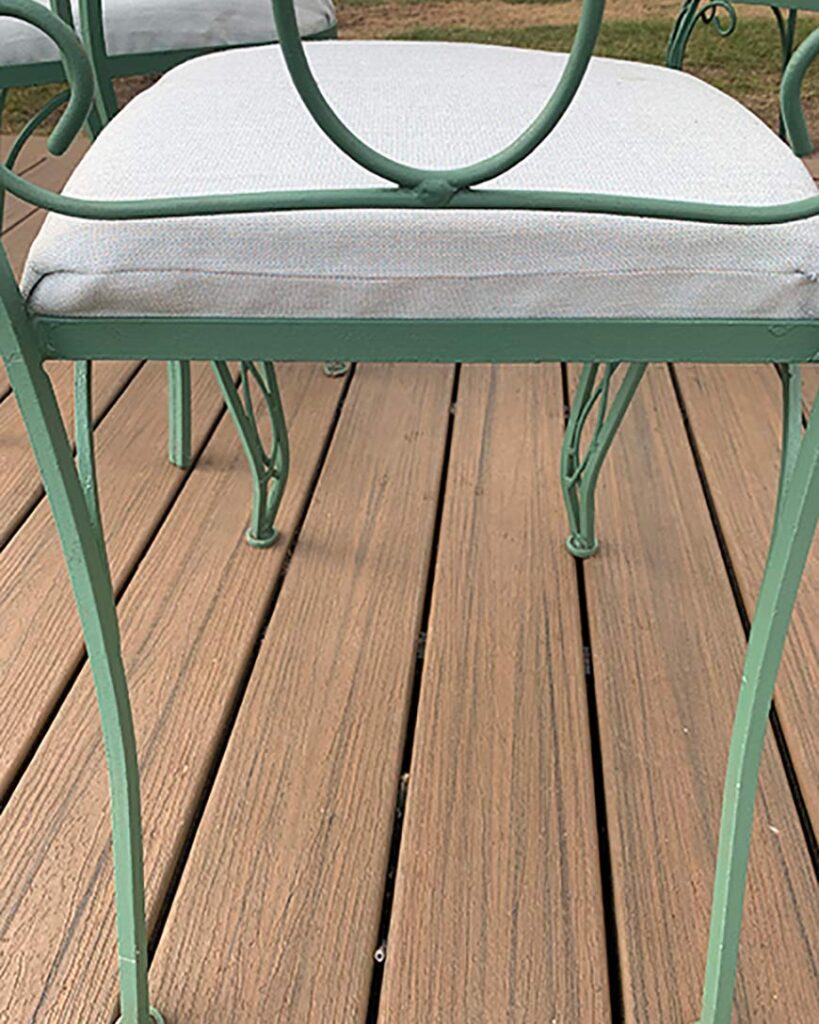
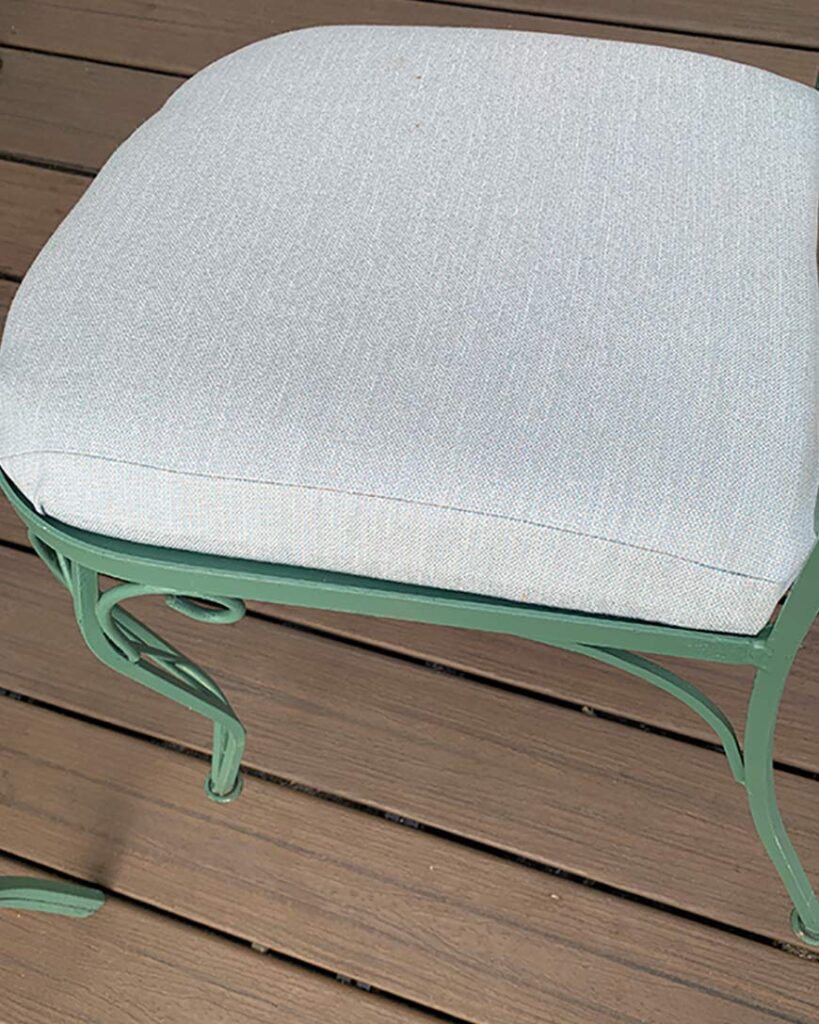
I fell in love with the color: Rust-Oleum Vintage Teal in a satin finish. This color is a neutral but fun choice, and the satin finish gives a smooth, clean look. The final result was even better than I imagined.
Pro tip: Spray paint has a way of getting everywhere and sticking to anything nearby. Do yourself a favor—always spray outdoors, give yourself plenty of space, and make sure there’s nothing around that you don’t want accidentally painted.
4: (Optional) Seal It In
While I didn’t use a sealant on this particular project, I’ve used Minwax Polycrylic spray sealant on other pieces, like a wicker chair, and it’s a great way to lock in color and add extra protection against the elements.
5: Keep It Looking Fresh
Outdoor furniture takes a beating from the weather, so don’t toss that spray can! Keep a can of your paint color on hand for easy touch-ups throughout the season and years to come.
Let this be your reminder: just because it’s rusty doesn’t mean it’s ready for the curb. With the right steps, a little creativity, and a pop of color, you can breathe new life into even the most worn-out patio sets.
For a deeper guide to cleaning, rust prep, primer, and spray painting outdoor metal furniture, see my full outdoor metal furniture painting guide.
Repurposed Patio Furniture Seat Covers
With the freshly painted frames looking brand new, it was time to give the seat covers a stylish upgrade too, and I did it all using leftover outdoor fabric and materials I already had on hand!
1: Make Use of What You’ve Got
I started with the original wood inserts from the seats and used them as templates to trace and cut foam I had left over from a previous project. These made for the perfect template and fit the seat frame perfectly.
2: Choose Durable, Outdoor-Friendly Fabric
For the covers, I used a Sunbrella fabric in the color Hybrid Sky—the same one I used a few years ago to upholster my kitchen stools. It’s designed for high-traffic and outdoor areas, making it the perfect choice for patio furniture.
While Sunbrella fabric isn’t exactly budget-friendly, the good news is you won’t need much. Depending on the fabric width and how you lay out your pieces, a yard or two can go a long way.
3: Maximize Your Material
Be strategic with your layout! By placing your templates thoughtfully, you can optimize your fabric and minimize waste. A little creativity here can save you both time and money.

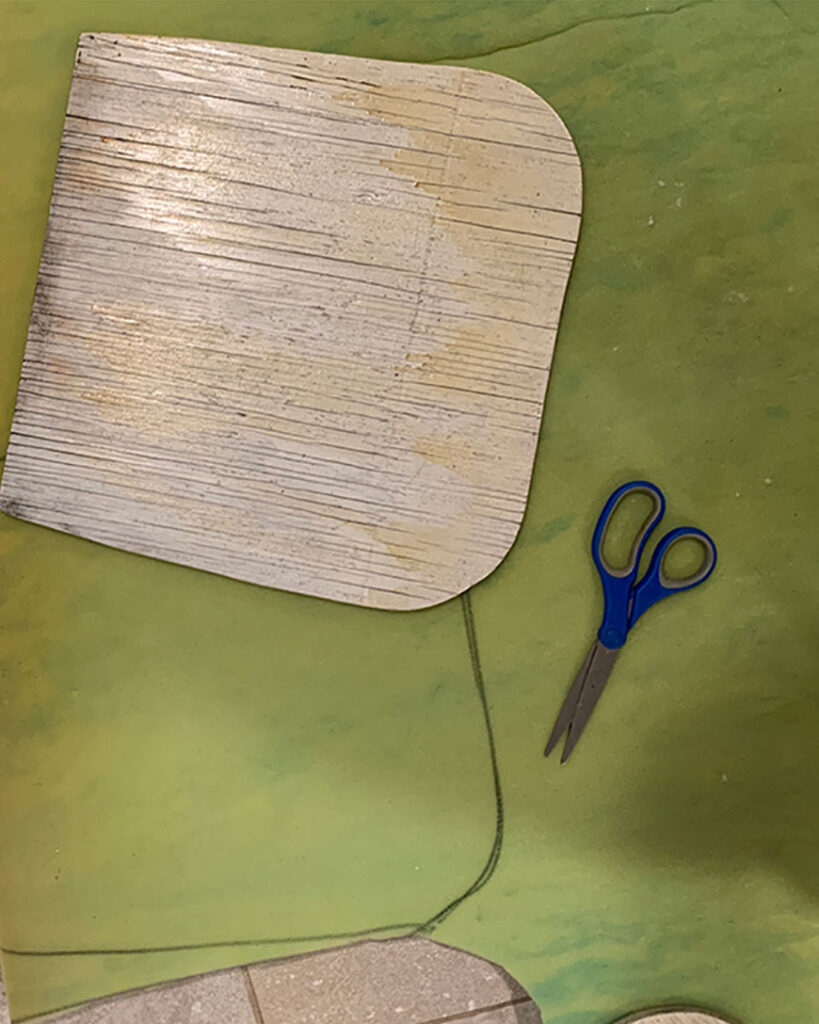
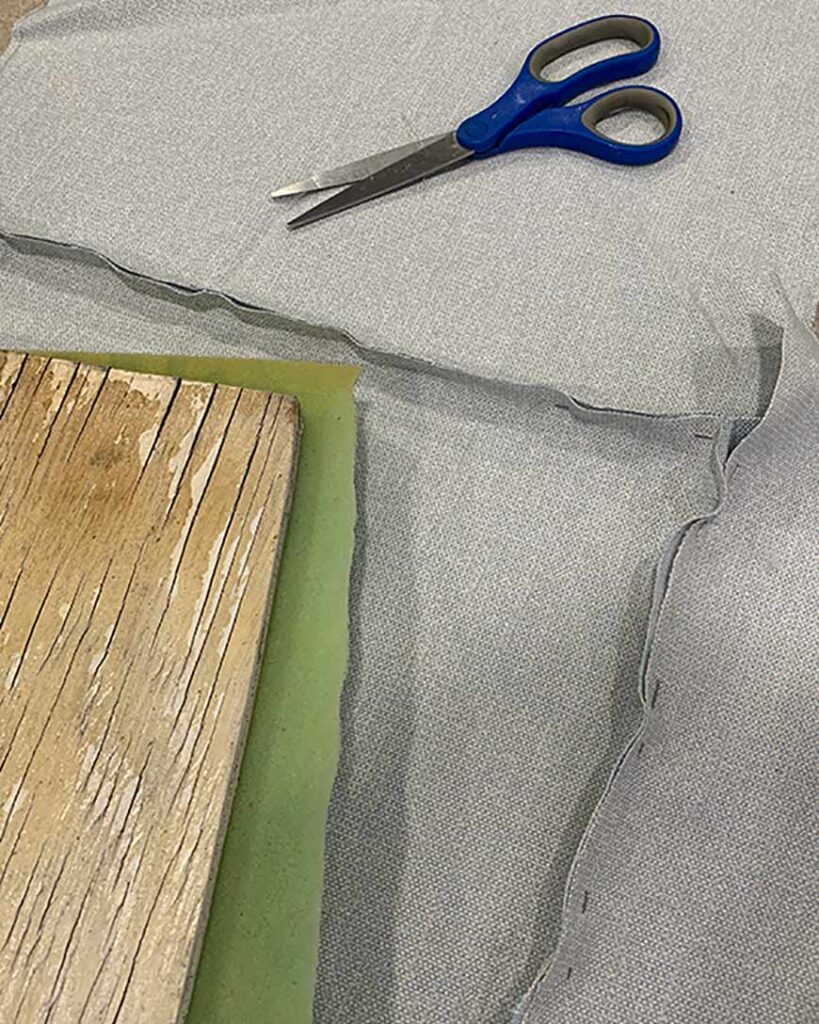
1: Cut the Foam to Size
Place your seat base (the wood insert) directly on top of the foam. Use it as a template to trace and cut the foam to the exact size and shape needed.
2: Choose the Right Fabric
Pick a durable outdoor fabric that can stand up to the elements. I used Sunbrella Hybrid Sky (originally from Mood Fabrics), but you can also find great options on Amazon. Look for high-performance, outdoor-rated fabrics.
3: Lay Out Your Layers
Stack your materials in this order:
Fabric (face down)
Foam
Seat base (wood side up)
Make sure you allow enough extra fabric around all edges to pull up and over both the foam and the back of the wood base. You can trim any excess after stapling.
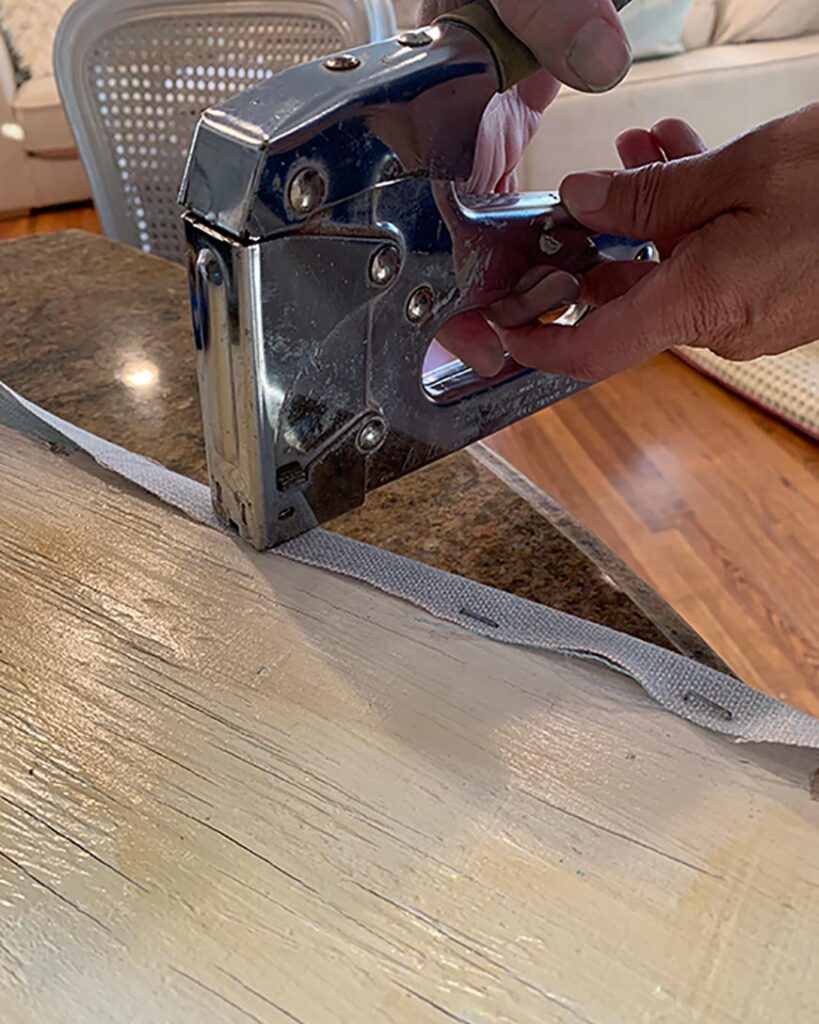
4: Staple for a Snug Fit
Start by pulling the fabric snugly over each side and placing one staple in the center of each edge. This keeps the tension even all the way around.
Then, continue stapling along all four sides, working from the center outwards to smooth the fabric and keep it tight.
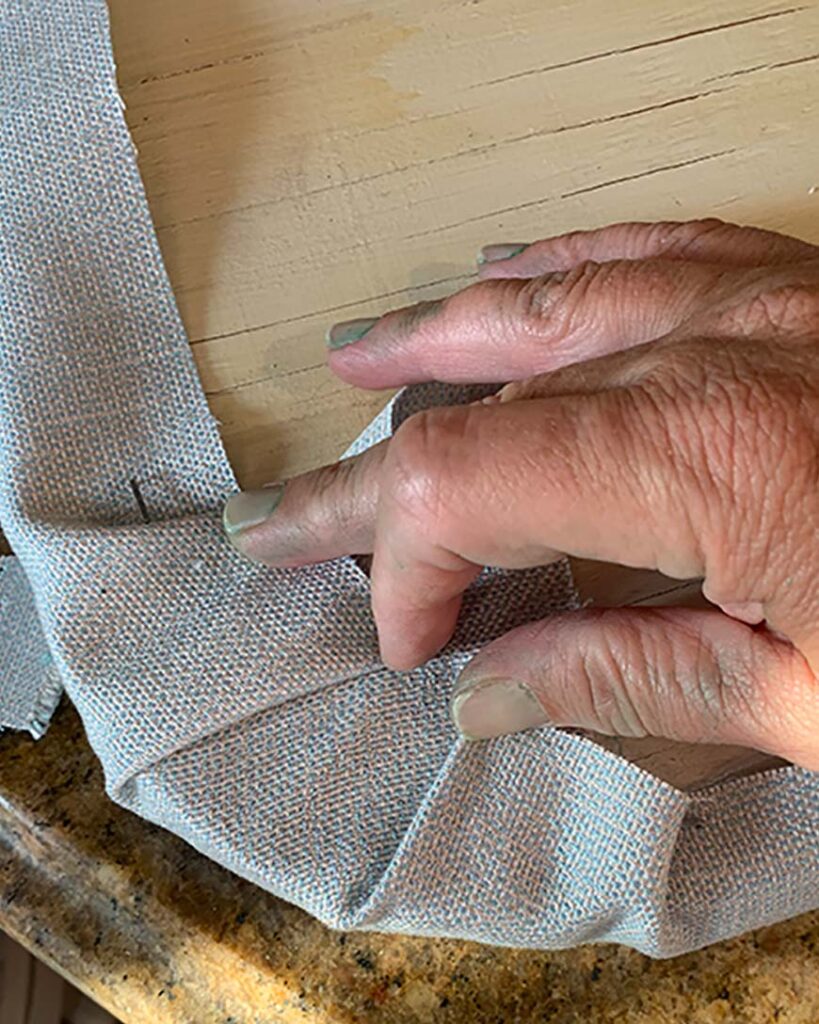
5: Tackle the Corners
Corners can be tricky, but here’s a simple method:
Fold the fabric neatly, tucking in one side before bringing the other over for a clean finish (like wrapping a gift).
Staple securely once folded to hold everything in place.
6: Trim the Excess
Once everything is fully stapled down, go back and trim any excess fabric close to the staples for a clean, professional-looking finish.
Constructing Seat covers
Fabric hack for seats
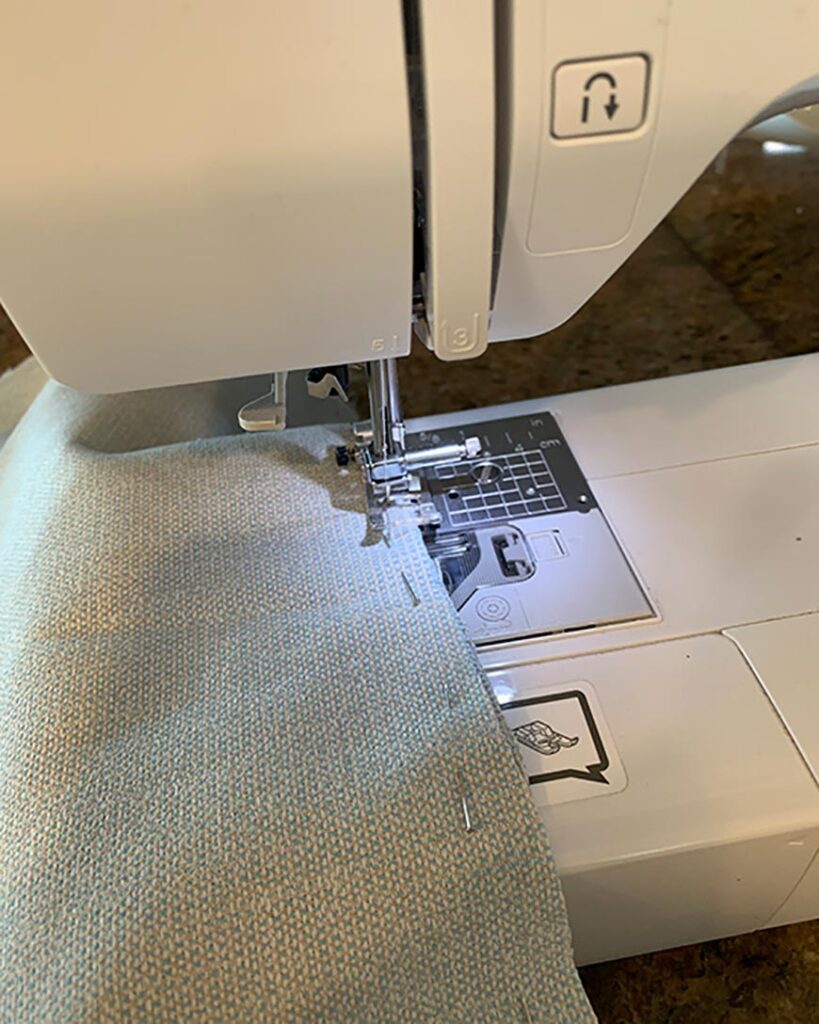
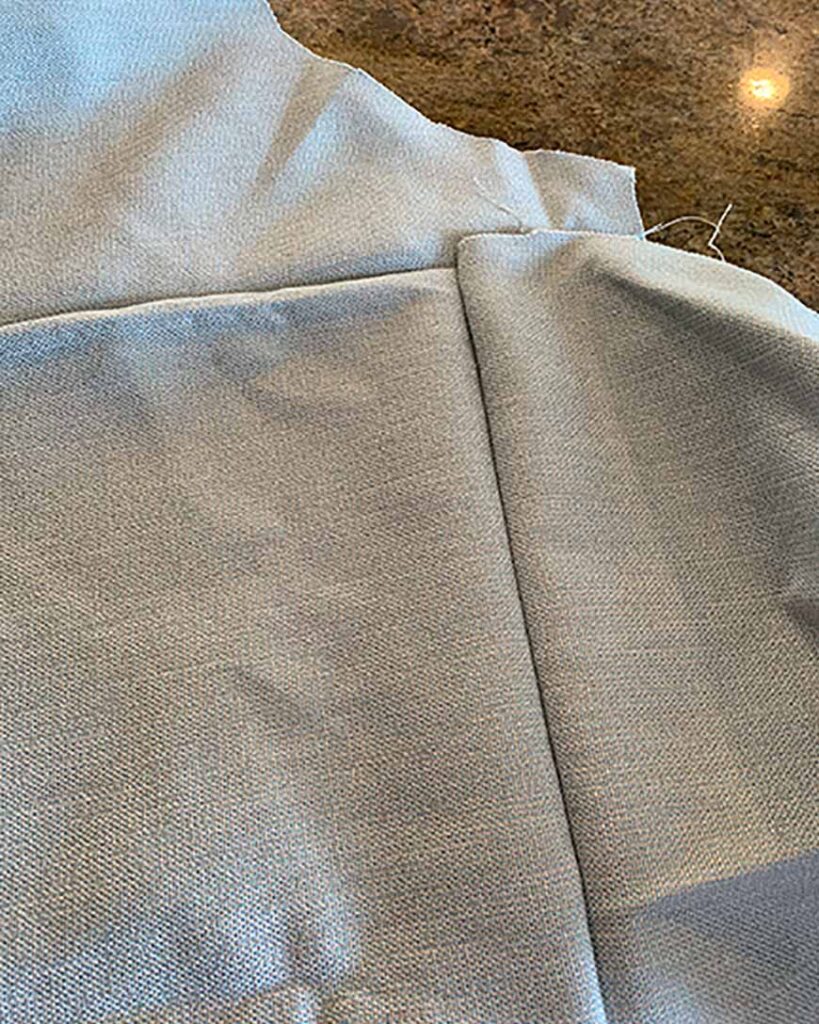
Not enough fabric to cover all seats? Check out how I solved this below!
My fabric remnant was just short of covering four seats, so I got creative. I cut three full pieces, then pieced together the fourth by sewing two extra strips to the sides. After pressing the seams flat, they blended into the cushion’s side and back, barely noticeable, and a great way to use every bit of fabric.
Supplies used on my Repurposed Metal Outdoor Furniture project

|| 1 || 2 || 3 || 4 || 5 || 6 || 7 ||
- Power Tool– Best for large areas and hard-to-remove paint.
- Wire brush Attachment– this attachment will get a lot of that paint off.
- Rust-Oleum Spray paint– I used the Ultra Coat, which has a built-in primer.
- Upholstery Foam– Easily order on Amazon or at your local fabric store. This comes in a variety of thicknesses, so be sure to get the right height for your specific project.
- Wire Brushes– these handheld ones were perfect to get into the hard-to-reach areas.
- Staple Gun & staples– You will need this if you are re-upholstering your seat cushions
- Sunbrella Hybrid Sky Fabric – Make sure that you use a durable fabric for any outdoor upholstering. It will make a difference when sitting out in the outdoor elements.
Below, you’ll find a similar project where I show how I reupholstered the seat cushion on a vintage telephone chair. It’s a great example if you’re looking for inspiration or guidance on tackling a simple upholstery update!
Cleaning the Glass tabletop with rust stains
Not only were the metal table and chairs rusted, but so was the edge of the original glass top. I used the following mixture with a wire brush on these rust stains. I used equal parts but more Baking soda so that there was a paste-like consistency. Then I spread this along the stain, waited a few minutes, then scrubbed with a wire brush.
- Baking Soda
- White vinegar
- Lemon juice
I applied this three times and scrubbed and washed each time. This removed much but not all of the rust stain on the glass. There are stronger, more chemical versions; however, I will leave my glass at this moment like this.
Caring for Your Newly Refinished Metal Furniture
Once you’ve put in the work to refinish your outdoor metal furniture, it’s important to maintain it so it lasts season after season. Start by allowing the paint or protective coating to fully cure, which can take anywhere from 24 hours to a few days, depending on the product you used. Even if the surface feels dry to the touch, giving it extra time ensures it hardens properly and resists chipping or scratching.
To extend the life of your refinished furniture, consider applying a clear topcoat or outdoor sealer designed for metal. This extra layer of UV protection helps prevent moisture from reaching the metal surface, reducing the chances of rust reappearing. Be sure the topcoat is compatible with the paint you used—oil- and water-based products don’t always mix well.
When the furniture isn’t in use, especially during the off-season, try to store it in a covered area, a garage, a shed, or under a durable furniture cover. Even the most weather-resistant finishes will wear faster under constant exposure to rain, sun, and snow. If storage space is tight, stack chairs or tuck items under a covered porch when possible.
Cleaning your metal furniture regularly also helps preserve your hard work. Wipe down surfaces with a damp cloth and mild soap every few weeks to remove dirt, pollen, and grime. Avoid abrasive scrubbers or harsh cleaners, as they can scratch the finish and expose the metal underneath.

Troubleshooting Common Issues
If you notice small chips or rust spots down the road, act quickly. Sand the area gently, wipe it clean, and touch up with leftover paint. Keeping a small amount of your spray paint or topcoat in storage can make quick repairs much easier. Rust spreads quickly once it takes hold, so staying on top of touch-ups is key to keeping your furniture looking fresh.
Also, if your furniture has moving parts like hinges or adjustable backs, lubricate them lightly with a silicone-based spray to prevent squeaks and corrosion.
By taking the time to refinish and properly care for your metal outdoor furniture, you’re not just saving money, you’re creating a custom look that reflects your style while extending the life of pieces you already own.With just a little effort, your outdoor space can feel brand new—stylish, refreshed, and uniquely yours.
Patio Furniture Sets
Not everyone is into DIY, so I always like to include a section of items that don’t require any crafting. So check out my selection below for some fun patio sets. I even added a few retro styles. Happy shopping!

Related posts
Check out these related DIY furniture posts for more projects! Below are additional DIY painted furniture posts for metal. You can also take a look at my Double Arrow Designs furniture section for other DIY furniture posts. Join my mailing list for weekly updates on all my projects and printables.
- From Formal to Fabulous!Repurposed China Cabinet Makeover
- Old Desk Makeover- Bland to Boho!
- Timeless Revival: How to Refinish a Secretary Desk with Style!
More Metal and Outdoor Furniture Projects
Keep going with these related Double Arrow Designs guides:
- How to paint outdoor metal furniture
- How to paint wrought iron furniture
- Furniture makeover ideas and before-and-afters
- How to paint wood furniture like a pro
Thanks for stopping by!

This post is all about how to finish metal outdoor furniture
Last update on 2026-07-30 / Affiliate links / Images from Amazon Product Advertising API