Painted Side Table Makeover With a Thrifted Find
Originally published on [February 7, 2021]. Updated on [March 1, 2026].
A painted side table makeover is an easy DIY project that turns a thrifted or outdated table into a stylish piece of décor using paint, stencils, and creative finishing techniques. Whether you’re refreshing a dated finish or giving thrift store furniture a new life, painting furniture is one of the most cost-effective ways to update your home style. Then sold it for a profit!
This guide walks you through the entire process — from preparation to styling — so you can recreate this look in your own space, especially if you have a small space you want to add a stylish piece to.
This post contains affiliate links. If you make a purchase through one of my links, I may earn a small commission at no extra cost to you. As an Amazon Associate I earn from qualifying purchases.
Side table thrift store find
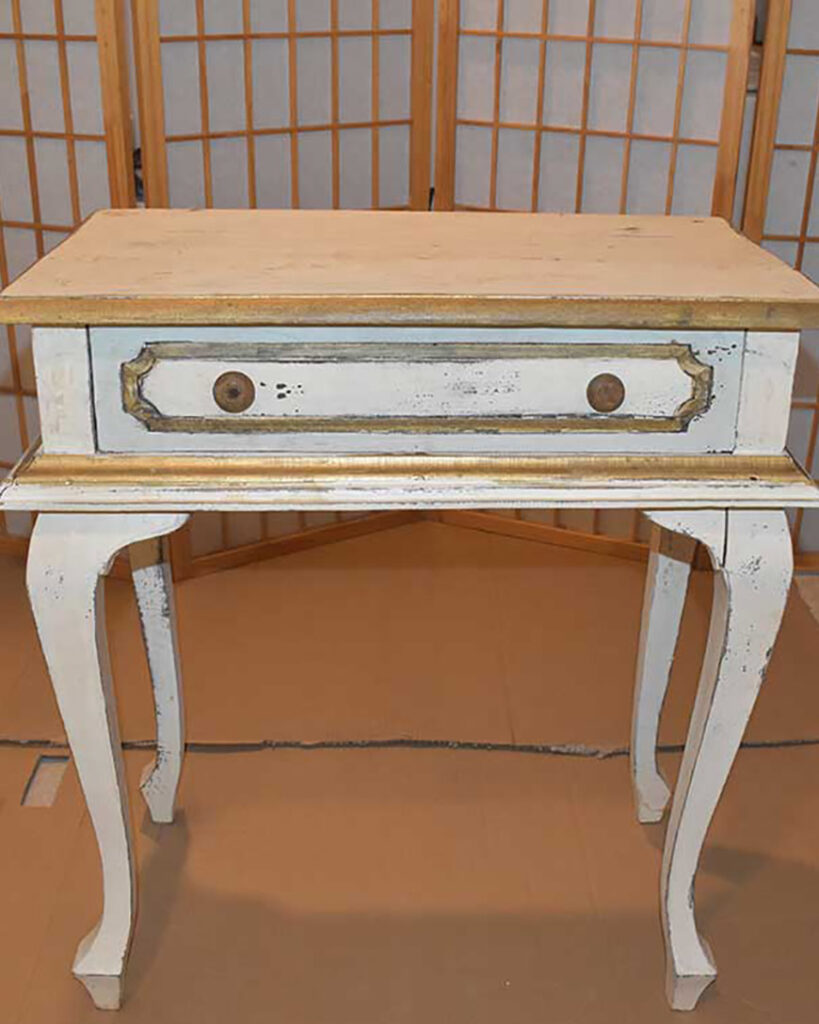
Yep. Taylor is an experienced thrift store shopper, as well as a fellow creative. She has an eye for the potential beauty and the vision to imagine what the possibilities are. This is a big help to me! We Facetimed while she went shopping. When she found this old painted side table, we both agreed that it had great potential and got to work on some side table makeover ideas!
Years ago, I started this business with my sister, Nicole (you can read about that here). It was so amazing that in my tight-knit family circle of women, I had my niece who wanted to join me in this adventure!
Step-by-Step Painted Side Table Makeover Tutorial
Taylor and I got to work in my workspace. She helped me organize this small space so that everything is at our fingertips. Check out the post to see that process. How To Organize A Craft Space.
Inspect, Clean & Prep
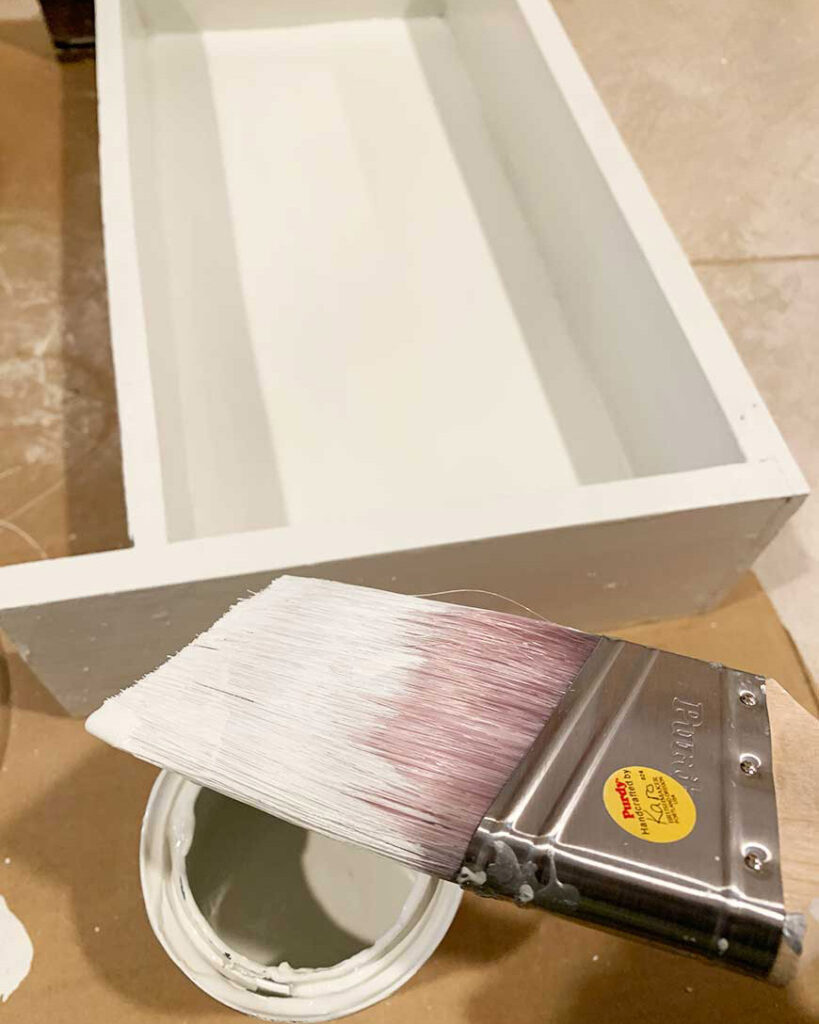
Start by wiping the table down to remove dust and grime. Sand the surface to eliminate peeling paint and create a better surface for primer. Filling any cracks or dents makes the final paint job smoother.
Apply Primer
Prime all surfaces evenly. This step helps the paint adhere, especially on old or glossy finishes.
Paint the Table
Once the primer is dry, start with your base color. Use multiple thin coats instead of one thick layer for a professional look.
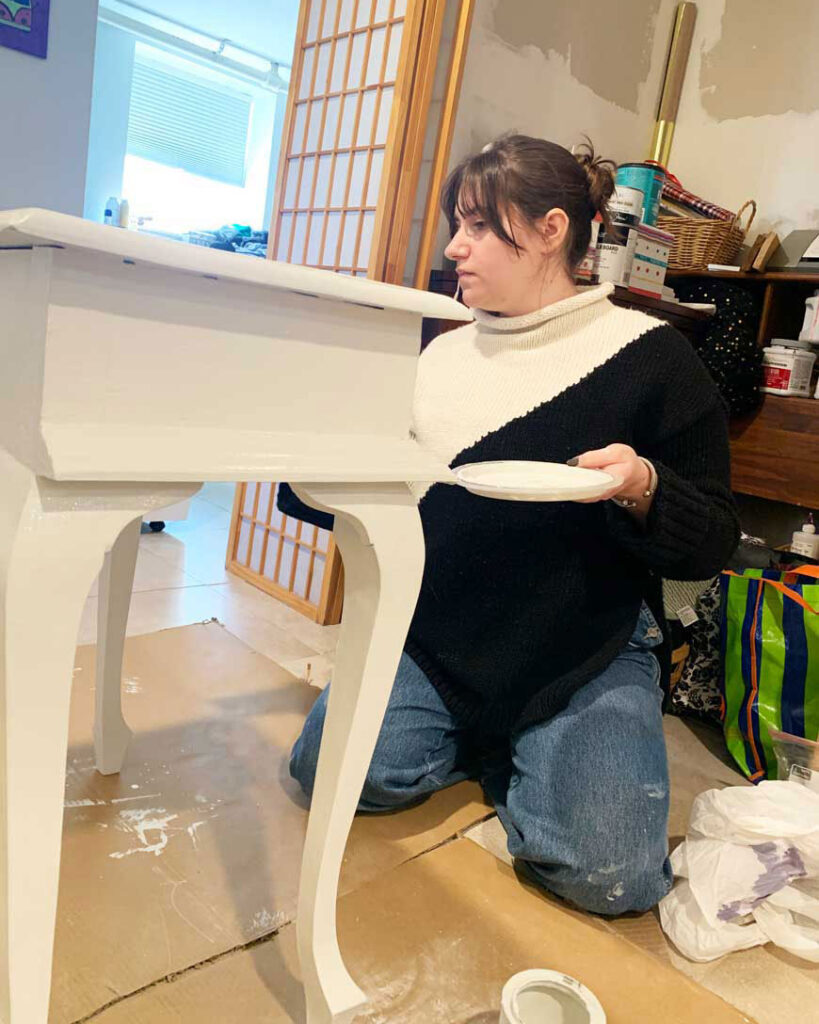
Pro tip! Always clean and wipe down furniture before starting anything! Prep work is just as important as final work.
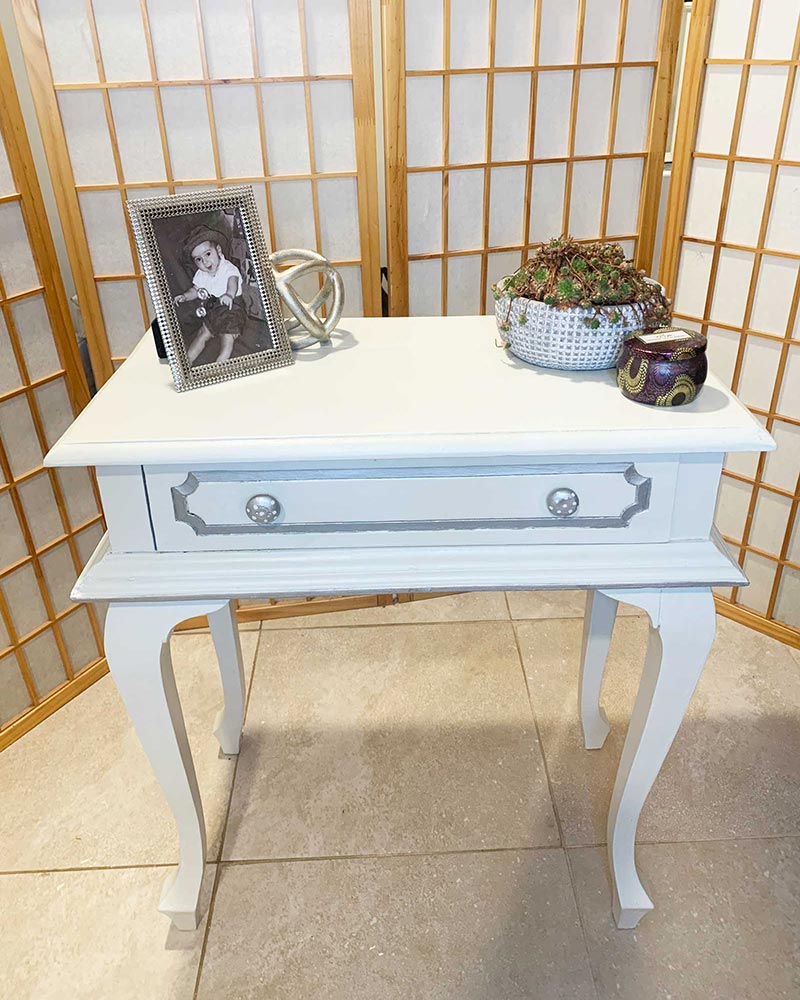
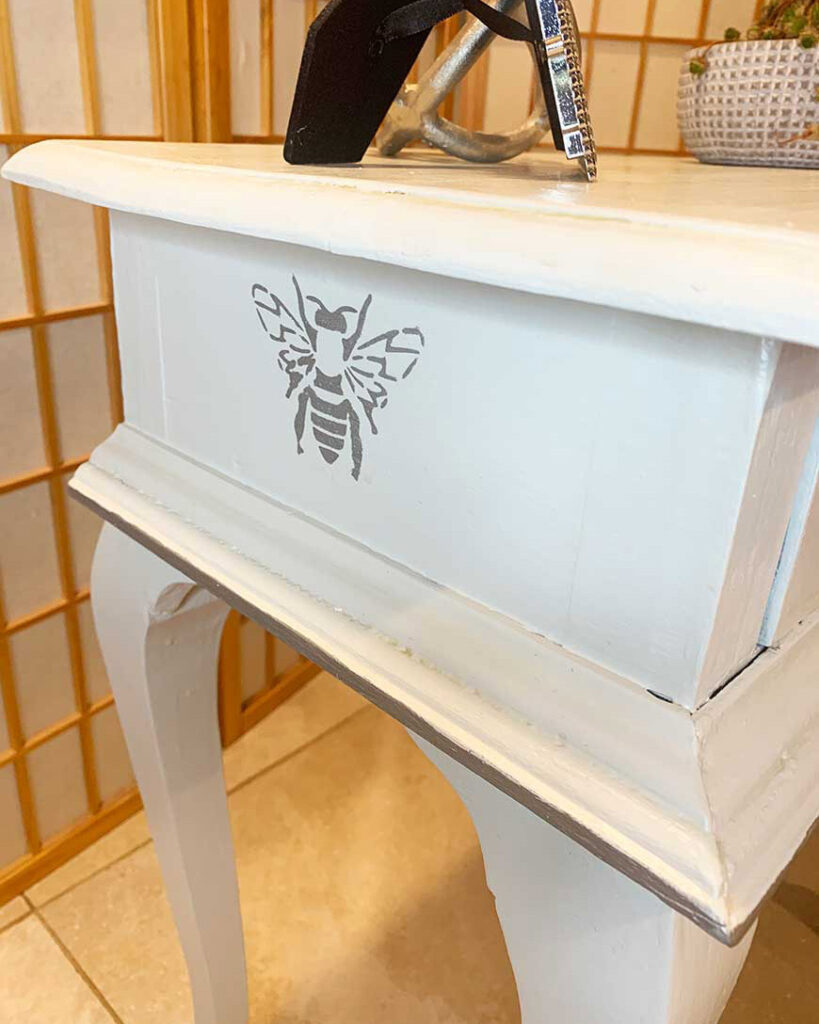
Color scheme for our diy painted end table
We decided, since this was a small, dainty side table, that we needed to keep the color scheme and overall look clean and pretty! We decided on Benjamin Moore “grey owl” for the overall piece. Then a matte silver for the stencils and accents, which would work best on our painted side table makeover. The cool grey and silver complemented each other perfectly while still keeping this monochromatic look.
Add Decorative Details (Optional)
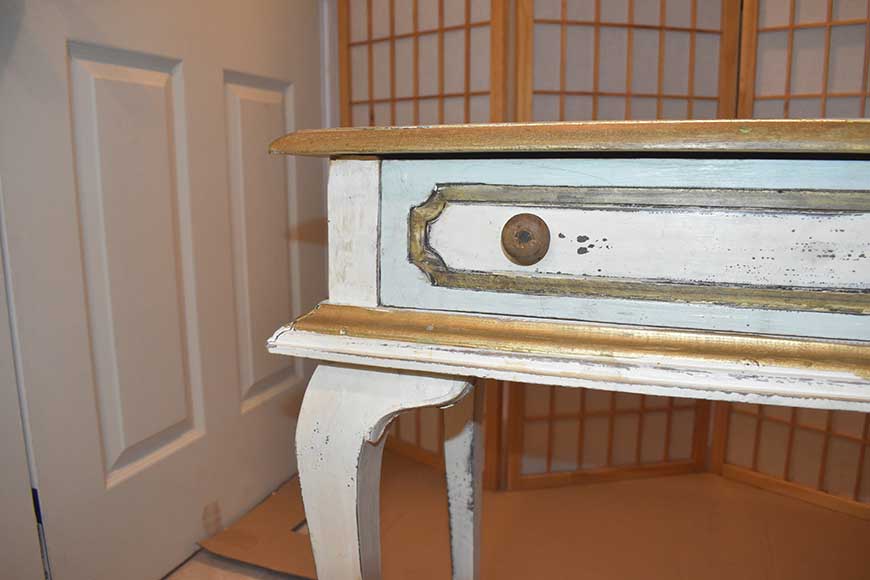
I had a bee graphic from a stencil that I had used from another project. You can see and read all about that here. We deconstructed this and recut a new bee stencil using my cameo machine for the sides and a small repeat pattern of bees and lattice for the inside of the drawer to continue with our bee theme. Take a look here at my Etsy store for some of my other stencils.
Details added to our painted side table makeover
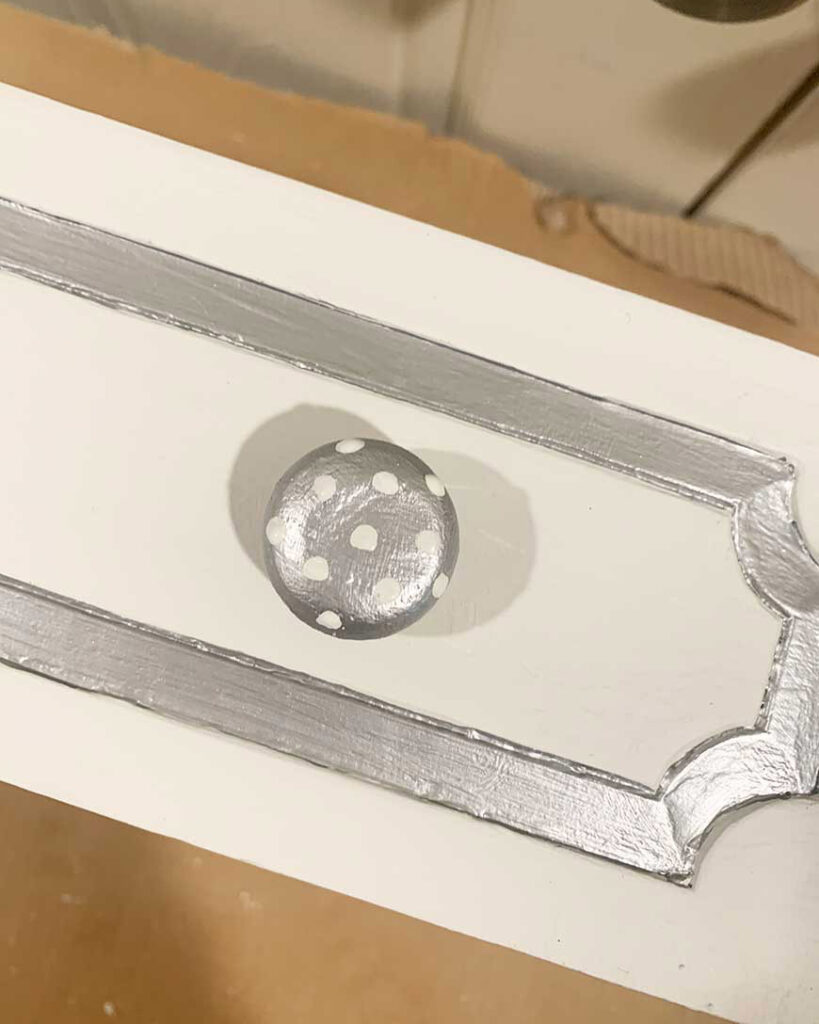
Once we stenciled the bee on, we wanted to continue with the silver in areas of this table to make it all balanced. We painted the sides of the drawers to add a pop when the drawer was opened. For the inside of the draw I created a bee stencil with a lattice to mimic a drawer liner. Then painted the set in the groove on the drawer face and trimmed the edge of the table. For the pull knobs, we also painted them silver, then came in with the grey owl color and dabbed on dots to give it a more playful finish. Just enough silver to not overpower the overall small painted side table makeover.
Final steps to our painted side table
Once all the paint has dried (I usually wait 24 hours), with a sponge brush, I apply a coat of Minwax clear coat in clear matte. I let that dry for a few hours, then apply a second coat. This will ensure that you haven’t missed any areas. The polyacrylic will help to protect your painted furniture from nicks and dirt. You can easily wipe down any area that may get dirty without worrying about ruining the paint underneath. The last step is to always add felt tabs under each leg to prevent scratching your floors.
Check out our video for the painted end table before and after
Luckily for me, Taylor is a pro at documenting our process. Lucky for you, you can check out the process on our painted end table before and after. Check below in our video. We had so much fun creating this diy painted end table together. She time lapse our afternoon of painting. Hope you enjoy!
Additional uses for this side table
After finishing this project, we realized that there were so many uses for this table. Not only is it perfect for a side table, but it can be used as a small vanity, desk, or a focal point in an entryway or a fun piece in a bathroom. The silhouette makes for a classic, timeless statement piece. Like a good piece of jewelry, like Jewelry for your home! Finding small pieces like this makes it easy to change it up and use it in multiple areas. This can be done depending on your mood.
Styling Tips: How to Display Your Painted Side Table
Once complete, your refreshed side table can enhance many spaces:
- Living Room: Pair with a lamp, candles, and a decorative tray
- Bedroom: Use as a nightstand with a plant and framed art
- Entryway: Style with a mirror above and a small dish for keys
Add color objects that complement your paint choice — neutrals for classic looks, or bold accents for a statement piece.

- Silver Plated 4″ x 6″ Metal Picture Frame with Easel Back
- Abstract Decorative Sculpture Arched
- Voluspa Santiago Huckleberry Limited 3 Wick Candle in Decorative Tin 12 oz
- Artificial Succulent Plants in Pot
Materials used for this project
Below are all the materials that Taylor and I used for our painted side table makeover. Most can be found at your local hardware store (if I can, I like to buy locally) if you are preparing and have a few days, order on Amazon, they always have everything. Numbers 8-10 are only needed if you are planning on stenciling your piece. It’s not always the solution in finishing a painted piece.
|| 1 || 2 || 3 || 4 || 5 || 6 || 7 || 8 || 9 || 10 ||
- Minwax Polycrylic Protective Finish, 1 quart, Matte– This seals in all your beautiful hard work. I use this on all my projects.
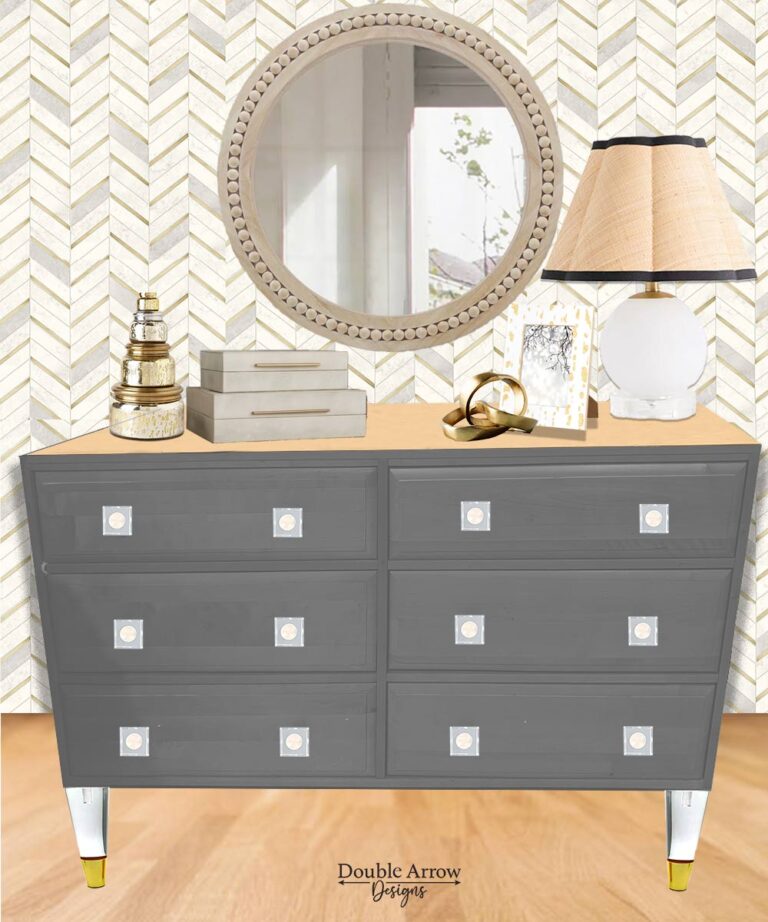
- Rust-Oleum Metallic Accents Paint– We used this to stencil our bee motifs. A little goes a long way. I am still working through my container even after painting a dresser (see here) as well as my dining room chandelier.
- Benjamin Moore paint– I use testers because you do not need a gallon of paint. The testers come in an eggshell finish, which I like.
- Rust-Oleum Zinsser Bulls Eye 1-2-3 Primer– This is always a best practice on wood, which gives you a perfect foundation before you start painting.
- Foam brushes– I like to use these to paint on the polyacrylic. They are less likely to pick up lint that can end up in your sealant and ruin your project. No one ever wants to redo what they have already done. Believe me, I have been there.
- Purdy Brush– I swear by these, Yes I know! They are expensive, so take good care of them, and they will take good care of all your painted projects. After each use, wash thoroughly with warm water and soap. I then hang them upside down to dry.
- Scotch Brand Felt Pads– once my painted furniture is complete, I finish all legs with these felt bottoms. They help even out any unbalanced piece and also help protect your floors from being scratched by the unfinished leg bottoms.
- Clear Vinyl Self-Adhesive Laminate– If you are going to stencil, use a thicker self-adhesive plastic to create your stencils with. It’s sturdy, and you can then use your stencils over again.
- Silhouette Cameo 4 with Bluetooth– Love my cameo, I can create any stencil I desire, you are only limited by your own imagination. I do not have a fancy one, and it does the trick every time.
- Stencils – You can order any of my digital downloads or contact me for custom images to make your piece one of a kind.
Final Thoughts
A painted side table makeover is more than just a quick DIY — it’s a creative way to refresh your home décor while giving new life to pre-loved furniture. With the right preparation, tools, and color choices, anyone can achieve a charming, high-impact result that looks professionally done.
If you want, I can also provide suggested images, Pinterest titles/descriptions, and social media captions for promoting your refreshed post and boosting traffic even more — just ask!
Related DIY Furniture Makeover Projects
If you enjoyed this painted side table makeover, you’ll probably love some of my other DIY furniture transformations too. I’m all about taking thrift store finds and giving them a fresh, modern look with paint, simple tools, and a little creativity. These projects use similar techniques—like prepping old finishes, choosing the right paint, and sealing for durability—so they’re perfect next steps if you’re ready to tackle another small furniture makeover this weekend.
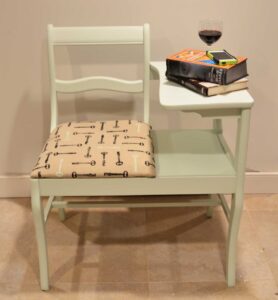
- The Ultimate DIY Telephone Chair Makeover: From Vintage Gossip Bench to Modern Treasure
- From Formal to Fabulous!Repurposed China Cabinet Makeover
- Sewing Machine Cabinet Repurposed Into a Stunning Bar Cart You’ll Love
Thanks for stopping by!

This post is all about how to transform a thrifted side table How to Transform a Thrifted Side Table with Paint (Painted Side Table Makeover Tutorial)