Cute Flour Sack Towel Designs: Easy DIY Stencil Tutorial
Originally published on July 25, 2021. Updated on March 14, 2026.
Flour sack towels have become one of the most popular DIY kitchen decor projects because they are affordable, versatile, and incredibly easy to customize. If you are looking for cute flour sack towel designs, this simple stencil project is the perfect place to start.
What Are Flour Sack Towels
These classic cotton towels are loved by home cooks and DIYers because they are highly absorbent, lint-free, and easy to decorate with paint, embroidery, or stencils. Their lightweight cotton weave also makes them ideal for crafting personalized kitchen accessories that look boutique-style without the high price tag.
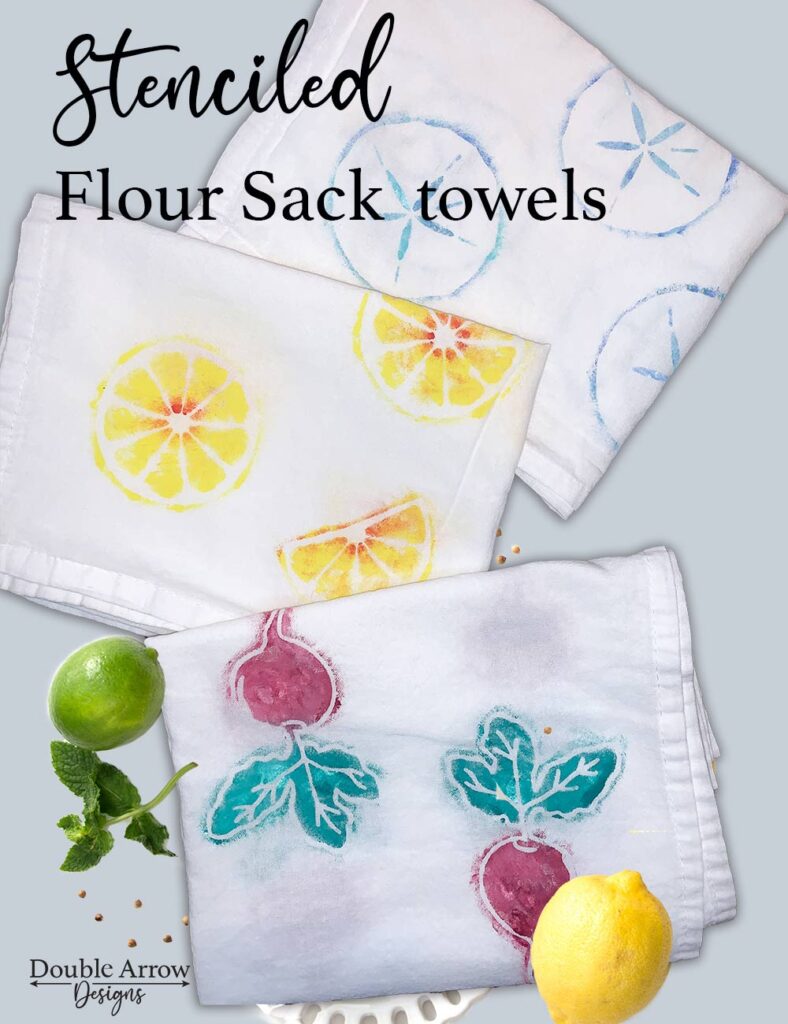
In this tutorial, I am sharing three adorable flour sack towel designs that are perfect for summer kitchens, gifts, or seasonal decor. Using simple stencils and acrylic paint, you can create charming tea towels with lemons, radishes, and beach-inspired sand dollars.
The best part is that this project is beginner-friendly and only takes about an hour to complete.
This post contains affiliate links. If you make a purchase through one of my links, I may earn a small commission at no extra cost to you. As an Amazon Associate I earn from qualifying purchases.
Why Flour Sack Towels Are Perfect for DIY Projects
Because the fabric absorbs paint well, they are especially popular for DIY tea towel projects and handmade kitchen decor.hen be used for the kitchen.
Supplies for DIY Flour Sack Towel Designs
To make your own flour sack towel designs, you only need a few basic supplies:
• plain flour sack towels
• stencil material or reusable stencil
• acrylic paint or fabric paint
• sponge brush or stencil brush
• painter’s tape
• tweezers for lifting the stencil
Pro Tip: Always wash and dry flour sack towels before starting your project. This removes the sizing from the fabric and allows paint to adhere properly.
Inspiration used for our designs
Since it’s the summertime, I wanted to design fun, colorful graphics that depicted the mood of the season for these super cute flour sack designs. There are so many fun icons that I was in love with the following ideas: In my post, I focused on the top three icons to keep it fun and colorful for summer.
- Lemons
- Radishes
- Sand dollars
- Florals
- Bees
How to Make Stenciled Flour Sack Towels
I designed my elements right on my computer. Once I was happy with my shapes and icons, I then converted my files into My Silhouette Cameo machine and in order to prepare my icons to cut stencils.
Lemon Flour Sack Towel
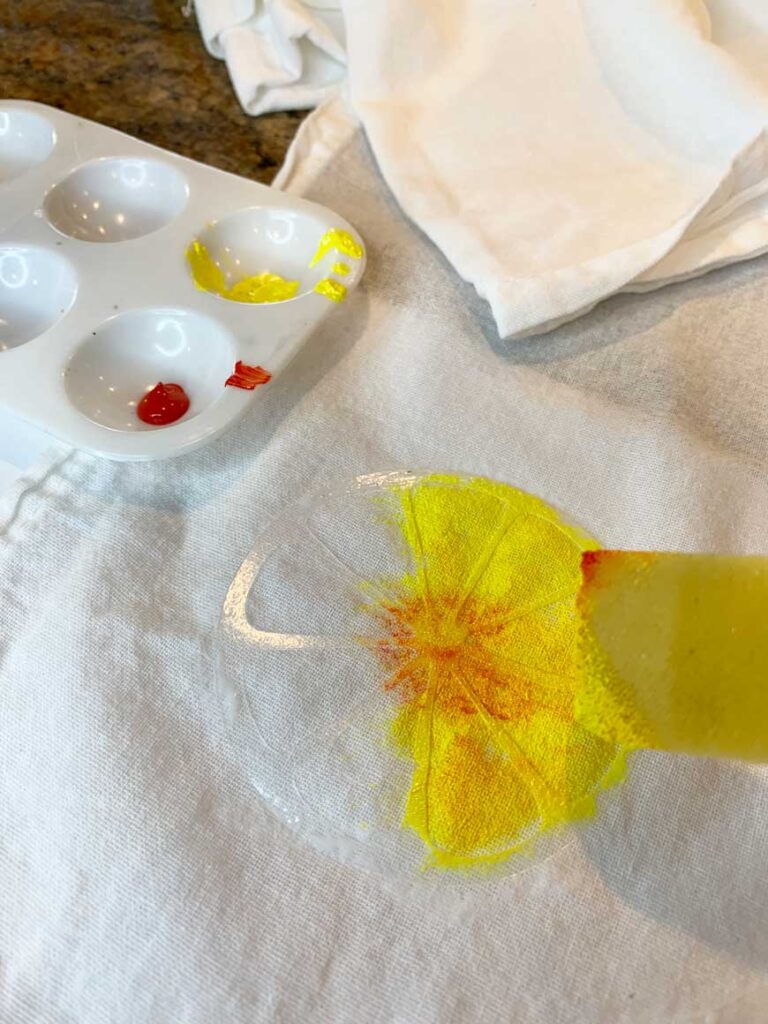
- After Cutting out your stencil using adhesive backed stencil material, lay stencil in desired position.
- Choose paint colors- I used lemon yellow & Vermillion to give me a blended look
- I Tried Mod Podge on the edges of these stencils to prevent paint bleed and it worked! dab some on, let dry then sponge the paint on top it makes a barrier
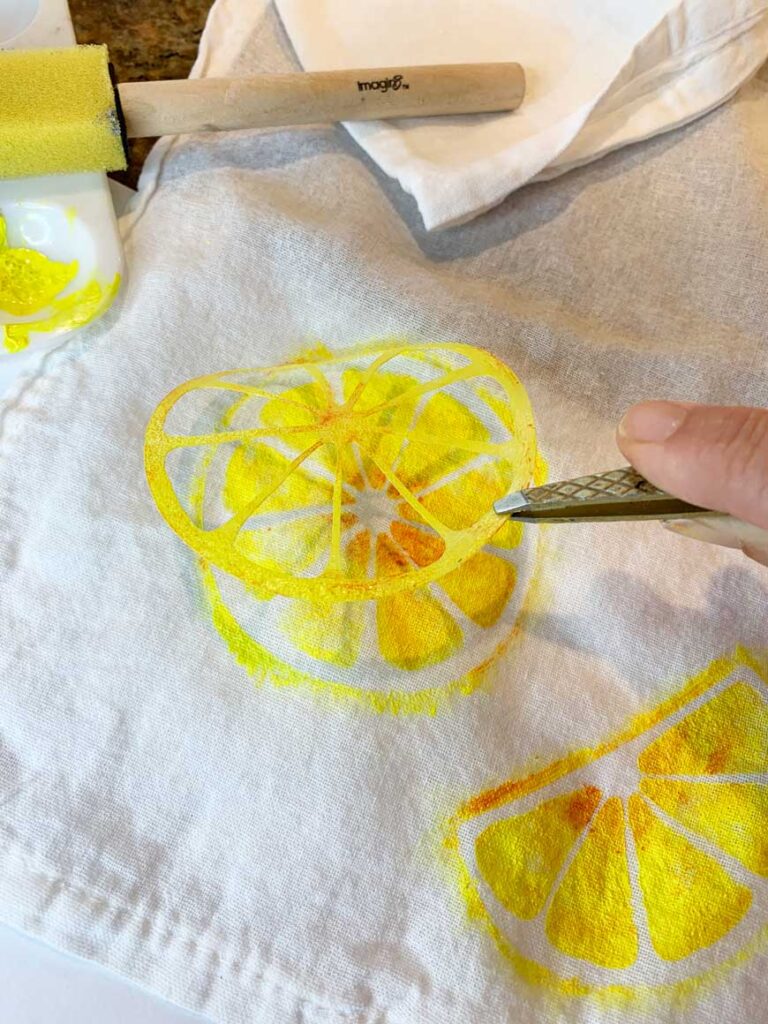
- Use a tweezer, and pull up stencil
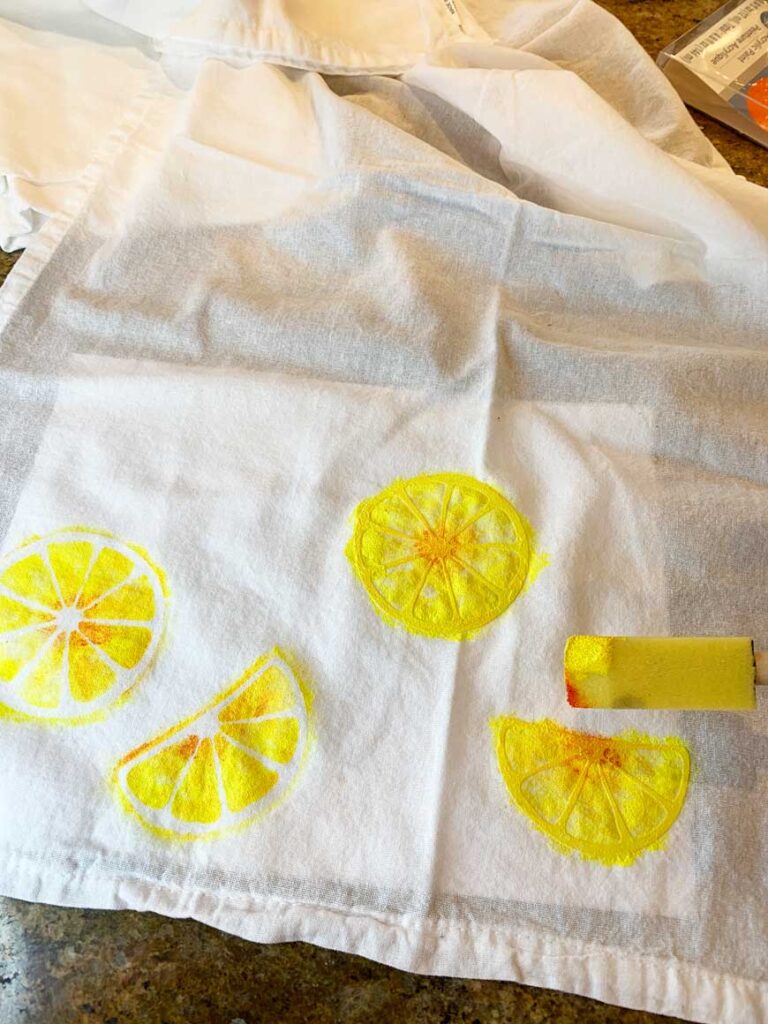
- Repeat the process to create the stenciled layout you desire.
Radish Tea Towel Design
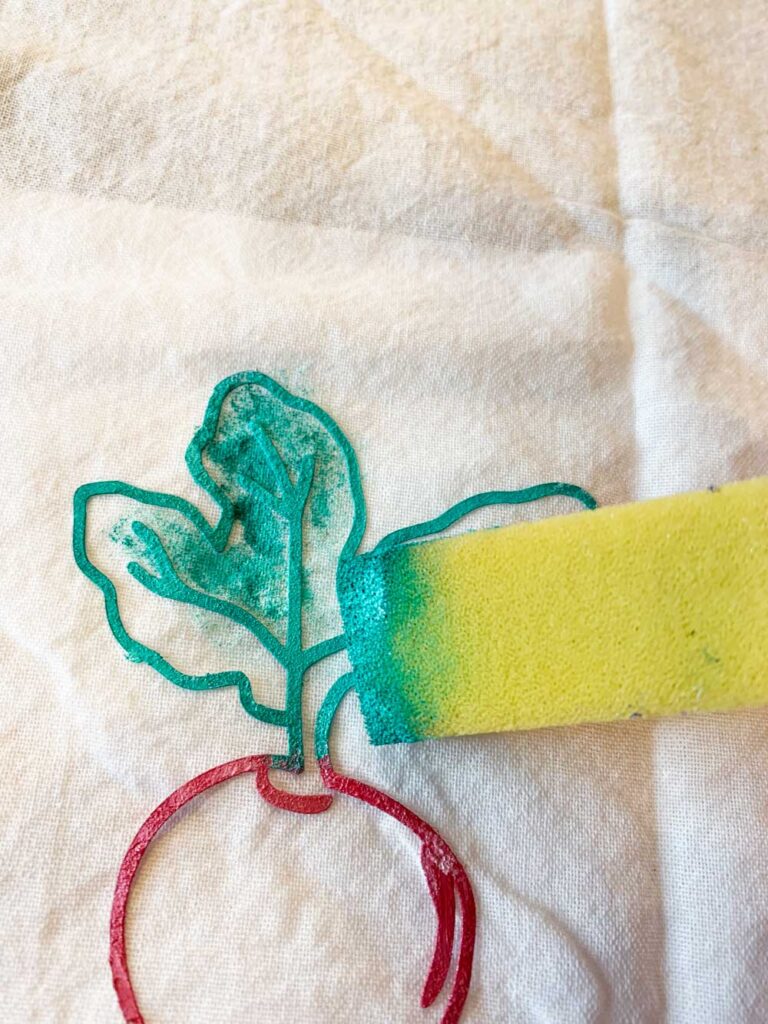
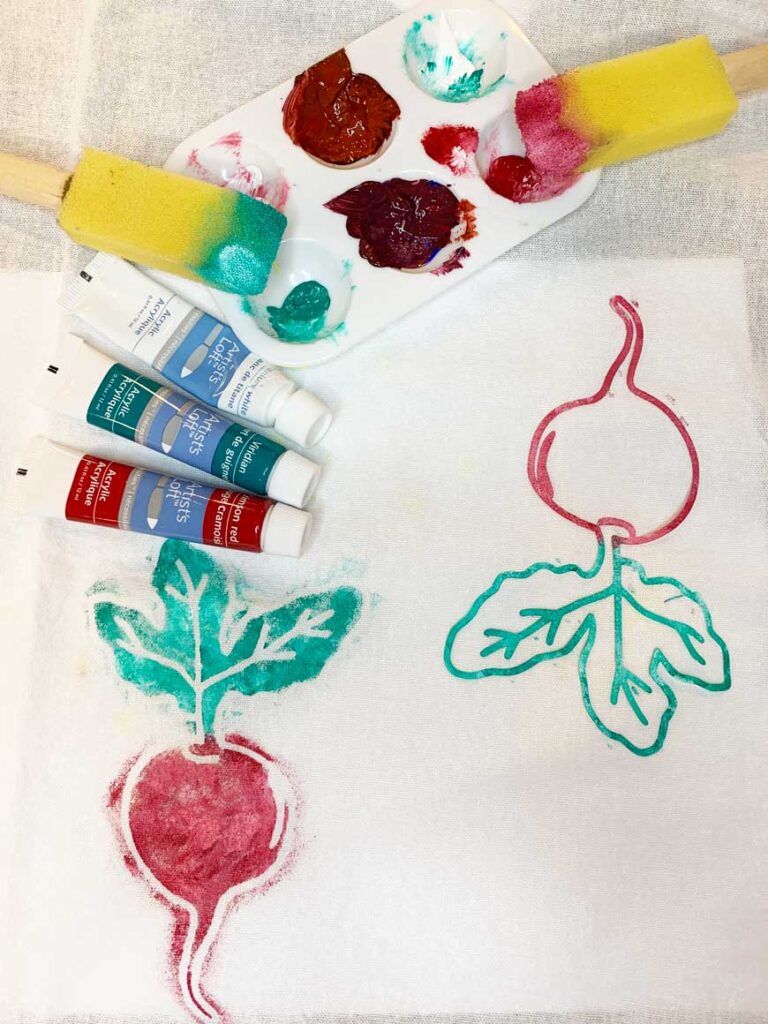
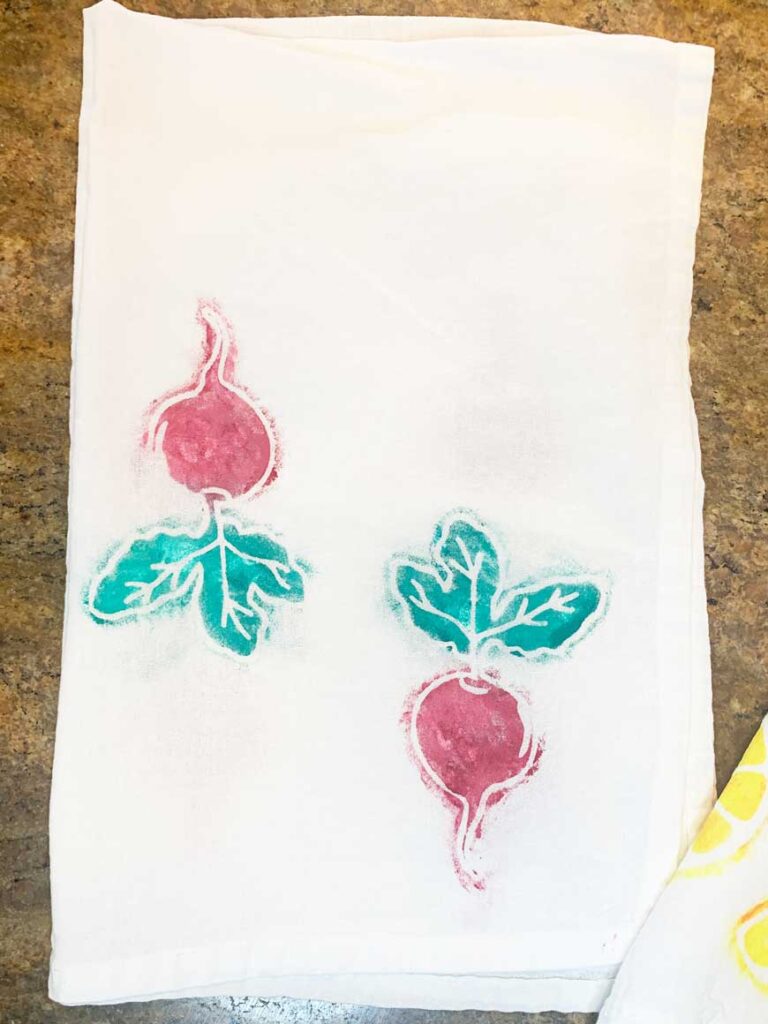
Vegetable-themed tea towels are perfect for farmhouse kitchens or garden lovers.
For the radish design:
• Use crimson red for the radish bulb
• Add titanium white for highlights
• Use green for the leaves
• Repeat the stencil pattern across the towel
Flipping the radish stencil in alternating directions creates a fun repeating pattern that feels more like designer fabric.
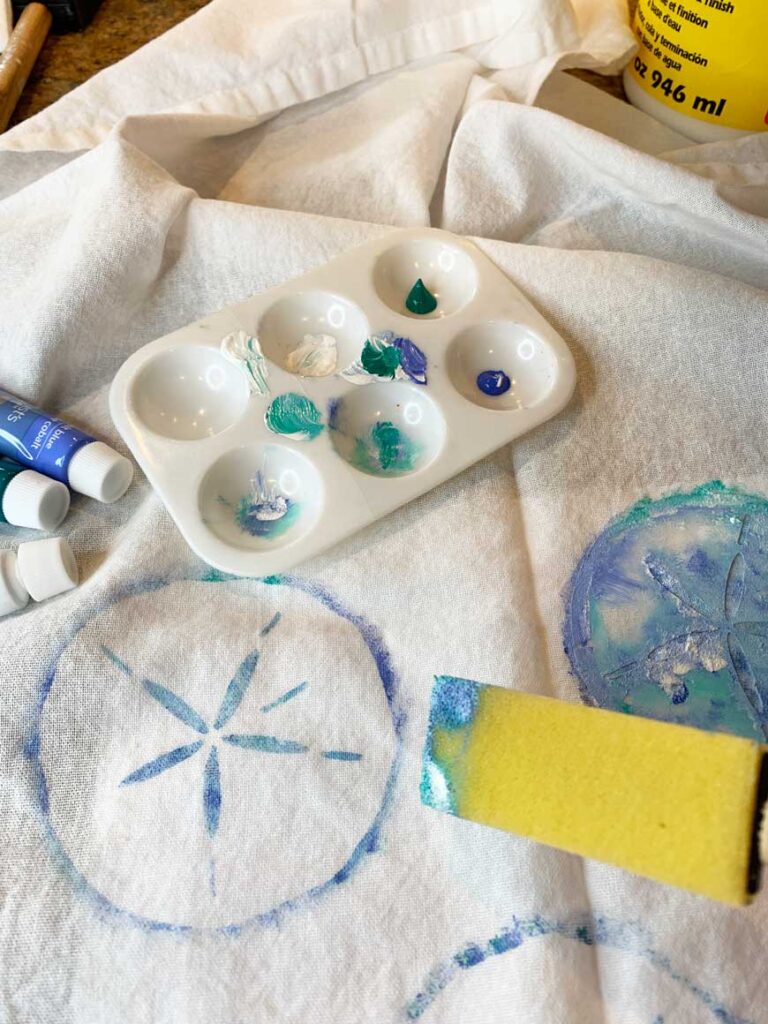
Beach-Inspired Sand Dollar Tea Towel
If you love coastal decor, a sand dollar design is a beautiful way to bring beach style into your kitchen.
To achieve this look:
- Apply the stencil to the towel.
- Blend light blue, teal, and white paint.
- Use a dabbing motion to create a soft batik effect.
- Remove the stencil once the paint is set.
The blended colors mimic the soft tones of the ocean and give the towel a relaxed coastal feel.
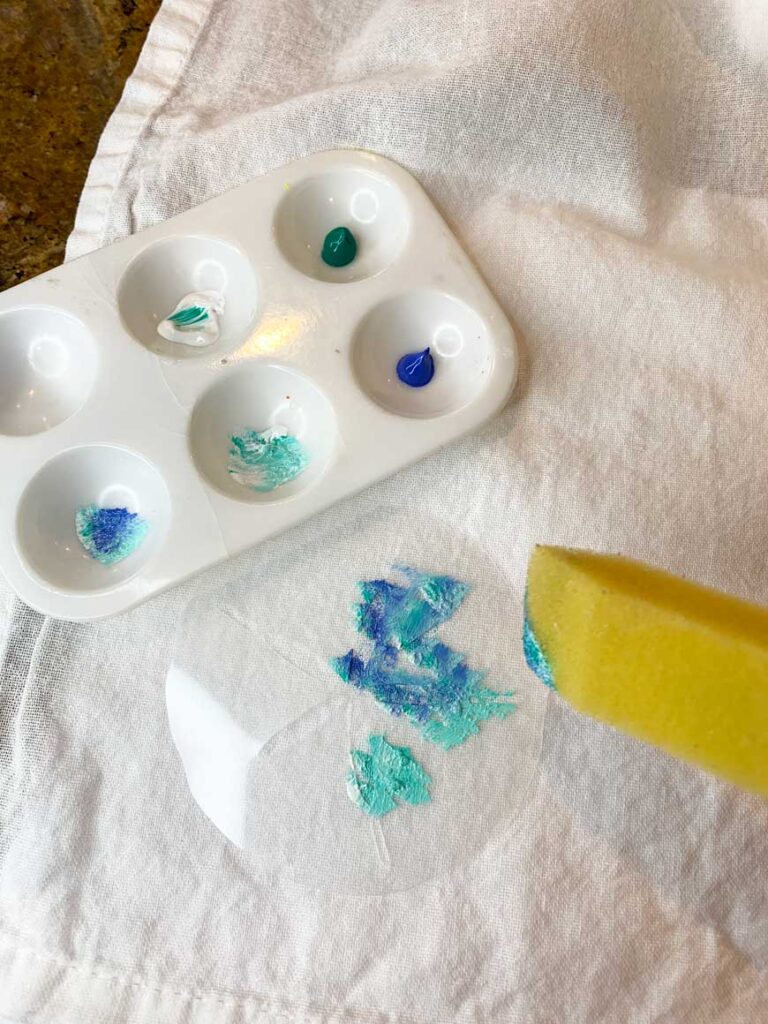
Technique for blending colors
When blending colors, there are a few tips
- Choose like colors so that you don’t end up with brown
- White is a great blender of colors
- Dab dark color sparingly, then use a lighter color and blend into the darker color
- Check out my TikTok video below, and you can see how I blend.
Pro Tips for Perfect Stenciled Tea Towels
If you want professional-looking results, these simple tricks make a big difference.
Seal the stencil edges. Apply a thin layer of Mod Podge along the stencil edges before painting. This creates a barrier that prevents paint bleed. Use a dabbing motion. Never brush paint across a stencil. Instead, dab the paint lightly with a sponge brush. Blend colors carefully. Stick to similar color tones when blending. Adding white helps soften the transition between shades. Let the paint dry completely Allow towels to dry overnight before washing or using them.
FREE STENCIL DOWNLOADS
Yep! You heard that right! Keep checking out my process, and at the end, you can download the stencils I used for these Super Cute Flour Sack Designs!
TIK TOK VIDEO
@doublearrowdesigns Trust the process… ##diy ##stencils ##teatowels ##summer ##paint
♬ I HEAR YOU [INSTRUMENTAL] – Vicetone
Supplies for our flour sack towels
You can purchase a pack of Flour sack towels from Amazon. I like to wash mine before I design on them. This will take off any residue and sizing ( will shrink to size). I then ironed them so that they were ready to go!
- Flour Sack towels
- Silhouette Stencil Material Sheets – Adhesive
- Acrylic paint/ fabric paint
- Sponge brush
Stenciling designs on flour sack towels
- Buy stencils- Amazon has a great selection, or even Etsy.
- Create your own stencils- as I did
- Cut your stencils using your Cameo Silhouette machine
- Adhere your stencil design with a little spray adhesive, then dab paint onto your fabric.
- Acrylic paint– or fabric paint
- Sponge brush
- Iron– to set your dry-painted stamp onto your fabric
For this project, a stencil was going to give me my desired look. Make sure that your stencil has an adhesive backing to stick onto the fabric before you dab your paint on. A few pointers:
Creative Ways to Use Flour Sack Towels
One reason DIY flour sack towels are so popular is their versatility.
You can use them as:
• decorative kitchen towels
• handmade housewarming gifts
• holiday hostess gifts
• personalized recipe towels
• eco-friendly gift wrap
Many people even print family recipes, quotes, or handwritten notes on flour sack towels to turn them into meaningful keepsakes.
RELATED POSTS
Check out these related posts! Once you draw your guide, use a simple running stitch to create your embroidered design. You can check out these posts I did using this technique:
- How to Hand Knit a Chunky Blanket/Throw
- How to use Stencils for Pillows, an Effortless Way to Transform Plain Covers
- Turn Fall Postage Stamps Into Adorable DIY Polymer Clay Magnets
Creating cute flour sack towel designs is one of the easiest ways to add personality to your kitchen without spending a fortune on decor.
With a few simple supplies and a little creativity, you can transform plain cotton tea towels into charming handmade pieces that feel completely custom.
Whether you prefer citrus designs, garden vegetables, or coastal patterns, this DIY project is a fun way to bring your own style into everyday kitchen essentials.
And once you start making them, you may find yourself creating a whole collection of personalized tea towels for every season.
Cute flour sack towels
I know not everyone has the time, patience, or desire to create their own flour sack designs. So I always try to add an option in my posts of ready-made items that can be purchased as well. See below for a cute selection of flour sack towels that will brighten any kitchen!
Creating cute flour sack towel designs is one of the easiest ways to add personality to your kitchen without spending a fortune on decor.
With a few simple supplies and a little creativity, you can transform plain cotton tea towels into charming handmade pieces that feel completely custom.
Whether you prefer citrus designs, garden vegetables, or coastal patterns, this DIY project is a fun way to bring your own style into everyday kitchen essentials.

And once you start making them, you may find yourself creating a whole collection of personalized tea towels for every season.
Thanks for stopping by!

This post is all about how to make cute flour sack towels.